Advertisement
Table of Contents
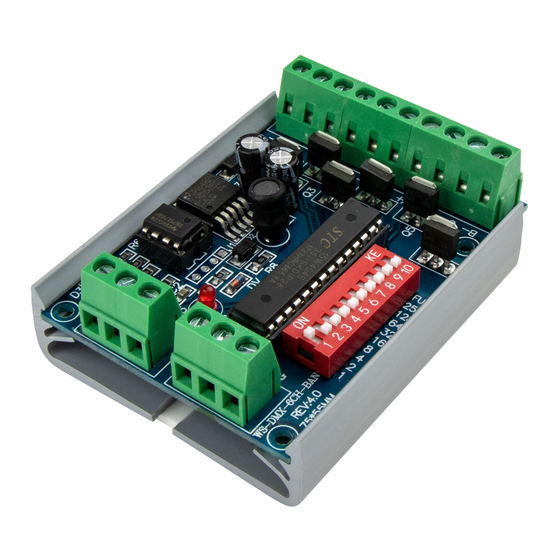
DMX-24506
SETUP INSTRUCTIONS
1
Connect power supply, DMX signal, and LED lighting strip(s) to the DMX512 decoder as shown below:
DMX
CONTROLLER
Once all connections have been made, set
2
decoder to desired DMX start address:
a) Scan QR code for a time-saving online
conversion tool.
http://www.sabretechnology.co.uk/calc.asp
b) Manual Instructions:
Use DIP Switch to select adress. To set
DMX address, first look at the sideways
numbers printed below switching board
(1, 2, 4,... 256); These are DMX adresses.
To achieve desired address, add up these
values then flip corresponding switches to
"on" position.
Questions/Support | 800-789-3810 | quotes@kelvix.com
Power Supply
12-24VDC
RGBW or RGB Lighting Strip
w
Unused in RGB
For example, desired DMX address is 40.
The value of switch 6 (DMX address 32) +
the value of switch 4 (DMX address 8) =
DMX value 40. Therefore, move switch 6 and
4 to the "on" position (see example below).
ON
1 2 3 4 5 6 7 8 9 10
Refer to setup instructions of system's DMX
3
controller for completion of setup.
Note: Multiple decoders set to the same
DMX address will function in unison.
Note: The DMX-24506 decoder complies to
standard DMX512 protocol and is compatible
with any third party standard DMX512
controller.
AC
012218NH
Advertisement
Table of Contents

Related Manuals for Kelvix DMX-24506


Summary of Contents for Kelvix DMX-24506
- Page 1 DMX address will function in unison. DMX address, first look at the sideways numbers printed below switching board Note: The DMX-24506 decoder complies to (1, 2, 4,... 256); These are DMX adresses. standard DMX512 protocol and is compatible To achieve desired address, add up these...
- Page 2 1 2 3 4 5 6 7 8 9 10 1 2 3 4 5 6 7 8 9 10 b) To test green, flip switch 2 to the “ON” position. 1 2 3 4 5 6 7 8 9 10 Questions/Support | 800-789-3810 | quotes@kelvix.com 012218NH...
Need help?
Do you have a question about the DMX-24506 and is the answer not in the manual?
Questions and answers