
Related Manuals for SVN Sound NEON 100

Summary of Contents for SVN Sound NEON 100
- Page 1 P E R S O N A L M U S I C A N D L I G H T H E A D P H O N E S Y S T E M NEON 100 U S E R...
-
Page 2: Product And Safety Information
PRODUCT AND SAFETY INFORMATION: Use the standard USB charging cable (included) to charge your headphones. Plug the cable into any standard USB (5 V, over 500 mA) power adaptor or computer. Avoid listening to music at high volume levels for extended periods of time. Exposure to high volume levels for extended periods may cause hearing damage. - Page 3 When storing the headphones, place them in the included protective carrying pouch. When cleaning the headphones, use a soft, dry cloth to wipe them clean. Do not use solvents. Wipe the ear pads with a damp cloth after use and before storing. Exposure to excessive sweat, moisture, or makeup for extended periods can damage the ear pads.
-
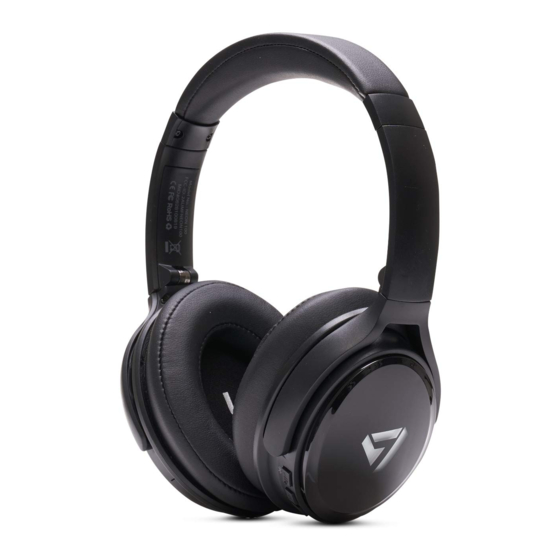
Page 4: Buttons And Switches
BUTTONS AND SWITCHES 1. Multi- function Button/Play/Pause 5. Headband 2. Volume Down/ Previous Track 6. Headband Extension 3. Volume Up/ Next Track 7. Headphone 3.5mm Input Jack 4. Lighting E ects 8. Micro USB Charging Jack... -
Page 5: Wearing The Headphones
WEARING THE HEADPHONES: The NEON 100 headphones are designed to be lightweight, adjustable, and very comfortable to wear. The unique multi-pivot hinge mechanism and headband extension allow for easy adjustment to fit almost any head, hairstyle, and ear size combination. Simply extend or retract the adjustable headband to adjust the ear cups in the most comfortable position. - Page 6 CHARGING: The headphones are not charged upon purchase and must be charged before first use. 1. Connect the provided USB charging cable to the headphones. 2. Connect the other end of the cable to a computer. You may also use a standard USB power adapter (5V, over 500 mA). DO NOT USE USB FAST-CHARGE OR PD ADAPTERS WITH GREATER THAN 5V OUTPUT OR YOU WILL DAMAGE YOUR HEADPHONES AND VIOLATE WARRANTY.
-
Page 7: Connecting To A Bluetooth Device
POWER ON AND OFF YOUR HEADPHONES: 1. To power on your headphones, press the Multi-function Button (1) for 2 seconds. 2. To power off your headphones, press the Multi-function Button (1) for 3 seconds. TURNING ON Press and hold for 2 seconds. TURNING OFF Press and hold for 3 seconds. - Page 8 3. Press and hold the Multi-function Button (1) on your headphones for 3 seconds. Press and hold for 3 seconds. 4. Select NEON 100 on the Bluetooth device menu. Ensure that the device shows “Connected” in the status display. (IF a PIN is required, enter 0000.)
- Page 9 RECONNECTING TO A DISCONNECTED DEVICE: 1. If previously connected to a Bluetooth device, the NEON 100 will automatically reconnect with the device when powered on. Bluetooth Bluetooth MY DEVICES NEON 100 Connected OTHER DEVICES None 2. The headphones will not automatically reconnect if the one meter distance is exceeded.
- Page 10 Multi-function Button (1) to connect automatically. Bluetooth Bluetooth Press and hold MY DEVICES for 3 seconds. NEON 100 Connected OTHER DEVICES None 2. If no Bluetooth device becomes available, the headphones will power off automatically after five minutes.
-
Page 11: Playing And Controlling Music
PLAYING AND CONTROLLING MUSIC: 1. Press the Multi-function Button (1) one time to play music from your Bluetooth device. 2. Press the Multi-function Button (1) for 1 second when music is playing to pause the music. 3. Press the Multi-function Button (1) for 1 second when music is paused to begin playing again. - Page 12 4. To go back to the previous track, press the Volume Down Button (2) for 1 second. 5. To skip to the next track, press the Volume Up Button (3) for 1 second. NOW PLAYING PREVIOUS TRACK Press 1 second to play previous track. NEXT TRACK Press 1 second to play on next track.
- Page 13 USING YOUR HEADPHONE’S LIGHTING EFFECTS: Express yourself! Our goal was to create great sounding and super comfortable headphones that are also fun to use. There are a number of lighting effects that can be configured to your personal tastes. Set the color and brightness, make it pulse, and change colors automatically.
- Page 14 USING YOUR HEADPHONE’S LIGHTING EFFECTS: 1. Setting the lighting mode. a. A short press on the Lighting Effects Button (4) cycles the headphone lighting between On with solid color, Pulse to Music, SVN Color Mode, and Off. Press here to turn the lights on.
- Page 15 2. Setting the lighting color. a. Press the Lighting Effects Button (4) for 3 seconds to cycle through the lighting colors. Stop on the one you want. This will be the color for the ON or PULSE mode lighting effect. The color choices include red, blue, green, purple, yellow, and teal. 3.
-
Page 16: Making Calls
MAKING CALLS: Press to answer incoming call. (Press again to end call) Press and hold 1 second to reject incoming call or redial the last number called. Press and hold 1 second to answer waiting calls, end current calls and return to previous call. Press and hold 1 second to switch between waiting and main calls. - Page 17 CONNECTING TO AN ANALOG AUDIO SOURCE: 1. Use the 3.5mm to 3.5mm analog cable (included) to connect to the 3.5mm Analog Input Jack (9) on the headphones. 2. Connect the other end to the analog audio source. 3. Set the desired volume on the attached device. The headphone volume controls will not operate when connected to an external wired audio source.
-
Page 18: Troubleshooting
TROUBLESHOOTING: 1. The headphone power does not turn on. a. Charge the headphones. If the headphones do not turn on even after charging, contact customer service at www.svnsound.com. 2. The headphones do not charge. a. Check whether the USB charging cable has been properly connected to the headphones and the power source. -
Page 19: Warranty
5. Sound lag/ distortion/ noise. a. Check if there is a 2.4 GHz device near your headpones or Bluetooth device. b. Check whether the Bluetooth device is within 10 meters (30’) of your headphones. 6. Caller cannot be heard. a. Check whether the headphones are connected to the Bluetooth device. b. -
Page 20: Regulatory Information
• Consult the dealer or an experienced radio/TV technician for help. Changes or modifications not expressly approved by SVN Sound could void the user’s authority to operate this equipment. Hereby, the manufacturer declares this device is in compliance with the Directive (RED) 2014/53/EU.
Need help?
Do you have a question about the NEON 100 and is the answer not in the manual?
Questions and answers