
Related Manuals for Tunstall Lifeline 400

Summary of Contents for Tunstall Lifeline 400
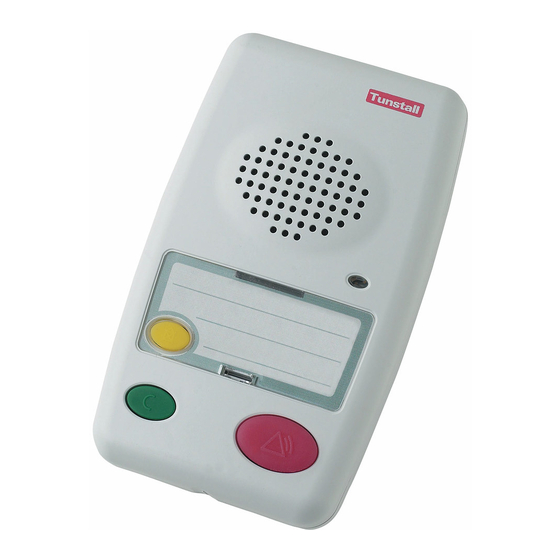
- Page 1 0083-Lline 400 pro guide cover 28/6/04 11:47 AM Page 1 Lifeline 400 programming guide Part Number: D3707146B...
- Page 2 1. INTRODUCTION Each Lifeline 400 is supplied with an ‘Installation and User Guide’. Please ensure you are familiar with this prior to reading this guide. This programming guide contains guidelines and examples of how to program the Lifeline 400 for use in most situations.
-
Page 3: Programming Options
2. PROGRAMMING OPTIONS This section focuses on two methods for programming the Lifeline 400. However, the Lifeline 400 can also be programmed from a control centre and from a PC or laptop using the TAPIT ( described in the ‘Frequently Asked Questions’... - Page 4 Programming a radio sensor This method is suitable for assigning and removing radio sensors. This can be done with just the Lifeline 400, no other equipment is required. • How to enter programming mode ♫ Slow flash Press and hold for 5 seconds ü...
- Page 5 Use the telephone keypad to program the unit Lift the handset of the telephone and key the digits as described for the feature you wish to program. Note that although the Lifeline 400 can be connected to the telephone line during programming it is not essential. The...
-
Page 6: Common Tasks
The unit identity is the unique number that identifies an individual Lifeline 400 when it makes a call to a control centre. Lifeline 400 units have a default of 995 which should be changed before installation. A maximum of 12 digits can be used for the unit identity. - Page 7 Assigning Radio Sensors Assignment of radio sensors was described on page 3 earlier in this guide. When a sensor is assigned, the Lifeline 400 detects the sensor type and automatically amends its settings - this is a new feature of Lifeline 400.
-
Page 8: Other Tasks
4. OTHER TASKS Monitoring for Inactivity The Lifeline 400 can monitor for signs of activity using sensors such as PIR movement sensors. Should no activity be found for a specified time ( 12 or 24 hrs ) then an alarm call is raised. The user will hear 10 minutes of warning beeps before this call is made. - Page 9 Silent Calls By default, periodic calls and other information calls are silent, this means that no noise will be heard from the Lifeline 400 during the call. An example of this is automatically reporting that a radio sensor’s battery is low.
- Page 10 should always be programmed in parameter 63, the third into parameter 65 and the forth into parameter 67 etc. Therefore, (after removing all sensors from the unit) to register a smoke detector as the first sensor and assign it to the living room, the procedure below should be followed:- 1.
- Page 11 ROM #4 Natural Gas Wandering A new bogus caller trigger will be available shortly Tunstall Part Number 67005/48. This will be plug and play compatible with the LL400 but will still require the text to be edited at the control centre.
- Page 12 TT92 Location Codes Location Code Text Living room Dining room first resident Study second resident Second living room third resident ROM4 Event 1 unspecified location ROM4 Event 2 unspecified location ROM4 Event 3 unspecified location ROM4 Event 4 CO Detector activation ROM4 auto low bat CO Detector auto low bat Hall/stairs not spec...
- Page 13 The intruder functionality is very flexible with a number of operational options. This section of the programming guide contains guidelines and examples of how to program the Lifeline 400 for each of these options starting with the default option as follows: Ø Single Zone Dwelling Ø...
- Page 14 To enable the Intruder Functionality simply input a 4 digit number known as a’ quick code’. A ‘quick code’ is a convenient and quick way to alter settings in the Lifeline 400. To activate the intruder functionality in the Lifeline 400 enter the following quick code:-...
- Page 15 Once all the PIR’s are assigned they can then be installed in the correct locations. Take the first PIR you would like to assign to the Lifeline 400 out of its box and then referring to the user guide for the PIR, put the PIR into “walk test” mode.
- Page 16 Entry/Exit PIR’s. More than one entry Exit PIR can be assigned to the unit. If the Entry/Exit PIR is activated the Lifeline 400 will emit entry and exit tones for 30 seconds during which time the system can be disarmed without activating the intruder alarm or the occupant can leave the dwelling without activating a false alarm call.
- Page 17 Whilst still in local programming mode: Press the AWAY key on the Lifeline 400 unit then enter the location code as below. If the PIR is chosen to be a standard PIR (not Entry/Exit PIR) then DO NOT press the AWAY key before entering the location code.
- Page 18 Leave the PIR in walk test mode but put the front cover back on loosely until testing is complete. Testing the recently installed PIR’s Once registered to the Lifeline 400 it is a good idea to test the PIR’s with the Lifeline 400 in local programming mode. Place the unit in LOCAL PROGRAMMING mode ♫...
- Page 19 Taking the PIR out of walk test mode significantly enhances its battery life. Exit local programming mode by pressing the cancel key. The PIR’s are now assigned to the Lifeline 400 and ready to work with the intruder system. Note: The Lifeline 400 will automatically Exit programming mode if untouched for 3-4 minutes.
- Page 20 The ability to use the PIN number for deactivation is already set up in the Lifeline 400. The default PIN number is 1234 and it is recommend that this should be changed now and kept in a safe place.
- Page 21 Lifeline 400. As you have entered the dwelling within that period the PIR will not activate and send a signal to the Lifeline 400 unit. As the Lifeline 400 unit has not received a signal from the Entry/Exit PIR the Entry/Exit tones will not beep and the intruder system will still be armed and the AWAY key will be lit as a reminder.
- Page 22 Lifeline 400 by pressing it, the Lifeline 400 will beep and re enter local programming mode from where the cancel key can be pressed to exit programming mode.
- Page 23 To do this, simply assign the trigger work to the Lifeline 400 and whilst still in local programming mode set up the PANIC or Bogus caller functionality by entering the...
- Page 24 :- 6 4 1 5 A beep will be heard at the Lifeline 400. Then choose and use the quick codes that can then be entered immediately after the dedicated trigger has been assigned Quick Code Sets dedicated trigger so that it….
- Page 25 Hardwired Input The Lifeline 400 has one hardwired input. To configure this input requires 16 digits to be entered for its meaning. For convenience, some digits have been shaded out as they are not relevant in these examples, however they do still need inputting and are fully explained in the ‘Frequently Asked Questions’...
- Page 26 The Lifeline 400 is fitted with a rechargeable battery to ensure that if mains power fails the unit will continue to operate for at least 30 hours. When the Lifeline 400 is first installed, the battery will take 24 hours to become fully charged.
-
Page 27: Frequently Asked Questions
5. FREQUENTLY ASKED QUESTIONS What is the TAPIT+? The TAPIT+ is a product designed to program the Lifeline 400, Lifeline 4000 and Lifeline 4000+ units from a PC or Laptop. It provides a simple graphical way of programming units. Below is a list of common TAPIT uses:- Common uses:- •... - Page 28 How many times does the Lifeline 400 attempt to make an alarm call if it is unanswered? By default the Lifeline 400 will attempt to call each alarm number up to 3 times before moving onto the next alarm number. Therefore if 2 control centre numbers have been entered, the first number will be attempted 3 times before calling the second number.
- Page 29 If required up to 10 different call sequences can be created. Example: 2 users share one Lifeline 400. They both have a personal trigger, we require that if (1) the first user raises an alarm with their personal trigger then a call is made to their son, followed by a call to the control centre if the first call is unanswered.
- Page 30 If the Lifeline 400 cannot get through to a control centre immediately it will pause and try again after set periods. It will also try alternative numbers if they are programmed into the unit.
- Page 31 What do all the other numbers mean when configuring hardwired input? 0 0 0 Type Normally Location Not used Delay Silence Not used Closed This determines whether the input resets the inactivity monitor. Also whether the input can answer and clear an incoming call. 0 = Do nothing 3 = Reset inactivity monitor but do not answer calls 6 = Answer and clear incoming calls but do reset the inactivity monitor...
- Page 32 Our policy of continual development means that product specification and appearance may change without notice. Tunstall Telecom Limited is a member of Tunstall Group Ltd. © 2004 Tunstall Group Ltd. ® TUNSTALL, LIFELINE and AMIE are registered trade marks of Tunstall Telecom Limited.
Need help?
Do you have a question about the Lifeline 400 and is the answer not in the manual?
Questions and answers