Table of Contents
Advertisement
Quick Links
Aervoe® Solar Strobe/Signal Light
#1197 Red or #1198 Yellow
IMPORTANT SAFEGUARDS
Read all instructions before operating
Do not operate at temperatures above 149°F or below -4°F
To reduce the risk of electric shock, do not submerge the unit in any liquid. Unit is weatherproof
but not submersible.
Do not use in flammable or explosive environments
For better light quality, protect the globe from scratching
For maximum battery efficiency, never completely deplete stored power
Use appropriate safeguards when mounting the light to any surface
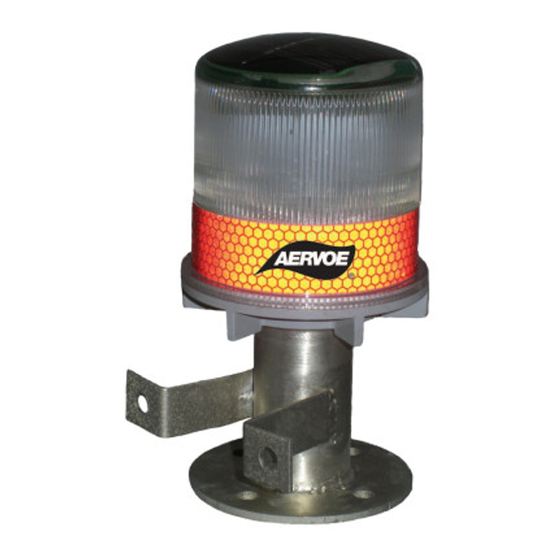
PARTS IDENTIFICATION
SOLAR STROBE/
SIGNAL LIGHT
Solar Panel
Reflective Stripe
On/Off Button
(not visible)
Shaft
4 LED
Light Globe
MOUNTING BRACKET
Vertical Mounting
(2-holes)
CHARGING
Place unit in a sunny location, with the solar panel facing the sun to charge. Unit will not charge as quickly
on a cloudy day and not at all in complete darkness.
OPERATION
1.
The unit will operate when the ON/OFF
BUTTON is in the ON position, but charging is still possible.
2.
When in the
OFF position the unit will not flash and stored battery power will not be depleted.
3.
Once the unit is charged it is operational. To activate the strobe, press the ON/OFF
start flashing when the ambient light is low enough.
4.
The strobe will continue to flash as long as there is battery power and darkness. Once daylight
returns the flashing will stop and if kept in a sunny location, it will recharge.
5.
You can test to make sure the ON/OFF BUTTON is either on or off by placing your hand over the solar
panel. If the light starts flashing it is in the ON position. If it does not flash, it is either in the OFF
position or battery power has been depleted.
BRACKET MOUNTING
Unit may be mounted vertically or horizontally to surfaces such as metal, concrete, wood, or asphalt; and to
plastic barricades and rubber safety cones. NOTE: Mounting hardware is not included. User is responsible
for ensuring proper selection of hardware, depending on location.
1.
Remove unit from the MOUNTING BRACKET
2.
Place the bracket in the desired location and mark either the horizontal (4-holes) or vertical (2-holes)
mounting holes.
3.
Once bracket is securely mounted, slide unit into the bracket and operate as stated above.
SAFETY CONES
Unit may be used with rubber traffic safety cones that include a top inside hole diameter of at least 1 5/16"
to accommodate the shaft.
REPLACING THE BATTERY
The rechargeable battery may be replaced when the battery life has been
exceeded.
1.
Remove the plastic seal cap on the SHAFT
2.
Carefully pull out the battery and circuit plug from the unit
3.
Unplug the battery and replace with the same size and capacity battery
4.
Replace the plastic seal cap
Horizontal Mounting
(4-holes)
BUTTON and it will
Advertisement
Table of Contents

Subscribe to Our Youtube Channel
Related Manuals for Aervoe 1197


Summary of Contents for Aervoe 1197
- Page 1 Aervoe® Solar Strobe/Signal Light #1197 Red or #1198 Yellow CHARGING IMPORTANT SAFEGUARDS Place unit in a sunny location, with the solar panel facing the sun to charge. Unit will not charge as quickly Read all instructions before operating on a cloudy day and not at all in complete darkness.
- Page 2 OPERATING INSTRUCTIONS FLASH RATE Approximately 60 flashes per minute HUMIDITY & TEMPERATURE May be used in wet or dry environments from -4°F to 145°F (-20°C to 65°C) AERVOE INDUSTRIES INCORPORATED Gardnerville, NV 89410 • 1-800-227-0196 www.aervoe.com • mailbox@aervoe.com 1197/1198inst; cs12/09...
Need help?
Do you have a question about the 1197 and is the answer not in the manual?
Questions and answers