
Related Manuals for M Solutions MS-TestPro


Summary of Contents for M Solutions MS-TestPro
- Page 1 User Guide MS-TestPro HDBaseT™, HDMI, DCR and AVoIP Test Device Revision: 1.1 - April 2021...
-
Page 2: Table Of Contents
MS-TestPro USER GUIDE Contents Introduction & Why the MS-TestPro Hardware 04 - 05 Optional Hardware 06 - 07 HDBaseT Support & Cabling for HDBaseT GUI - Home Page GUI - Display Calibration MS-TestPro Setup & Testing Types 11 - 12... -
Page 3: Introduction & Why The Ms-Testpro
With the MS-TestPro test device, faulty or inadequate cabling and systems can be identified and remedied before leaving site, saving both time, money and reputation. -
Page 4: Hardware
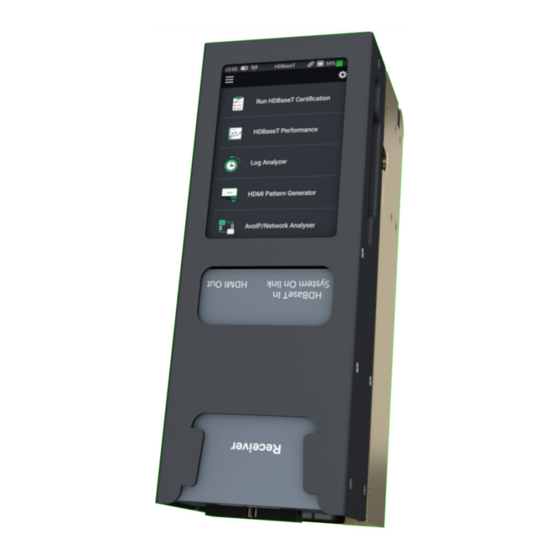
MS-TestPro USER GUIDE Hardware MS-TestPro Side elevation Test pattern generator HDMI output Audio out Power Stylus Top elevation Front elevation LAN / Ethernet Power switch Stylus Bottom elevation Data adapter PoH Adaptor storage... - Page 5 The MS-TestPro HDBaseT Test Device is supplied with HDBaseT Spec 1.0-standard TX and RX modules. The HDBaseT Spec 2.0 Modules (TX and RX units) are available as an optional add-on that can be used with the MS-TestPro to tesat for the additonal functionality contained within the HDBaseT Spec 2.0 chipsets.
-
Page 6: Optional Hardware
MS-TestPro USER GUIDE Optional Hardware The HDMI Cable Tester (HCT) module allows installers and integrators to test the quality and resolution support of HDMI cables before installation. The module identifies missing and shorted wires in a HDMI cable that will render the cable incapable of 4K streaming. - Page 7 MS-TestPro USER GUIDE Optional Hardware The Looper module is a remote-end module with RJ45 and HDMI ports that is used to create the loop at the other end for HCT and DC Resistance testing. A Looper is supplied with any HCT or DCR module purchase.
-
Page 8: Hdbaset Support & Cabling For Hdbaset
MS-TestPro USER GUIDE HDBaseT Support The MS-TestPro test device integrates a Valens VS100 HDBaseT Class A (Spec 1.0 Module - included) or VS2310 HDBaseT class C (Spec 2.0 Module - sold separately) chipsets, including transmit and receive IC’s. The class A chipset supports HDBaseT Specification 1.0, and is compatible with HDBaseT Specification 2.0, allowing it to work with HDBaseT... -
Page 9: Gui - Home Page
MS-TestPro USER GUIDE GUI - Home Page The home page of the MS-TestPro will be the first screen that appears on first powering on the unit. See below overview of the home page: Link: will show USB drive connected: icon... -
Page 10: Gui - Display Calibration
MS-TestPro USER GUIDE GUI - Display Calibration Due to the size of the display included on the MS-TestPro there are certain menus and options that require a precise press of the screen when usig the supplied stylus. It is recommended to calibrate the display on furst use, then periodically depending on use. -
Page 11: Ms-Testpro Setup & Testing Types
Generator, to pass a HDMI signal over the link for the MS-TestPro to properly qualify the link. The MS-TestPro can generate a range of HDMI signals (up to 4K 30Hz 4:4:4) using the built-in Test Pattern Generator on the side of the unit. By default, the signal output from the HDMI output of the tester is 4K 30Hz 4:4:4 (10G). - Page 12 4. Connect the CATx cable to the HDBaseT connection on the local module inserted into the tester. 5. Run a short HDMI cable from the HDMI output located on the side of the MS-TestPro to the HDMI input of the local module (assuming the local module is the Transmitter), or from a HDMI source device, or 3rd party Test Pattern Generator to the HDMI input of the Transmitter if the Transmitter is going to be used as the remote module.
-
Page 13: Wifi / Lan Connectivity
Use this method when ther eis a hardwired LAN connection. Use the RJ45 connection on the top of the MS-TestPro to connect to the network. The LAN Connection icon will appear at the top of the display (see GUI Home Page for further details). -
Page 14: Hdbaset Certification Test
HDBaseT signal. This test would be used for new CATx cable runs, or for existing runs to determine the suitability for stable HDBaseT transmission. Select the first menu option on the main Home menu of the MS-TestPro to enter the ‘HDBaseT Certification’ page. - Page 15 For more information on MAX ERR and MSE ERR values, see next page. To save the test result into the memory of the MS-TestPro, click ‘SAVE’ . Enter the details into the 3 open text fields for: Customer, Job Site, Cable Type and Operator before hitting ‘Save’...
-
Page 16: Max Err And Mse Err
HDBaseT is an Asymettical Link meaning that the technology has a higher rate of data transmission from TX to RX, than it has from RX to TX. The MS-TestPro will test for data flow in both directions, allowing for a true reflection of the link quality for all HDBaseT... -
Page 17: Hdbaset Performance Testing
The HDBaseT Performance overview gives the user a live overview of the signal passing through the MS-TestPro for both MAX ERR and MSE ERR on both Transmitter and Receiver modules. The tester can be switched between TX and RX by using the selection switch at the top of the screen as highlighted above. - Page 18 HDBaseT chipsets in use on both TX and RX side (using the switch in the top left of the screen). The MS-TestPro can also be used to send a signal to a HDBaseT receiver, or receive a HDBaseT signal from a HDBaseT...
- Page 19 MS-TestPro USER GUIDE HDBaseT Performance Testing Reading the Performance graphs: With any data being passed over a CATx cable, the idea is to have adequate headroom in the cable to allow for fluctuations or increases in data. The performance graphs show the individual twisted pairs data performance. Some points to note as follows when viewing the live output of the performance: •...
- Page 20 MS-TestPro USER GUIDE HDBaseT Performance Testing Clicking on the dial icon in the middle top of the screen shows a slightly different view of the Performance overview which shows the individual live performance of each twisted pair to view the average MAX ERR of each pair:...
- Page 21 In summary: The HDBaseT Performance option within the MS-TestPro allows for a test to be carried out over a longer period of time than the HDBaseT Certification, which only analyses the signal over a 10 second period.
-
Page 22: Log Analyzer
Log files are generated in pairs – one for the Transmitter module and one for the Receiver module. Up to 5 pairs of log files are stored in the internal memory of the MS-TestPro. When a 6th pair of log files is generated, the oldest log file pair in the system is automatically deleted. - Page 23 MS-TestPro USER GUIDE Log Analyzer Log Generation: To generate a Log Analysis, click on the ‘Log Analyzer’ function on the main tester menu: 1. Connect the equipment as per performing a HDBaseT Certification test with a live HDMI signal being input to the Transmitter module, and a display connected to the HDMI output of the Receiver module.
-
Page 24: Hdmi Pattern Generator
The built-in HDMI test pattern generator is always outputting a live signal from the HDMI output port on the side of the MS-TestPro. The image is a 4K (10Gbps) image with a resolu- tion of 3840x2160 30Hz RGB 4:4:4 8-bit colour with no HDCP. -
Page 25: Edid Analyzer
2. Connecting the MS-TestPro device to an HDMI sink device via a HDMI cable directly To access the sink EDID capabilities: 1. Connect the MS-TestPro device to the sink either via HDMI, or HDBaseT, as shown in one of the methods as described above. - Page 26 The following screen appears, presenting the sink device display information, and supported display resolutions: To save the EDID data to the MS-TestPro’s internal memory, click the ‘SAVE REPORT’ button. To download EDID data, connect a USB memory stick and tap the ‘DOWNLOAD REPORT’...
-
Page 27: Report Files
MS-TestPro internal memory. All reports from any of the tests that the MS-TestPro can carry out will be saved into this location for download onto a USB stick inserted to one of the 4 slots on the top of the MS- TestPro. - Page 28 Once selected: • Insert a USB stick into one of the USB ports on the top of the MS-TestPro unit and click ‘Download x files’ . The files will be downloaded in .pdf format.
-
Page 29: Cloud Connectivity
3rd party equipment sending other non-HDBaseT standard power schemes such as PoC (Power over Cable), or PoW (Power over Wire) is likely to damage the test module. The warranty of the MS-TestPro does not include damage to either TX, RX or the tester caused by non-HDBaseT standard power schemes. - Page 30 MS-TestPro USER GUIDE Firmware / System Upgrade From time to time, and as new features are released for the MS-TestPro, there may be the requirement to update the firmware on the MS-TestPro unit. Before starting the process, please ensure that there is sufficient battery life on the unit, or it is plugged into the mains supply.
-
Page 31: Specifications
MS-TestPro USER GUIDE Specifications Physical / Mechanical: • Chassis construction: aluminium • Ingress protection: IP54 • Unit dimensions (tester) W x D x H: MS-103TD - 67mm x 180mm x 55mm (2.6” x 7” x 2.1”) MS-104B - 67mm x 180mm x 79mm (2.6” x 7” x 3.1”) •... - Page 32 www.m4sol.com...
Need help?
Do you have a question about the MS-TestPro and is the answer not in the manual?
Questions and answers