
Related Manuals for Techniglass Grinder

Summary of Contents for Techniglass Grinder
- Page 1 OPERATION MANUAL STATE-OF-THE ART BREAKTHROUGH TECHNOLOGY Phone: 716.564.8888 www.techniglass.com...
- Page 2 Techniglass Corporation company updates, promotions, and news! Go to techniglass. com and tell us about your new GRINDER experience – any comments and feedback you may have – we would love to hear from you! On behalf of our entire team, thank you for choosing Techniglass for all your glass grinding needs.
-
Page 3: Safety Precautions
SAFETY PRECAUTIONS Always use eye protection while • operating this glass grinder Use only a properly grounded, • three-prong outlet Water from reservoir must not reach • electrical outlet Power off THE GRINDER ® • THE GRINDER 2 when not in use ®... - Page 4 ASSEMBLY FOR THE GRINDER ® Insert the power cord into inlet Remove the Lift Grid Slide Quick Fit Bit down shaft and lock into place ® 4a-c Install Aqua Flow System and wet the brush bristles ® Page 3.
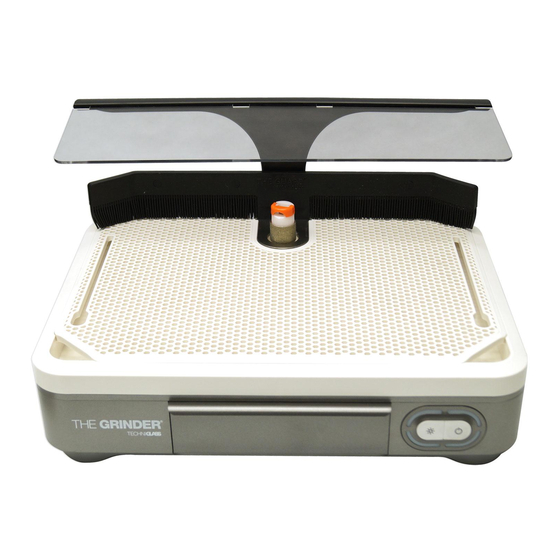
- Page 5 ASSEMBLY FOR THE GRINDER CONTINUED ® WATER LEVEL 6 a-b Place THE LUMISHIELD or LUMISHIELD Mount Cap ® into slot 7 a-b Add water until it reaches base of Aqua Flow System brush ® Position Lift Grid Install the THE GUARD into slot...
- Page 6 ASSEMBLY FOR THE GRINDER CONTINUED ® Slide transparent lens into channel Insert Everwear Bit Guard Plug power cord into grounded 3-prong socket 13 a-b Press Light /Power Switch Page 5.
- Page 7 ASSEMBLY FOR THE GRINDER 2 ® Insert the power cord into inlet Remove the Lift Grid Slide Quick Fit Bit down shaft and lock into place ® 4a-c Install Aqua Flow System and wet the brush bristles ® Page 6.
- Page 8 ASSEMBLY FOR THE GRINDER 2 CONTINUED ® WATER LEVEL 5 a-b Add water until it reaches water level mark in reservoir or base of Aqua Flow System brush ® Position The Lift Grid, and install The Guard into slot Insert Everwear Bit Guard Press Power Button on front to operate Page 7.
- Page 9 ASSEMBLY FOR THE GRINDER 2 ® OPTIONAL ACCESSORY – THE LUMISHIELD 2 ® Insert THE LUMISHIELD 2 into slot Connect the cable to the port on the back of THE GRINDER 2 Slide transparent lens into channel, securing in-place Press Light Button on front to operate...
- Page 10 ASSEMBLY FOR THE GRINDER 2 ® OPTIONAL ACCESSORY– THE GUARD 2 ® 1 a-b Insert THE GUARD 2 into slot The LUMISHIELD 2 and THE GUARD 2 are sold separately, ® ® allowing THE GRINDER 2 to be completely customizable.
- Page 11 PREPARING THE GRINDER THE GRINDER 2 ® ® FOR THE MINI G PLATFORM ® Remove THE GUARD /THE GUARD 2 ® ® Remove Quick-Fit ® Remove Everwear Bit Guard ® 4 a-b Remove the Aqua Flow System ® Remove Water from the basin...
- Page 12 ® 1a-b Remove Shaft Water Seal included with THE MINI G and MINI G Bit System and slide down shaft of Grinder ® Screw 1/4" or 1/8" jewelry bit onto shaft Align and install THE MINI G over shaft *MINI G Bit System sold separately. Please contact your favorite retailer for purchase information.
- Page 13 THE MINI G PLATFORM ASSEMBLY FOR ® THE GRINDER THE GRINDER 2 CONTINUED ® ® WATER LEVEL Install Aqua Flow System with orange base brush, wet the ® brush bristles and slide into holder 5a-b Add water until it reaches base of Aqua Flow System brush...
-
Page 14: Maintenance
THE GRINDER 2 ® ® Drain water from reservoir If using GRINDER, install brush on scraper Clean (scrape) excess debris from reservoir surface Clean surface with soap and water to remove additional debris Clean eye shield with soft cloth Page 13. - Page 15 Be sure to register THE GRINDER THE GRINDER 2 ® ® serial number with Techniglass Corporation within 90 days of purchase to ensure warranty validity. Visit www.techniglass.com/grinder/registration/ to register your Grinder. Registering your purchase links your product to your account for proof of ownership, warranty service and recall notifications.
- Page 16 GR.M1.0121.R2 Techniglass Corporation 80 Thompson Street N. Tonawanda, NY 14120 USA Phone: 716.564.8888 www.techniglass.com...
Need help?
Do you have a question about the Grinder and is the answer not in the manual?
Questions and answers