
Subscribe to Our Youtube Channel
Related Manuals for CDVI IEVO-U


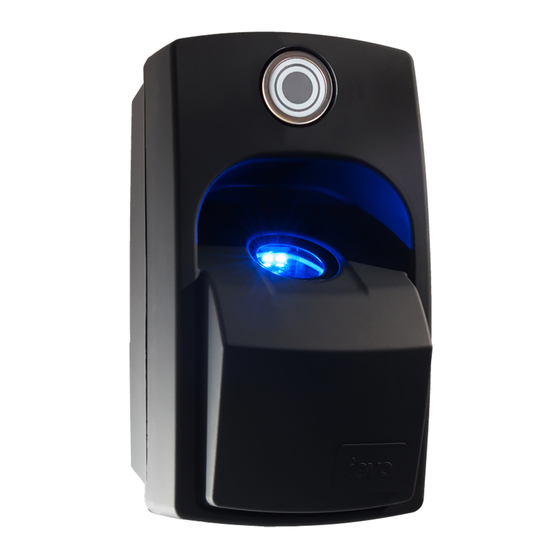
Summary of Contents for CDVI IEVO-U
- Page 1 IEVO-U ultimate™ Fingerprint Reader IEVO-U ievo® ultimate™ Fingerprint Reader Installation Manual...
-
Page 2: Table Of Contents
IEVO-U ultimate™ Fingerprint Reader 1] CONTENTS TITLE PAGE 2] Package Contents 3] Technical Features 4] Introduction Standards Help & Support 5] Installation Guidance Power Reader Head Cabling Wiegand Cabling Network 6] Control Board Connections 7] Door Wiring Example 8] Back Plate Installation... -
Page 3: Package Contents
IEVO-U ultimate™ Fingerprint Reader 2] PACKAGE CONTENTS Phoenix Back plate Security Security 5m CAT6 Connector O-ring screws screw tool cable (CTF-03008) Surface Reader Back plate plate head 3] TECHNICAL FEATURES Description Data Connection Shielded (S-FTP) Cat5e/6 cable Voltage Current Draw... -
Page 4: Introduction
IEVO-U ultimate™ Fingerprint Reader 4] INTRODUCTION This manual will guide you through the installation of an ievo ultimate™ reader. Please ensure you read and understand all the information in this manual before commencing with installation. STANDARDS Symbol Description Open Book Please refer to the user manual once installation is complete. -
Page 5: Installation Guidance
IEVO-U ultimate™ Fingerprint Reader 5] INSTALLATION GUIDANCE The ultimate™ reader is IP65 rated and is suitable for both internal and external use. The reader must be continually powered on when installed outdoors to retain its IP65 rating. The ultimate reader can be either flush or surface mounted. Ensure you use the correct fixings and plugs for the type of wall for which you are fixing the reader. -
Page 6: Reader Head Cabling
IEVO-U ultimate™ Fingerprint Reader Please follow ESD Safety Procedures to prevent any damage to electronic components. READER HEAD CABLING Each ultimate reader uses a bespoke PoE (Power over Ethernet) connection to the ievo Control Board, carrying both power and data. Therefore, you must use a high-quality shielded Ethernet cable to prevent power and data loss. -
Page 7: Control Board Connections
IEVO-U ultimate™ Fingerprint Reader 6] CONTROL BOARD CONNECTIONS... -
Page 8: Door Wiring Example
IEVO-U ultimate™ Fingerprint Reader 7] DOOR WIRING EXAMPLE ACU Power Supply Unit Network Access Switch Control Unit Lock Power Ethernet Reader Cable Wiegand Cable Ground Connection... -
Page 9: Back Plate Installation
IEVO-U ultimate™ Fingerprint Reader 8] BACK PLATE INSTALLATION The backplate is necessary to create a water tight seal and to enable the reader to be flush or surface mounted. STEP 1: Plug the ethernet cable into the back of the ultimate reader. Ensure the cable is positioned into the duct as shown below. -
Page 10: Surface Mount Installation
IEVO-U ultimate™ Fingerprint Reader 9] SURFACE MOUNT INSTALLATION STEP 1: STEP 2: Use the wall plate to mark out the size Attach the wall plate to the wall using of the hole required for the reader 6 counter-sunk screws, ensuring the cable. - Page 11 IEVO-U ultimate™ Fingerprint Reader STEP 4: Use the security screw and tool provided to secure both plates together. Wall STEP 5: STEP 6: Bend the security latch on the wall plate Stretch the aesthetic seal provided inwards using pliers as shown below.
-
Page 12: Flush Mount Installation
IEVO-U ultimate™ Fingerprint Reader 10] FLUSH MOUNT INSTALLATION Ensure you have followed the instructions for attaching the Ultimate reader to the back plate before continuing (see: 8] Back Plate Installation). STEP 1: Attach the wall plate to the flush mounting place using the 4 screws provided, ensuring the Ethernet cable is fed through the holes as shown below. -
Page 13: Installation Complete
IEVO-U ultimate™ Fingerprint Reader STEP 4: STEP 5: Bend the security latch on the wall plate Mount the ultimate reader and flush- inwards using pliers as shown below. kit into the wall, using the 4 security screws and security tool provided. -
Page 14: Product Disposal
IEVO-U ultimate™ Fingerprint Reader 11] PRODUCT DISPOSAL When the product reaches the end of its useful life, it must not be disposed of in normal waste. The product must be disposed of at an authorised recycling plant. The ievo Control Board contains a Lithium metal... - Page 15 IEVO-U ultimate™ Fingerprint Reader Notes ..................................................................................................................................................................................................................................................................................................................................................................................................................................................................................................................................................................................................................................
- Page 16 +39 (0) 321 90 573 - www.cdvi.it CDVI MAROC +212 (0) 5 22 48 09 40 www.cdvi.ma CDVI NORDICS [SWEDEN - DENMARK - NORWAY - FINLAND] +46 (0) 31 760 19 30 www.cdvi.se CDVI UK [UNITED KINGDOM - IRELAND] +44 (0) 1628 531300 www.cdvi.co.uk...
Need help?
Do you have a question about the IEVO-U and is the answer not in the manual?
Questions and answers