Advertisement
Quick Links
Advertisement

Subscribe to Our Youtube Channel
Related Manuals for Woody Valley Libero


Summary of Contents for Woody Valley Libero
- Page 2 5.4 - HOOKING INTO THE HANG GLIDER ..........................6 - FLYING WITH LIBERO ..............................11 6.1 - PRE-FLIGHT CHECKS ................................. 6.2 - HOW TO PUT LIBERO ON ..............................6.3 - TAKE-OFF ..................................... 6.4 - TOW LAUNCHING ................................6.5 - IN-FLIGHT .....................................
- Page 3 THANK YOU We would like to thank you for choosing a Woody Valley product. We invite you to read this important document, the harness user manual and to pay special attention to the two most important paragraphs concerning: Inserting the reserve parachute and adjusting the harness.
-
Page 4: General Information
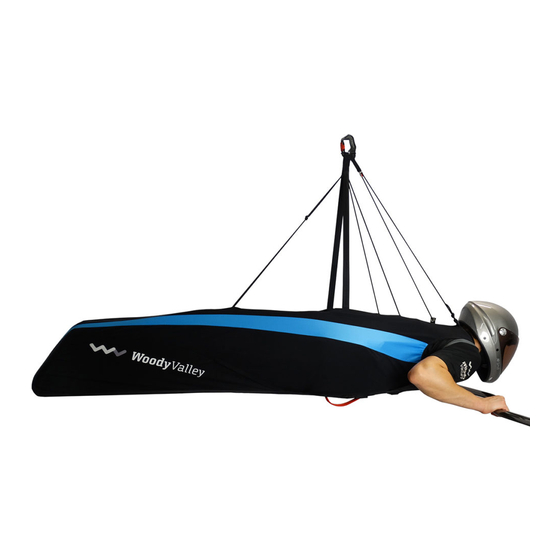
4 small aluminium tubes and Kevlar cords used to distribute the load over the entire body of the pilot. LIBERO is suitable for anyone from beginners on their very first flights, to occasional pilots, to top pilots for pure enjoyment outside of competitions. - Page 5 The outer cover (Skin) is assembled and attached by Velcro to the rest of the harness - the parachute pockets and the straps are separate from the skin. This allows easy cleaning, repair and/or replacement of all the external fabric. To reduce weight, we have abandoned heavy fabrics, such as Cordura, and instead utilised lighter ones used on paragliding harnesses.
-
Page 6: Reserve Parachute
500 covering. 3.1.1 - CONNECTING THE HANDLE TO THE DEPLOYMENT BAG LIBERO is supplied with a special parachute deployment handle. Remember that only this handle must be used. The black handle connection loop should be inserted in the deployment bag loop and then the entire handle should be passed through the same loop in order to obtain a tight connection. - Page 7 3.1.2 - CONNECTING THE RESERVE PARACHUTE TO THE HARNESS The harness bridle should pass through the emergency parachute bridle loop. Next, the emergency parachute should be passed through the large loop of the harness bridle. The result is a connection that should be tightened as much as possible so as to prevent dangerous friction between the two cables during emergency opening shock.
- Page 8 Introduce a thin rope (1 or 2 mm diameter) into each elastic loop which you will use to help close the container. Introduce the elastic loops into the two smaller eyelets. Follow the closing order of the various flaps visible in the photos. Insert the metal handle pins into the elastic loops.
- Page 9 3.2.1 USING THE DROGUE PARACHUTE This system will allow you to deploy your drogue parachute by holding it firmly in your hand during the last stage while approaching landing and then releasing it at the end, at the most opportune moment.
- Page 10 5 – ADJUSTMENTS 5.1- OVERALL LENGTH ADJUSTMENT Before carrying out any adjustment the reserve parachute must be inserted. To find the optimum position we recommend hanging in the harness, simulating flight position and conditions. It is best to place all the material which you normally take in flight with you in the back pocket.
- Page 11 120 cm. Any personal adaptation can be obtained by replacing the main hang loop on the hang glider or the strap on the harness. 6 - FLYING WITH LIBERO 6.1 - PRE-FLIGHT CHECKS For maximum safety, use a valid and complete pre-flight inspection method.
- Page 12 The harness is correctly hooked into the hang glider and the snap-hook is perfectly tightened by means of the closing mechanism. 6.2 - HOW TO PUT LIBERO ON Put the arms in the shoulder straps and then secure the two leg-strap buckles. Close the zip starting from the top downward and secure the Velcro strip limiting slider movement.
- Page 13 6.5 - IN-FLIGHT After you have adjusted the harness properly to your needs and build, LIBERO is able to offer excellent comfort even for long flights. Flying for a long time with your head lower than your feet can be very tiring. We recommend flying short sections with the head higher than the feet, thereby resting your arms and back muscles in order to conserve energy.
-
Page 14: Replaceable Parts
6.7 - THE BACKPACK We recommend following these tips to pack the harness in the backpack: the backpack has been designed to be small and compact for transp ort. Position the right and left sides toward the centre, fold the harness over the space between the front and rear tubes. Put the harness in the backpack and close the zip halfway from both sides. -
Page 15: Maintenance And Repairs
7.1.2 ZIP AND OUTER SKIN The main zip and the total outer SKIN are replaceable. 7.2 - MAINTENANCE AND REPAIRS Check the harness before each flight. In the event of a crash, check the straps and support cords more carefully. To prevent unnecessary wear and deterioration of the harness, it is important to avoid scraping it against the ground, rocks or abrasive surfaces. - Page 16 Mark the length before removing the old ones. Follow the instructions which will be attached to the product to replace the outer cover (skin). WE HOPE YOU ENJOY GREAT FLIGHTS WITH LIBERO! This owner’s manual is subject to change without prior notice. Please check www.woodyvalley.com for all the latest news on the LIBERO.
Need help?
Do you have a question about the Libero and is the answer not in the manual?
Questions and answers