Advertisement
INSTALLATION / MAINTENANCE INSTRUCTIONS
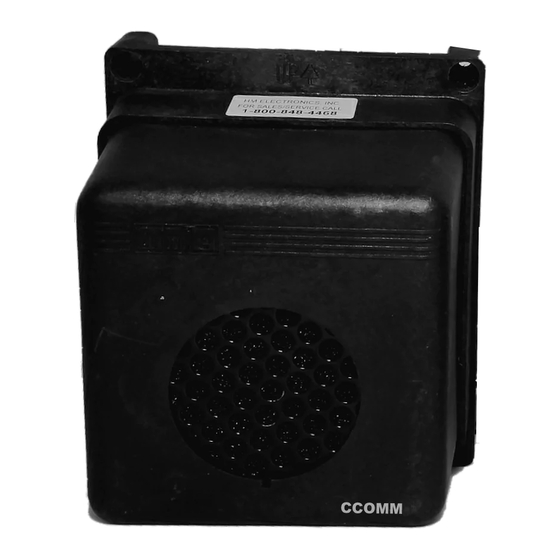
The DU3 is a vehicle detector unit with self-
contained electronics, designed for use with a
drive-thru timer system. It should be installed at
the service window, not at the menu board or
speaker post.
Installation of the DU3 requires only one hole to
be drilled through the wall for cable routing, and
four screw holes for mounting the detector unit
on the outside wall of the building, near the
drive-thru service window. Its cables will be
routed to the AC adapter and the timer system
control unit.
Installation of the DU3 should take approximately
one hour. Follow these instructions.
Parts List
The following parts are included with the DU3. As the items are
unpacked, check them against the packing slip. If any item is
missing or damaged, contact your HME sales representative.
Detector unit with 12 ft. (3.66 meter) cables
! !
AC adapter
!
Mounting hardware
!
Tools Required
Be certain you have the items listed below before beginning
the DU3 installation.
Tape measure
! !
Phillips (cross point) and standard (slotted) screwdrivers
!
Electric drill with ½ inch (13mm) and ¼ inch (6mm) bits to
!
drill the mounting surface (wood, cinder block or metal)
where detector unit will be installed
Electrical tape or shrink tubing
!
HM ELECTRONICS, INC.
14110 Stowe Drive, Poway, CA 92064 USA ! Phone: 1-800-848-4468 Fax: (858) 552-0172
Ultrasonic Vehicle Detector
Figure 1.
Typical DU3 installation site
Figure 2.
DU3
DU3 detector unit
HME# 400251
Rev B 11/13/02
Advertisement
Table of Contents

Summary of Contents for HME DU3
- Page 1 Installation of the DU3 should take approximately one hour. Follow these instructions. Parts List The following parts are included with the DU3. As the items are unpacked, check them against the packing slip. If any item is missing or damaged, contact your HME sales representative.
- Page 2 NOTE: Be certain there is an available AC electrical outlet near the mounting site, on the wall inside the drive-thru service area. Figure 3. Typical DU3 position on building near drive-thru service window Drill a ½ inch (13mm) hole through the wall at the location where the detector unit will be mounted.
- Page 3 Cover splices with electrical tape or shrink tubing. Route the larger cable coming through the wall from the DU3 to the AC power adapter. Connect the wires of this cable to the two outer screws on the bottom of the AC adapter, as shown in Figure 5.
- Page 4 C If vehicle-detect signal is not heard or seen, cable from timer system is defective. Replace cable. C If vehicle-detect signal is heard or seen, detector unit is malfunctioning. Call HME. * * For assistance, call HME Customer Support at 1-800-848-4468.
- Page 5 5. Specifications Voltage input: 16VAC AC current: 100mA Minimum, 3A Maximum Operating temperature range: -40 F to 122 F (-40 C to 50 C) Internal Heater: Active below 50 F (10 C) Acoustic Characteristics: Ultrasonic, Frequency 50kHz Angle of Detection: Target must be perpendicular ±...
- Page 6 Operation of this equipment in a residential area is likely to cause harmful interference in which case the user will be required to correct the interference at his own expense. CAUTION: Changes or modifications not expressly approved by HME could void the users authority to operate this equipment.


Need help?
Do you have a question about the DU3 and is the answer not in the manual?
Questions and answers