Table of Contents
Advertisement
Quick Links
Advertisement
Table of Contents

Subscribe to Our Youtube Channel
Related Manuals for SET 1501 T


Summary of Contents for SET 1501 T
- Page 1 SERVICE MANUAL SET 1501 T / 2501 T / 3501 T Rev. 1.0 • 2021-W12-3...
-
Page 3: Table Of Contents
Introduction: Table of contents Introduction Table of contents Introduction . . . . . . . . . . . . . . . . . . . . . . . . . . . . . . . . . . . . . . . . . . . . . . . . . . . . . . . . . . . . . . . . . . . . .3 Table of contents . -
Page 4: Overview
Introduction: Overview Overview The target group for this service manual is the technicians who install and maintain the SET Target group 1501 T/ 2501 T/ 3501 T dehumidifier. Thus the manual covers instructions about installation, operation and maintenance. Safety precautions It is the responsibility of the operator to read and understand this service manual and other information provided and to use the correct operating procedure. -
Page 5: Declaration Of Conformity
Introduction: Declaration of Conformity Declaration of Conformity Declaration SET Energietechnik GmbH hereby, declare that the unit mentioned below: No.: 351510, 351511, 351512 Type: SET 1501 T, SET 2501 T, SET 3501 T - complies with the following directives: 2006/42/EC Machinery Directive 2014/30/EU... -
Page 6: Product Description
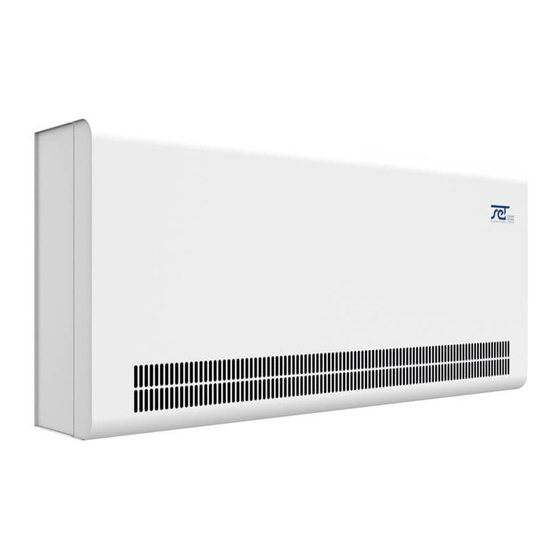
Product description: Overall description Product description Overall description Air flow direction This illustrates the functional principle of the SET 1501 T/ 2501 T/ 3501 T. Fig. 1 Functionality of SET 1501 T/ 2501 T/ 3501 T work in accordance with the condensation principle. - Page 7 Product description: Overall description Two cable grooves for accessory make it Cable groove easy to guide the cables from the control (accessory) panel to the mains electricity connection and out of the unit. Groove B is for use with cable from ex- ternal RH sensor as it requires a separate groove to avoid interference.
- Page 8 Product description: Overall description Presentation Pos . Part Illustration Air inlet Air outlet Drip tray Control panel (behind the cover) Cable groove (for accessory only) Humidity sensor LED lamp Wall bracket Wall mounting spacers (incl. in delivery - only used for wall mounting) Floor mount (incl.
-
Page 9: Enclosure Dimensions
Enclosure dimensions 434,2 Dimensions Front view SET 3501 T - 1488 SET 2501 T - 1154 SET 1501 T - 1004 Bottom view 434,2 Side view SET 3501 T - 1488 SET 2501 T - 1154 SET 1501 T - 1004... -
Page 10: Technical Data
Product description: Technical data Technical data Data sheet Specification unit SET 1501 T SET 2501 T SET 3501 T Operating range, humidity 40-100 40-100 40-100 Operating range, temperature °C 10-36 10-36 10-36 Air volume at max. external pressure m3/h Capacity at 28ºC - RH 60 l/day SEC 28ºC - RH 60... -
Page 11: Installation
It is advisable to use the Langelier Saturation index to ensure that the combination of the different water parameters is acceptable. Saturation index Contact SET Energietechnik GmbH if necessary. Optimal • Do not place the dehumidifier close to a heating source, e.g. a radiator. -
Page 12: Wall Mounting
Installation: Wall mounting Wall mounting Mounting Please follow this procedure to mount the SET 1501 T/ 2501 T/ 3501 T to the wall: procedure Step Description Illustration Find the right spot for the de- humidifier and measure where the wall suspension bar has to be mounted. - Page 13 Installation: Wall mounting Fasten the two wall mounting spacers (included in the deliv- ery) on the back of the unit. Drain outlet: Connect a drain hose and make a condensate outlet through the wall. Connect a 3/4” flexible or fixed water hose to the spigot at the base of the dehumidifier.
-
Page 14: Floor Mounting
Installation: Floor mounting Floor mounting Mounting Please follow this procedure to fix the floor mounts to the SET 1501 T/ 2501 T/ 3501 T unit: procedure Step Description Illustration Fasten both floor mounts to the bottom of the dehumidifier with screws and nuts (incl. -
Page 15: Electrical Connection
Installation: Electrical connection Electrical connection Risk of damaging the dehumidifier, if it has been lying down . Warning CAUTION The compressor can be damaged permanently, when the unit is started up just after it has been lying down. Caution • Wait 1 hour with the start up of the dehumidifier, if the unit has been lying down (e.g. - Page 16 12 VDC Connection of LPHW (water) or electric heating helps controlling the Heat control indoor temperature. Contact your SET dealer for more information. External RH/T There is an option for connecting an external RH/T sensor, which makes it possible to overrule sensor connection the internal sensors.
- Page 17 Installation: Electrical connection Alarm There is an option for connecting an external alarm, which makes it possible to see, when the Run/ fail dehumidifier is operating normally or has an error. In order to use this option you must create connection your own external electrical circuit and connect it to the run/fail terminal on the main PCB (Optional)
-
Page 18: Operation
Operation: Control panel Operation Control panel Risk of electric shock Warning DANGER An electric shock can cause severe burning and in most extreme cases shock to the brain, strain to the heart, injury to other organs or result in death. Caution •... - Page 19 5-34 The el/water heating coil (accessory) will start (accessory only) to heat, when the temperature is lower than the (OFF) set value. (Note the +/- 2 °C hysteresis) Extractor fan 40-99 The extractor fan (accessory) will start, when the humidity is higher than the set value, complete-...
-
Page 20: Maintenance And Care
Insert filter in the filter holder, reattach the cap and lock the two locks. (From Step 1) NB: If the filter (one size PPI filter with order no. 094686) has to be replaced, you can order it through a SET dealer. Annual service The dehumidifier should be inspected once a year. -
Page 21: Software Update And Log Files
RH_amb_ext <0..100> Humidity from external RH/T sensor (0 = Not conn.) RH_set <40..99> Humidity set point (Default 60) ExtFanSet <40..99> Extractor fan set point (Default OFF) Service [Blank] Service interval disabled “ENABLED” Service interval enabled Mode “SB” Stand-by mode state “STARTUP”... - Page 22 Step Action Use an empty USB memory stick. Obtain latest software version from SET Energietechnik GmbH and copy the file to the USB memory stick. Insert the USB memory stick in the USB port of the control panel of the unit.
-
Page 23: Trouble Shooting
When the connection is reestablished the error message can be cleared by pressing OK. It is time for service inspection. • When a new service interval is set, the display will return to standard view. PaIr The unit tries to connect to a remote control. •... - Page 24 Maintenance and care: Trouble shooting Unlock Sequence The message indicates that the unit is locked. If no buttons are pressed within 5 seconds the display will return to previous fail state. Follow the steps below in order to unlock the unit. Step Action Description UnLo...
- Page 25 Normal power up Part of normal op- (flashing) beep sequence erating condition. If you cannot find the reason for the fault, switch off the unit immediately in order to prevent further damage. Contact a service technician or a SET representative.
-
Page 26: Spare Parts
Maintenance and care: Spare parts Spare parts Find spare parts If the need for spare parts occurs, please visit: shop.dantherm.com... -
Page 27: Schematics
Schematics: Cooling circuit Schematics Cooling circuit Illustration This illustration shows the cooling circuit of the dehumidifier. Fig. 7 Description This table lists the different parts of the cooling circuit according to Fig. 7. Pos . Description Compressor Evaporator Air-cooled condenser Thermostatic expansion valve Receiver/liquid line drier Solenoid valve for pressure equalization... -
Page 28: Main Pcb
Schematics: Main PCB Main PCB Illustration This illustration shows the main PCB and its terminals. Fig. 8... -
Page 29: Wiring Diagram
Schematics: Wiring diagram Wiring diagram Illustration This illustration shows the standard connection of the unit. Resistance coversion Temp. °C Kohm TEMP. 6,96 SENSOR 5,44 (EVAPO.) 4,29 3,40 2,72 2,19 1,77 TEMP. J1 (DIODE) SENSOR LED LAMP J17 (TEMP.) RGB RE EVAP.1 (COND.) RGB GR... - Page 32 Fax +49 (0) 71 50 – 23 37 www.set-energietechnik.de info@set-energietechnik.de SET Energietechnik GmbH can accept no responsibility for possible errors and changes (en) Irrtümer und Änderungen vorbehalten (de) SET Energietechnik GmbH n’assume aucune responsabilité pour erreurs et modifications éven- tuelles (fr)
Need help?
Do you have a question about the 1501 T and is the answer not in the manual?
Questions and answers