Table of Contents
Advertisement
Quick Links
Operation & Maintenance Manual
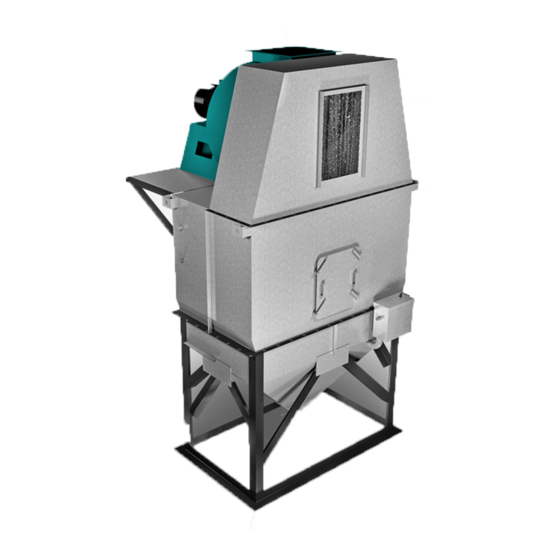
TYPHOON CENTRAL DUST COLLECTOR
READ AND SAVE THESE INSTRUCTIONS
Visit our Website for more information on this product
www.diversitech-air.com
www.diversitech.ca
1200 55
Avenue, Montreal, Quebec H8T 3J8
th
Tel: 1-800-361-3733 | Fax: 1-514-631-9480 | info@Diversitech.ca
Advertisement
Table of Contents
Troubleshooting

Subscribe to Our Youtube Channel
Related Manuals for DIVERSITECH Typhoon TY-8000


Summary of Contents for DIVERSITECH Typhoon TY-8000
- Page 1 Operation & Maintenance Manual TYPHOON CENTRAL DUST COLLECTOR READ AND SAVE THESE INSTRUCTIONS Visit our Website for more information on this product www.diversitech-air.com www.diversitech.ca 1200 55 Avenue, Montreal, Quebec H8T 3J8 Tel: 1-800-361-3733 | Fax: 1-514-631-9480 | info@Diversitech.ca...
-
Page 2: Table Of Contents
TABLE OF CONTENTS SECTION 1 – SAFETY ............................................................3 SECTION 2 – GENERAL PRODUCT INFORMATION ..............................................4 SECTION 3 – PRODUCT SHIPMENT ......................................................6 SECTION 4 – PRODUCT RECEIPT AT THE DESIGNATED DELIVERY POINT ..................................6 SECTION 5 – UNLOADING AND HANDLING ................................................... 7 SECTION 6 –... -
Page 3: Section 1 - Safety
(“HSE”) rules, regulations and legislation shall be fully complied with at all times. 1.2 Safe working practices and staff training Diversitech is fully committed to the safety of its employees and those of its customers. In this spirit the following guidelines are offered for the consideration of those responsible: •... -
Page 4: Section 2 - General Product Information
1.4 Electrical hazards Before doing any work on the Diversitech equipment make sure that all potential electrical hazards have been identified and that all electric current connected to the equipment, and to any connected or associated equipment, has been properly disconnected and securely locked-out to prevent accidental reconnection prior to completion of the work. - Page 5 (aluminum, titanium, or magnesium) and coal dust, or dusts that are damp, wet, sticky or oily. Contact Diversitech support at 1-800-361-3733 for assistance with your application.
-
Page 6: Section 3 - Product Shipment
SECTION 4 - PRODUCT RECEIPT AT THE DESIGNATED DELIVERY POINT The people of Diversitech take pride in the quality of the products that we supply and it is our intention that our customer’s experience with our products and services be positive and satisfying. This process begins at delivery. It is important to ensure that the product delivered is what was ordered and that it arrives at its destination in perfect condition. -
Page 7: Section 5 - Unloading And Handling
4.4 Damaged goods If there is any visible damage to the packaging or the equipment, notify the carrier and Diversitech before proceeding further and, if appropriate, file an immediate claim with the carrier against such damage. Be aware that damage to packaging may indicate hidden damage to the product that is not immediately discernable. - Page 8 5.5 Hopper Base Hoisting Hoisting must be done from the hoist mounts. Appropriate hoisting procedure should be followed according to 5.3 Rigging and Hoisting Instructions 5.6 Middle Section Hoisting Hoisting must be done from the hoist mounts. Appropriate hoisting procedure should be followed according to 5.3 Rigging and Hoisting Instructions...
- Page 9 5.7 Top Section Hoisting Hoisting must be done from the hoist mounts. Appropriate hoisting procedure should be followed according to 5.3 Rigging and Hoisting Instructions 5.8 Motor-Blower Hoisting Hoisting must be done from the hoist mounts. Appropriate hoisting procedure should be followed according to 5.3 Rigging and Hoisting Instructions...
-
Page 10: Section 6 - Storage And Protection
SECTION 6 – STORAGE AND PROTECTION • If not installed immediately, the equipment shall be retained and stored in a protective environment until immediately prior to installation. This environment shall be clean, dry, and temperature and humidity-controlled. • At all times the equipment shall be protected from exposure to weather and from standing water. •... -
Page 11: Section 8 - Assembly And Installation
SECTION 8 - ASSEMBLY AND INSTALLATION • Safe and efficient operation of the Typhoon Central Dust Collector depends on proper installation. • Diversitech recommends that the ductwork going into the collector be as straight as possible, with at least 5 diameters of straight run recommended. -
Page 12: Assembly Of Hopper To Cleaning Sections
8.3 Assembly of Hopper to Cleaning Sections As previously noted (see section 8), the hopper (lower level) and cleaning section (middle level) supplied for Typhoon Central Dust Collector are shipped separately for installation at the jobsite. Follow hoisting instructions from Section 6. Field assembly of these sections will be as follows: If the baffles of the middle section were shipped separately, they will need to be installed prior to mounting the middle section on the lower section. - Page 13 Prepare the base section on the foundation and clean the mounting flange. Place the supplied sealant tape or a thick constant bead of silicone around the base section external flange to create a gasket with the middle section. Lower the middle section carefully onto the flange of the hopper section, watching for interference between intermediate sheets and baffles.
-
Page 14: Assembly Of Middle Section To Clean Air Transition Section
8.4 Foundation Installation and Levelling With the middle section installed on the hopper, the clean air transition section can be installed. Follow hoisting instructions from section 6 As previously noted (see section 8.3), the clean air transition supplied for the Typhoon Central Dust Collector ships separately for installation at the jobsite. -
Page 15: Assembly Of Hydrogen Vent Fan
8.5 Assembly of Hydrogen Vent Fan With the clean air section installed on the middle section, the hydrogen vent fan can be installed. • Locate the predrilled mount pattern on the middle section • Bolt the hydrogen fan and motor to the middle section •... -
Page 16: Water Inlet And Solenoid Valve
8.6.3 Top Mount Blower Assembly As previously noted • Locate the middle section top bolting holes for securing the motor-blower assembly • Lower the motor-blower carefully onto the middle section, watching for interference. Set the motor-blower assembly in place so that its base structure bolt pattern matches the middle section bolt hole pattern •... - Page 17 • Connect a ¾” hose from the water level box to the main body outlet to allow pressure equalization. • Secure to body with hose clamps • Mount the water level sensor on the lid of the water level box •...
-
Page 18: Drain Connection For Typhoon Central Dust Collector
• Exhauster motor starter: The exhauster motor starter may or may not be supplied by Diversitech • Solenoid valve: This valve is normally supplied in the water supply line. A solenoid valve is furnished with Typhoon Central Dust Collector. -
Page 19: Section 9 - Water Level Control Options
SECTION 9 – WATER LEVEL CONTROL OPTIONS Water loss can occur in the Typhoon Central Dust Collector for a variety of reasons. These include: Evaporation Sludge removal It is critical for the proper operation of the Typhoon Central Dust Collector that the correct operating water level be maintained at all times. For this reason, make-up water must be supplied to the Typhoon Central Dust Collector at all times. -
Page 20: Controls
10.2 Controls PLC LCD Alarm Annunciator Display/message center Stop Start DC Power Supply Fuses Controller Overload Aux Fan Current monitoring 10.3 Water Level Monitoring As soon as the start button is pressed, the main motor will start if no alarm conditions are present and will run until an alarm occurs or the stop button is pressed. -
Page 21: Level Set Point
10.5 Level Set Point This should only be done in consultation with an authorized Diversitech technician! The following steps have been done at the factory and should not need adjustment. CAUTION Initial Set Point Adjustment if the PLC has been factory reset •... - Page 22 6. Insert flash memory 7. Select memory>zelio 8. Press menu/ok 9. Program will now transfer 10. Once done press menu/ok and scroll to run/stop 11. Select run 12. Select from non-volatile memory (first one on list) and press Ok 10.7.2 Reprogramming Water Level Sensor - Tech Ultrasonic Probe 1.
-
Page 23: Section 11 - Maintenance
10.7.5 Reprogramming Water Level Sensor - Set Water Level When Machine Off 1. Check that the temperature sensors and Photohelic are properly connected 2. If they aren’t there, check that the jumpers are installed 3. Set the minimum for the Photohelic to almost zero [Left Dial] 4. -
Page 24: Replacement Part Stock
4. Open access panels and use pressure washer or plastic bristle brush to thoroughly clean interior baffling of any sludge or residue. 5. Remove semi-solid build-up at bottom of basin, using a Diversitech PneuVac (DTECH- PNEU) or similar equipment, considering: 6. -
Page 25: Reduced Dust Collection Efficiency
12.2 Reduced dust collection efficiency Extreme reduction in air flow may be caused by corrosion or abrasion to impeller sections. Low water level in Typhoon Central Dust Collector. Can be observed through closed glass sight. Water level below running level can be caused by: •... -
Page 26: Troubleshooting Procedure
12.4 Troubleshooting Procedure... -
Page 27: Appendix 1A - Electrical Diagram [240/415V] 3-Phase Power
APPENDIX 1A – ELECTRICAL DIAGRAM [230/460/575V] 3-PHASE POWER ELECTRIC Disconnect power before performing any maintenance on unit, including filter inspection. The input SHOCK power to this unit is high voltage, and touching any live electrical parts can cause fatal shocks or severe HAZARD burns. -
Page 28: Appendix 1B - Setting Sensing Window
APPENDIX 1B – SETTING SENSING WINDOW Setting the Sensing Window Note: For manual setup use the external contact in place of button G. 1. Install accessory XXZPB100 2. Remove all objects from the sensor’s field of detection 3. Align the sensor with the object to be detected 4. -
Page 29: Notes
NOTES... -
Page 30: Terms And Conditions To Sales Orders
2.4. During the Warranty Period, prior to any warranty work being effected, any such work must be pre-approved by us by sending a request to us at service@diversitech.ca in the prescribed warranty claim form available on our website at •. All such work must be completed by us or a party expressly authorized by us. We may charge you any costs, expenses and disbursements incurred by us to effect such work, the whole in our entire discretion. - Page 31 Prior to the return of material, for whatever reason, a return merchandise authorization number (“RMA#”) is required from our customer service department. This procedure is necessary for proper control and handling of returned materials. Call 1-800-361-3733 or email support@diversitech.ca to obtain a RMA #.
-
Page 32: Back Cover
For full product support, visit our website: https://bit.ly/2P6CGBX Scan above on mobile An Absolent Group Company 1200 55 Avenue Montreal, Quebec H8T 3J8 Email: info@diversitech.ca...
Need help?
Do you have a question about the Typhoon TY-8000 and is the answer not in the manual?
Questions and answers