Advertisement
DEAR CUSTOMER
In order to achieve the best performance of your product, please read this instruction manual carefully
before using, and keep it for future reference.
Caution: To reduce the risk of electric shock do not open this device,
there are no serviceable parts for customers. Please refer any
maintenance or repair to qualified personnel.
NOTE
This unit may be submitted for changes in specifications, characteristics and/or operation without
prior notice to user, in order to continue improving and developing its technology.
Contents
1. Important Notice
Precautions
2. Your Party Speaker
Introduction
What's in the box
Overview of the Top control panel
Overview of the Rear panel
Overview of the Remote control
INSTRUCCIONES MANUAL
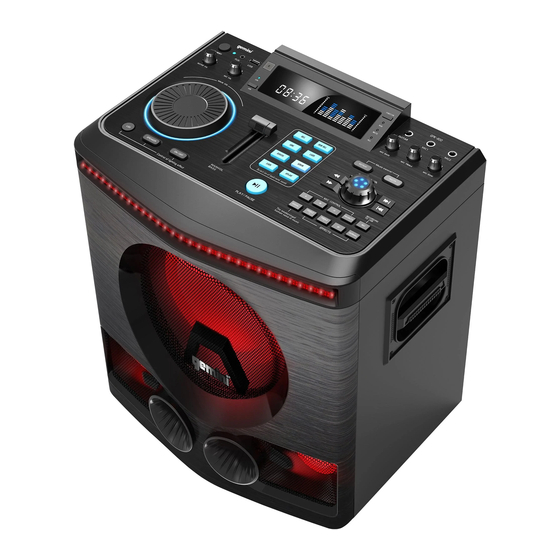
Home Karaoke Party Speaker
GPK-800
CAUTION
RISK OF ELECTRIC SHOCK, DO NOT OPEN
This sign means the existence of dangerous voltage
inside the unit, which states a risk of electric shock.
This sign means that there are important instructions
of operation and handling in the manual that comes with
this device.
Advertisement
Table of Contents

Related Manuals for Gemini GPK1200


Summary of Contents for Gemini GPK1200
- Page 1 INSTRUCCIONES MANUAL Home Karaoke Party Speaker GPK-800 DEAR CUSTOMER In order to achieve the best performance of your product, please read this instruction manual carefully before using, and keep it for future reference. CAUTION RISK OF ELECTRIC SHOCK, DO NOT OPEN Caution: To reduce the risk of electric shock do not open this device, there are no serviceable parts for customers.
-
Page 2: Important Notice
3. Get started Connect power Prepare the remote control Turn on 4. Play Basic key play operations Play from USB 5. Listen to radio Turn to FM radio stations 6. Connect with Bluetooth 7. Connect with AUX Line in 8. Connect with Wired Microphone 9. - Page 3 Batteries (battery pack or batteries excessive heat such as sunshine, f ire, or the like). ⑮ Apparatus shall not be exposed to dripping or splashing. ⑯Do not place any sources of danger on the apparatus(e.g. liquid filled objects, lighted candles ). ⑰...
- Page 4 2. Your Party Speaker Introduction With this unit, you can: Enjoy audio from USB storage Devices, and other external device; Listen to radio stations; Enjoy the music from your phone by bluetooth connecting; What’s in the box Check and identify the contents of your package: Speaker ...
- Page 5 11. REC Function Indicator Light 12. FM Function Indicator Light 13. AUX Function Indicator Light 14. Function Switching Button 15. Microphone Bass Volume Adjustment 16. Guitar Insert Jack 17. Microphone Treble Volume Adjustment 18. Microphone Insert Jack-1 19. Microphone Echo Volume Adjustment 20.
-
Page 6: Get Started
Overview of the Remote control 1. Standby button 2. Mute button 3. BT function button 4. Previous button 5. Backward button 6.Next button 7. FM function button 8. Main Volume +/- 9.3D function button 10. Bass Volume +/- 11. USB function button 12. - Page 7 Prepare the remote control To insert the remote control batteries: 1.Open the battery compartment. 2.Insert 2 x AAA batteries with correct polarity (+/-) as indicated. The 2xAAA battery not include in our products, please purchase from Authorized Seller. 3.Close the battery compartment. Please Note: If you are not going to use the remote for a long time, remove the batteries.
- Page 8 Insert the 6.3 Guitar to the GUITAR jack Insert the 6.3 wired microphone to the MIC1 / MIC2 jack Turn MIC BASS knob to adjust the bass sound level of microphone Turn MIC TREBLE knob to adjust the treble sound level of microphone Turn MIC ECHO knob to adjust the echo sound level of microphone Turn MAIN VOL knob to adjust the sound level (This knob controls the sound of all source, means when the speaker is playing the...
- Page 9 b Button 1. Press this button to switch to the falling tone when using the microphone. 2. Press one time for one level, there are 12 levels can be selected. VOCAL Button Press this button for the weakening of human voice in music. Recovery Button Press this button to recovery the tone from b or # when using the microphone.
-
Page 10: Listen To Radio
5.Listen to radio Turn on FM radio stations Make sure that you have connected and fully extended the supplied FM antenna. Instructions: 1. Insert the FM Antenna Cable to the FM ANT jack on the rear panel. 2. Press FUNCTION button on the Top Control panel or press FM key on the remote control to switch to FM mode. -
Page 11: Product Information
8.Connect with Wired Microphone Insert 6.35mm wired microphone to use the microphone function. When playing with the wired microphone, please use these knob to adjust the bass / treble / echo volume of microphone. When playing with the wired microphone, please turn these two rotary knob to adjust the volume of microphone. -
Page 12: Troubleshooting
Output power 120W Input Sensitivity L&R: 830mV~2V (±20%) SW: 450mV~2V (±20%) FM range 87.5-108MHZ Step 0.1MHZ Speaker Treble Speaker 3 Inch Bass Speaker 8 Inch General information AC Power 110-240V~,50Hz/60Hz Dimension 400*315*450MM Weight USB play ability information Compatible USB storage devices: USB flash memory (USB 2.0 or USB 1.1) ... - Page 13 No sound or poor sound Adjust the volume. Disconnect the headphones. Check that the speakers are connected correctly. No response from the speaker Disconnect and reconnect the AC power plug, then turn on the speaker again. Remote control does not work Before you press any function button, first select the correct source with the remote control instead ...
- Page 14 Radiation Exposure Statement This equipment complies with FCC radiation exposure limits set forth for an uncontrolled environment. This equipment should be installed and operated with minimum distance 20cm between the radiator and your body.
Need help?
Do you have a question about the GPK1200 and is the answer not in the manual?
Questions and answers