Advertisement
Quick Links
Thank you for your purchase!
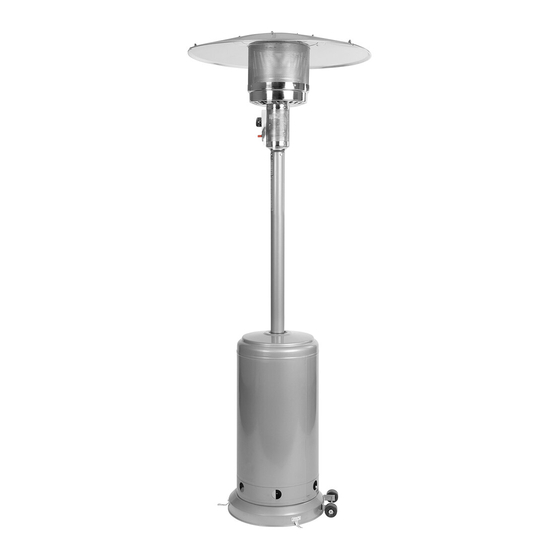
Outdoor Heater
ASSEMBLY INSTRUCTIONS
Before You Begin:
Please identify all component parts and hardware pieces required before you begin.
Carefully remove all components from the packaging and set aside for assembly.
Assemble on a soft surface to prevent scratching during assembly.
Caution:
Tighten all components securely before use. Failure to do so may result in personal
injury.DO NOT use any sharp objects to open plastic wrapped components as damage
to product or competitor may result.
Warning:
CHOKING HAZARD - Small Parts. Adult Assembly Required.
DO NOTALLOW CHILDREN TO CLIMB ON FURNITURE
Online Assembly Instructions:
http://ftp.flashfurniture.com/AssemblyInstructions/NAN-HSS-AGH-BR-GG.pdf
Customer Service email: CustomerExperience@belnick.com | Phone: 866-552-2810
NAN-HSS-AGH-SL-GG / NAN-HSS-AGH-BR-GG
Advertisement

Related Manuals for Flash Furniture NAN-HSS-AGH-SL-GG


Summary of Contents for Flash Furniture NAN-HSS-AGH-SL-GG
- Page 1 NOT use any sharp objects to open plastic wrapped components as damage to product or competitor may result. Warning: CHOKING HAZARD - Small Parts. Adult Assembly Required. DO NOTALLOW CHILDREN TO CLIMB ON FURNITURE Online Assembly Instructions: http://ftp.flashfurniture.com/AssemblyInstructions/NAN-HSS-AGH-BR-GG.pdf Customer Service email: CustomerExperience@belnick.com | Phone: 866-552-2810 NAN-HSS-AGH-SL-GG / NAN-HSS-AGH-BR-GG...
- Page 2 Patio Heater DANGER If you smell gas: 1. Shut off gas to the appliance. 2. Extinguish any open flame. 3. If odor continues, keep away from the appliance and immediately call your gas supplier or fire department. A WARNING Do not store or use gasoline or other flammable vapors and liquids in the vicinity of this or any other appliance.
-
Page 3: Safety Information
SAFETY INFORMATION • Do not attach a remote gas supply to this unit. • Only use propane gas for this unit. • This unit is not intended for natural gas. • Converting this unit to natural gas is dangerous and not recommended. The conversion of this unit will void the manufacturer warranty. - Page 4 • The maximum gas supply pressure is 250psi. • All installation and repair should be done by a qualified professional. This unit should be inspected annually and cleaned regularly. • Inspect all elements of this heating unit before each use. If there is damage, the burner must be replaced. •...
- Page 5 SAFETY INFORMATION BE CAREFUL: WHEN CERTAIN MATERIALS OR ITEMS ARE STORED ABOVE, BESIDE OR UNDER THIS HEATER WHILE IN USE, THEY WILL BE SUBJECT TO RADIANT HEAT AND COULD BE SERIOUSLY DAMAGED. Combustible materials should not be within inches of the top of the unit, or within inches around the entire unit.
- Page 6 HARDWARE Item Description M8 Flange Nut (pre-assembled on part 1) Bolt M8x16 (2 pcs pre-assembled on part I) M6 Flange Nut Stainless Steel Bolt (pre-assembled on part C) Bolt M6x30 Reflector Spacer Washer Screw M6x10 Cap Nut Wing Nut Wrench Anchoring Arm Bolt M6x10 M6Nut...
- Page 7 CONTENTS Item Description Reflector Panel Center Reflector Burner Assembly Tank Housing Post Support Bracket Base Wheel Assembly Regulator...
- Page 8 ASSEMBLY INSTRUCTIONS STEP 1 Turn the base upside down, then attach wheel assembly (I) to base (H) using 2pcs M8 flange nuts (AA) and 2pcs bolts M8x16 (BB). Attach 3pcs anchoring arm (MM) to base (H) using 6pcs M6 nuts (OO) and 6pcs bolt M6x10 (NN).
- Page 9 ASSEMBLY INSTRUCTIONS STEP 3 Attach post assembly to support brackets (G) using 6pcs bolts M6 X 30 (EE) and 6pcs M6 flange nuts (CC). Tighten bolts securely. Hardware Used M6 Flange nut Bolt M6x30 STEP 4 Load tank housing onto post, slide tank housing down.
- Page 10 ASSEMBLY INSTRUCTIONS STEP 6 WARNING: Remove protective cover before assembling. Note: If necessary, for proper alignment of reflector sections. Attach 3 pcs reflector panels (A) to center Reflector (B) using 9 pcs Screws M6x10 (II) and 9 pcs cap nuts (JJ). Fully tighten all the screws. Hardware Used Screw M6X 10 Cap nut...
- Page 11 ASSEMBLY INSTRUCTIONS STEP 8 Place the propane gas tank (not included) on the base. STEP 9 Turn the cylinder valve on the tank clockwise to close the propane tank. Attach the regulator (J) to the cylinder valve by turning the regulator coupling nut clockwise. Make sure it is fastened securely and tighten connections by hand only.
-
Page 12: Operation
OPERATION Before performing a leak test, be sure that no sparks can occur and you are in a spacious outdoor area. Connect the propane gas tank to the regulator and turn the valve on the unit to the "off position. Brush a soap and water mixture on all connections. - Page 13 • Permanent damage may occur if powder or solvent comes into contact with painted or plastic components on this heating unit. • Keep the heating unit stored away from direct sunlight. • If storing this unit inside, disconnect the propane gas tank from the gas valve. •...
-
Page 14: Troubleshooting
TROUBLESHOOTING Problem Cause Solution The burner will not light. The burner injector is clogged. Clean the burner injector. There is low gas supply pressure. Call your gas supplier There is low gas pressure. Call your gas supplier; The burner flame goes off immediately after ignition.
Need help?
Do you have a question about the NAN-HSS-AGH-SL-GG and is the answer not in the manual?
Questions and answers