Table of Contents
Advertisement
Quick Links
Advertisement
Table of Contents

Related Manuals for Xblitz X5

Summary of Contents for Xblitz X5
- Page 1 Xblitz X5 obsługi Instrukcja obsługi w ję...
-
Page 2: Package Details
Package details: 1- Car Recorder 2- Holder 3- Car Charger 4- Manual - 2 -... - Page 3 Before first use: 1. It is recommended to use high-quality class 10 microSD cards for this device (4 to 128 GB). 2. It is necessary to format the memory card to FAT32 format before inserting it into the recorder. 3. Do not remove or insert the memory card while the device in powered on, as this may damage the memory card. 4.
- Page 4 - 4 -...
-
Page 5: Video Mode
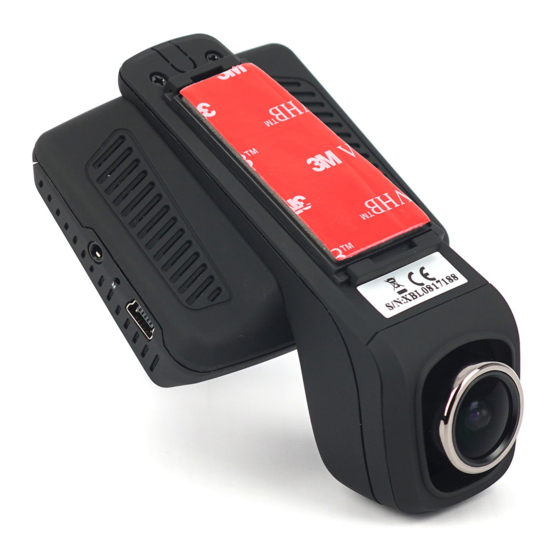
for the windshield mounting bracket 9- OK Button Place 10 – AV out 2- Lens 11 – RESET hole 3- microSD card slot 4- POWER Button 12 – Mini USB port (power) 5- MODE Button 6- MENU Button 7- UP Button 8 –... -
Page 6: Photo Mode
5. Exposure Exposure settings. 6. Motion Detection When you enable this option and leave the camera in standby mode, powered on, the camera will record a short (10 second) video every time motion is detected in front of it. If you manually stop recording, the option will be automatically disabled. 7. -
Page 7: Playback Mode
8. ISO ISO settings. 9. Exposure Exposure settings. 10. Image stabilization Enables and disables stabilization for taking photos. 11. Date stamp Enables and disables the date and time on the photo. Playback Mode 1. Delete Deletes the selected file or files. 2. - Page 8 4. Button sounds. Enables and disables button sounds. 5. Park Mode When this function is turned on, and the camera is left in the car, powered on, it captures the shock of the car (for example, when our car is hit by another car), turns on and starts recording. The higher value is set the more sensitive the camera is. 6.
- Page 9 Buttons Video Mode We use the OK button to turn on/off the recording. Recording starts automatically, once the camera is powered on (provided there is a ▪ memory card in the camcorder). We use the MENU button to enter the current mode settings (only when the camera is not recording). Double pressing it (in every mode) ▪...
- Page 10 1- Current Mode info 2- Camera recording mode info (red dot is blinking) 3- WDR info 4- Free space on the memory card (hours/minutes/seconds) When camera is recording there is information about time video 5- Resolution 6- Parking Mode info 7- Audio Recording info 8- Memory card info 9- Battery indicator...
- Page 11 Photo Mode OK button – single pressing it takes a picture. ▪ We use the MENU button to enter the current mode settings. Double pressing it (in every mode) lets you enter the Main Menu. ▪ We use the MODE button to navigate between different camera modes. ▪...
- Page 12 Playback Mode We use the OK button to play a video file. ▪ We use the UP and DOWN buttons to navigate between files. ▪ We use the MENU button to enter the current mode settings. Double pressing it (in every mode) lets you enter the Main Menu. ▪...
- Page 13 FAQ: 1) The device does not turn on, the display is blinking. ✓ It is necessary to charge the device’s battery before the first use. 2) The device does not turn on,/turns off automatically. ✓ The reason for this may be constant powering by the cigarette lighter socket. 3) The device reboots while driving.
-
Page 14: Warranty Claims
The guarantee does not cover consumable items such as batteries, rechargeable batteries. The warranty on batteries is 6 months. Complaints should be submitted in writing, e-mail address: reklamacje@kgktrade.pl Contact details and the address of the service you can find on website: www.xblitz.pl Reseller / distributor: Sale date:... - Page 15 Technical specifications and content set are subject to change without notice, we apologize for any inconvenience. Importer: KGK Trade Sp. z o.o. sp. K Os. Teatralne 24 31-946 Kraków www.Xblitz.pl Made in P.R.C. - 15 -...
- Page 16 XBLITZ X5 CAMERA APPLICATION 1. Download and install the application named "Final Cam". 2. Turn on Wi-Fi in your camcorder - your camcorder will create an access point (network) that your smartphone connects to. 3. Run the app. Main application screen: In the upper left corner of the main screen is the access button for "Settings"...
- Page 17 9. On the left side of the screen, in the vertical layout, there are icons that controll the following functions (starting from the top): motion detection, clock icon, WDR function, photo resolution, video resolution. 10. At the bottom of the screen, in the horizontal layout, there are icons that control the following functions (starting from the left): brightness control, download recordings from the camera to phone memory, enable / disable recording, enable / disable audio recording, volume control.
- Page 18 1- Motion detection 2- Loop recording 3- WDR function 4- Photo resolution 5- Video resolution 6- Brightness control 7- Download recordings from the camera to phone memory 8- Enable / disable recording 9- Enable / disable audio recording 10- Volume control 11- Access to application settings 12- Access to files downloaded from the camera 13- Access to the gallery of recordings...
Need help?
Do you have a question about the X5 and is the answer not in the manual?
Questions and answers