Table of Contents
Advertisement
Advertisement
Table of Contents

Subscribe to Our Youtube Channel
Related Manuals for PROLiNK Xtend PRO


Summary of Contents for PROLiNK Xtend PRO
- Page 1 User Manual ® PROLiNK Xtend PRO Whole Home Mesh Wi-Fi System PRC2402M v. 1.1...
- Page 2 Copyright The contents of this publication may not be reproduced in any part or as a whole, stored, transcribed in an information retrieval system, translated into any language, or transmitted in any form or by any means, mechanical, magnetic, electronic, optical, photocopying, manual, or otherwise, without the prior written permission.
- Page 3 Preface Revision Date Descriptions 7/2/2020 Initial release 1/9/2020 Content Update...
-
Page 4: Table Of Contents
Introduction ................................1 Features ................................1 Hardware Overview ............................. 2 Xtend Pro LED Indicator ............................3 Getting Started ................................4 Wi-Fi Mesh Placement Guide ..........................4 Physical Connectivity Setup - PRC2402M as Router or Access Point (AP) Mode ..........5 Setting up the PRC2402M as a Mesh Node ....................... - Page 5 Wizard ................................18 Router Wizard ............................19 AP Wizard ..............................20 Wi-Fi ................................21 Wi-Fi Configuration ........................... 21 Mesh Network ............................22 TouchLink .............................. 22 Region Settings ............................23 2.4GHz and 5GHz Wireless Settings ....................... 24 Setup ................................25 Internet Setting ............................26 DHCP Settings ............................
- Page 6 Login Password ............................37 Backup/Restore Settings .......................... 38 Firmware Upgrade ............................ 39 Device Status ............................41 Device Reboot ............................42 App User Interface Configuration ........................43 Wi-Fi Configuration ............................45 Adding New Mesh Node Using mXtend App ....................46 Technical Specification ............................48...
-
Page 7: Introduction
Wi-Fi connection in home sizes of up to 6,000ft with an aggregated wireless speed of up to 2100Mbps. Features • Easy Setup - Xtend Pro units come pre-paired out of the box, just plug in and get started. • Seamless Roaming - Enjoy seamless roaming without experiencing disconnection. • TouchLink - Tap and connect to Wi-Fi without having to create password for guests. -
Page 8: Hardware Overview
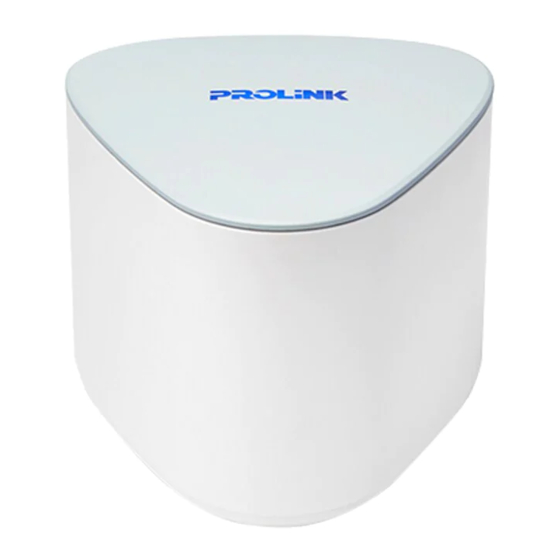
PRC2402M User Manual v1.1 Hardware Overview... -
Page 9: Xtend Pro Led Indicator
PRC2402M User Manual v1.1 Xtend Pro LED Indicator LED Behaviour Mesh Router Mesh Node Solid Purple Starting-Up / Booting-Up Starting-Up / Booting-Up Solid Blue The internet connection is up The connection between the Mesh Node and the Mesh Router or... -
Page 10: Getting Started
PRC2402M User Manual v1.1 Getting Started To setup PRC2402M you need to ensure the following item in the list is available. • Internet Access (DSL, Modem or existing Wireless Router). • Ethernet Cable with RJ45 connector at both ends. • Computer equips with Ethernet Network adapter (10Base-T or 100Base-TX or 1000Base-TX) with capability IEEE802.11a/b/g/n/ac. -
Page 11: Physical Connectivity Setup - Prc2402M As Router Or Access Point (Ap) Mode
PRC2402M User Manual v1.1 Physical Connectivity Setup - PRC2402M as Router or Access Point (AP) Mode Step 1. Identify the master Mesh Router (Blue Unit) to be connected to the existing Internet Service Step 2. Power off all existing Internet source from your equipment / modem / router provided by your ISP (Internet Service Provider) Step 3. - Page 12 PRC2402M User Manual v1.1 Example diagram for AP mode physical setup: Step 1. Turn OFF Main Router/Existing Router Step 2. Connect Ethernet cable between Main/Existing Router LAN ports to PRC2402M WAN/LAN Port. Step 3. Connect Ethernet cable between Computer LAN ports to PRC2402M LAN port. Step 4.
-
Page 13: Setting Up The Prc2402M As A Mesh Node
PRC2402M User Manual v1.1 Setting up the PRC2402M as a Mesh Node PRC2402M is a Mesh-Ready device. To set up your mesh system, you will need at least two units of PRC2402M. First unit is to be connected to main Internet source (known as Mesh Router) and the second PRC2402M as the Mesh Node unit. -
Page 14: Option 2: Via Web Browser
PRC2402M User Manual v1.1 Step 6. Wait for the Pairing sequence to complete, once successful, both the Mesh Router LED and the Mesh Node LED will be solid blue Option 2: Via Web Browser Step 1. Connect your computer to the existing Mesh System, launch a web browser and access via any one of below options: http https... - Page 15 PRC2402M User Manual v1.1 Step 4. Press the Plus Button [+] Step 5. Wait until the Mesh Node’s LED turns Solid Blue indicating that the pairing is successful. Step 6. Move the node unit to the desired location. For placement guide, refer to Wi-Fi Mesh Placement Guide covered in earlier section.
-
Page 16: Accessing The Gui (Graphical User Interface)
Desktop, Web Utility is not restricted to Microsoft Edge only, but the user can enter through Mozilla Firefox, Chrome, Internet Explorer or Apple Safari. With the mXtend App for Mobile phone, it provides convenience and hassle-free management to your PROLiNK Whole Home Mesh System PRC2402M. - Page 17 PRC2402M User Manual v1.1 2. Enter the Web GUI Password. Default password can be found at the product label. Do note that password is Case-Sensitive. 3. Upon login, set Time Zone and New Login Password. Click Save to proceed. Note that the New Login Password is the password that you will require for subsequent login to through Web GUI and App.
- Page 18 PRC2402M User Manual v1.1 For better security, it is highly recommended to set complex password. 4. To set PRC2402M as Router, select Router Wizard and complete the following steps: a. Select Respective WAN Connection Type as determined by the ISP (Internet Service Provider), otherwise, leave it as DHCP (Dynamic IP) b.
- Page 19 PRC2402M User Manual v1.1 5. To set PRC2402M as AP, select AP Wizard and complete the following steps: a. Set the new SSID (Default: PROLiNK_Mesh_XXXX), and new Wi-Fi password (Default: refer to product label) b. Click Apply c. NOTE: to re-access the PRC2402M GUI after the setting above, go to http://prc2402m.setup or https://prc2402m.setup.
- Page 20 PRC2402M User Manual v1.1 Page 14 / 49...
- Page 21 PRC2402M User Manual v1.1 6. After (4) or (5) above, try to go back to the PRC2402M GUI through http://prc2402m.setup https://prc2402m.setup using the new password created earlier. Once login, the GUI will show the current Home Page. Page 15 / 49...
-
Page 22: Home Page
PRC2402M User Manual v1.1 Home Page Allows you to access the Status of the Device, Setup Wizard, Wi-Fi Configuration, and System Setup of PRC2402M. This includes the basic and advanced wireless network properties, view the connected clients and to view the status and the list of Mesh Node in the current Mesh System. -
Page 23: Client List Information
PRC2402M User Manual v1.1 Client List Information The Client List will show the information of connected devices to the Mesh Network. Mesh Network Status On this option, user can manage by adding or delete the current Mesh Node and get the information regarding the current status if the Mesh System/Network. -
Page 24: Device Information
PRC2402M User Manual v1.1 Device Information The device information will show the current configuration set for the Mesh router. This include the WAN connection, Wireless SSID and Channel and Device up time and Device Firmware Version. Wizard Wizard is the setup wizard for the PRC2402M. User can select which Operation Mode is preferred. -
Page 25: Router Wizard
PRC2402M User Manual v1.1 Router Wizard The PRC2402M connect as router to a modem or another router through the WAN port. • User can configure the WAN connection type as determined by ISP (Internet Service Provider), otherwise, leave it as DHCP. •... -
Page 26: Ap Wizard
PRC2402M User Manual v1.1 AP Wizard The PRC2402M connect to your routers via WAN ports and extend the coverage of your current network via LAN cable between main router and PRC2402M. Do note that Main router LAN is to be connected to PRC2402M’s WAN port. •... -
Page 27: Wi-Fi
PRC2402M User Manual v1.1 Wi-Fi Wi-Fi tab is the tab for Wi-Fi Configuration. User can make a change to the Wi-Fi Configuration, Mesh Network, TouchLink, Region Settings, 2.4G and 5G Wireless Settings. Wi-Fi Configuration On this settings user can enable / disable the Smart connect. By enabling the Smart Connect feature, user can easily balance network demands on the wireless bands, giving you the highest possible speed. -
Page 28: Mesh Network
PRC2402M User Manual v1.1 Mesh Network On this option, user can manage by adding or delete the current Mesh Node and get the information regarding the current status if the Mesh System/Network. TouchLink TouchLink is patented with Touchlink technology, home owners or user only just need to tap and connect to Wi-Fi without having to create additional passwords for guest-users. -
Page 29: Region Settings
PRC2402M User Manual v1.1 Region Settings On this option, user can change the Country/Region for the device. Page 23 / 49... -
Page 30: 2.4Ghz And 5Ghz Wireless Settings
PRC2402M User Manual v1.1 2.4GHz and 5GHz Wireless Settings On this option, user can configure the wireless advance settings for 2.4GHz Wireless connection and 5GHz Wireless connection. The Settings that can be configured is: • Wireless Standard – support all wireless standard 802.11 a/b/g/n/ac •... -
Page 31: Setup
PRC2402M User Manual v1.1 Setup Setup tab is the PRC2402M basic and advance setup that available for user to configure. This option also available in the mXtend App for user to configure through mobile phone. Note that all firewall related features (e.g. port forwarding, DDNS, etc). Page 25 / 49... -
Page 32: Internet Setting
PRC2402M User Manual v1.1 Internet Setting Internet Setting is the option for user to configure the WAN setting and VLAN settings. WAN settings support: DHCP (Dynamic IP), Fixed IP, and PPPoE. This is the advanced setting for advanced user to configure, by default the WAN type is set to DHCP and Obtain DNS automatically. - Page 33 PRC2402M User Manual v1.1 Fixed IP - Manually set WAN IP address, gateway, DNS server etc. for the network connection. PPPoE- User name and password is provided by ISP and must be a valid account in order for internet access to be successful. Page 27 / 49...
-
Page 34: Dhcp Settings
PRC2402M User Manual v1.1 VLAN - is used to provide the segmentation services. In this scenario, VLAN is typically required if the ISP specifies the need to set VLAN ID and VLAN Priority ID for the subscribed services (Internet / IPTV / VOIP). It is not recommended to change any settings here unless user has the detail information on what needs to be set for the specific ISP. - Page 35 PRC2402M User Manual v1.1 Static IP (DHCP IP Reservation) – is used to reserve a specific IP address based on client’s MAC address, so the host will always obtain the bound IP address when booting up. It currently support up to 10 entries. Notes: Ensure no IP Address conflict prior setting.
-
Page 36: Client List
PRC2402M User Manual v1.1 Client List It will show the information of connected devices in the Mesh Network. The page load may take slightly longer (approx. ~12 seconds) as it is polling information from the network. User also can further set Internet blocking on respective of the device connected, or limit the internet access through QoS Settings. - Page 37 PRC2402M User Manual v1.1 Page 31 / 49...
-
Page 38: Qos Settings
PRC2402M User Manual v1.1 QoS Settings QoS is a short form of Quality of Service. In this setting, you could enable and configure QoS base your need for each connected client. By enabling QoS, user can set specific Upload and Download speed for the specific client. -
Page 39: Usb Storage
PRC2402M User Manual v1.1 USB Storage This option allows you to configure the USB storage devices to share with different users within the same network. By plugging in an USB drive, this feature is automatically enabled. Supported File format and capacity is FAT32 / NTFS with up to 2TB size. Accessing the USB can only be done through Window Explorer / MAC Finder / FTP. -
Page 40: Ddns
PRC2402M User Manual v1.1 DDNS Dynamic DNS is a service, which provides a valid, unchanging, internet domain name (a URL) to go with the (possibly ever changing) IP address. Please note, the device may obtain an IP address dynamically, so the IP address may be changed after reboot. The PRC2402M supports no-ip.com and changeip.com. -
Page 41: Network Tools
PRC2402M User Manual v1.1 Network Tools On the Network Tools option user can configure: NAT (Virtual Server) – which function is Port Forwarding, by default Disabled DMZ (Demilitarized Zone), by default Disabled UPnP (Universal Plug and Play), by default Enabled (from FW ver. 1.0.17 onwards) Page 35 / 49... -
Page 42: Security Management
PRC2402M User Manual v1.1 Security Management Security Management feature continuously monitors your Internet traffic, protecting your network and connected devices from malicious Internet attacks. The PRC2402M offers high- grade firewall features like Syn Flood Attack and SPI (Stateful Packet Inspection). Time Settings Router's time is used for Schedule function, as well as firmware update check purpose. -
Page 43: Led Control
PRC2402M User Manual v1.1 LED Control LED Control is the option for user to Turn-Off or Turn-On the LED indicator on the Mesh Router or on the Mesh Node. Login Password Login Password allows user to edit the Administrative password of the Web and App User Interface login page Page 37 / 49... -
Page 44: Backup/Restore Settings
PRC2402M User Manual v1.1 Backup/Restore Settings In this option user can Backup and Restore the PRC2402M router setting and also user can Reset to Factory Default setting. Backup Configuration - Export current settings information into a file. Restore Configuration - Import a backed-up setting from local directory to replace existing PRC2402M setting. -
Page 45: Firmware Upgrade
A. For Local Firmware Upgrade Step 1. Download firmware to local directory / folder (e.g. C:\Users\PROLiNK\Downloads) from official PROLiNK website or obtained through official PROLiNK Technical Support Step 2. Click Upgrade > Choose File > select the firmware file downloaded in Step 1. - Page 46 PRC2402M User Manual v1.1 WARNING: All product warranty will automatically void due to any attempts to upgrade or change firmware through unofficial means. Page 40 / 49...
-
Page 47: Device Status
PRC2402M User Manual v1.1 Device Status The device status will show the current information of the Mesh router and its WAN information. This include the System Info, Internet Status, LAN Status and 2.4GHz and 5GHz Wireless Status. Page 41 / 49... -
Page 48: Device Reboot
PRC2402M User Manual v1.1 Device Reboot This is the option for user to manually reboot the router, or to set scheduled reboot. For scheduled reboot, it is based on the Time Zone set. Page 42 / 49... -
Page 49: App User Interface Configuration
PRC2402M User Manual v1.1 App User Interface Configuration 1. Search for mXtend App through your mobile phone (Android – Google Play, IOS – App Store), alternatively scan the QR Code below to download the mXtend App. 2. Once the app is installed, connect your phone to PRC2402M Wi-Fi Network and launch mXtend App. - Page 50 PRC2402M User Manual v1.1 4. Enter the Login Password (default: refer to product label). Note that this password here refers to GUI/Admin password. Page 44 / 49...
-
Page 51: Wi-Fi Configuration
PRC2402M User Manual v1.1 Wi-Fi Configuration 1. Select Wi-Fi Icon > Select Wi-Fi Configuration Page 45 / 49... -
Page 52: Adding New Mesh Node Using Mxtend App
PRC2402M User Manual v1.1 Adding New Mesh Node Using mXtend App 1. Power On the new PRC2402M to set as Node near the Router unit. On the mXtend App, login and click Home icon. 2. Under Mesh Device List > Click More.. Page 46 / 49... - Page 53 PRC2402M User Manual v1.1 3. Enter the device name and add the 5G MAC address of the PRC2402M. the 5G MAC Address can be found on bottom of the device. MAC Address format to be keyed in has to be in 90:61:0C:XX:XX:XX 4.
-
Page 54: Technical Specification
PRC2402M User Manual v1.1 Technical Specification Specification Hardware Interface 1x 10/100/1000Mbps WAN/LAN port 2x 10/100/1000Mbps LAN port 1x Reset to factory default button 1x Pairing button 1x Touch sensor 1x Power On/Off Switch 1x USB Host por 1x Dynamic lighting status indicator Power Supply DC 5V 3A Input: 100 –... - Page 55 PRC2402M User Manual v1.1 Up to 1733Mbps at 5GHz Wireless-AC Wireless Antenna 4x 5GHz Omni Directional Antenna (Internal) 2x 2.4GHz Omni Directional Antenna (Internal) Wireless Security WPA/WPA2, WPA-PSK/WPA2-PSK encryption Software WAN Connection Type Dynamic IP, Static IP, PPPoE DHCP Setting Server, Client Functions DDNS, Port Forwarding, DMZ, NTP...
Need help?
Do you have a question about the Xtend PRO and is the answer not in the manual?
Questions and answers