
Subscribe to Our Youtube Channel
Related Manuals for SCHEU TAP


Summary of Contents for SCHEU TAP
- Page 1 Dental Sleep Medicine -Booklet ® SCHEU-DENTAL GmbH Am Burgberg 20 www.scheu-dental.com 58642 Iserlohn · Germany S C H E U G R O U P...
-
Page 3: Table Of Contents
Content: Introduction ......................4-7 Description TAP ...................... 8-9 ® Instruction Manual TAP ..................10-11 ® Description TAP -T / TAP -T Reverse ..............12-13 ® ® Instruction Manual TAP -T / TAP -T Reverse ............14-15 ® ® Protrusion Adjustment TAP... -
Page 4: Introduction
For your comfort we summarized the most important steps and hints for a comforta- ble and effective application of the TAP ® device in this brochure. For more detailed information on your TAP device, please ®... - Page 5 In addition, the appli- ance is contraindicated for patients who have central sleep apnea, severe respira- tory disorders or are under 18 years of age. ADVICE Before using the TAP device, please read ® these instructions carefully! The Thornton Adjustable Positioner (TAP ) may only be ®...
- Page 6 Healthy Sleep Reduction or alleviation of nighttime snoring The Thornton Adjustable Positioner (TAP Return to your prescriber at least yearly for ® devices are intended to reduce or alle- examination and assessment to ensure the viate nighttime snoring and obstructive is not damaged and is still effectively ®...
-
Page 8: Description Tap
The front piece on the TAP ® permits you to adjust the protrusion of the lower jaw to the most effective and com-... - Page 9 Upper tray Front piece (individually adjustable) Hook Lingual bar Lower tray...
-
Page 10: Instruction Manual Tap
Then move the lower jaw may bend or break. If the hook is bent, do slightly forward, so that the lower teeth can not use the TAP and return it to your den- ® slide into the lower tray. You can remove tist for a replacement hook. - Page 11 Device ® Adjustment of the TAP should only be ® done with the approval of your prescriber. Note: Operating the front assembly (knob) is written from the perspective of the patient with the TAP in his/her mouth. ® To pull your lower jaw forward with the...
-
Page 12: Description Tap ® -T / Tap ® -T Reverse
The front piece on the TAP -T permits you ® to adjust the protrusion of the lower jaw to... - Page 13 -T / TAP -T Reverse ® ® Upper tray Upper protrusion adjustment device (titanium alloy) Lower guiding device (nickle free CoCr alloy) Lower tray -T Reverse with reduced upper ® protrusion adjustment device...
-
Page 14: Instruction Manual Tap ® -T / Tap ® -T Reverse
Instruction Manual -T / TAP -T Reverse ® ® Inspect the device prior to each use. Contact the prescriber if you observe any material separation, material degradation or cracks. Place the upper tray on your upper jaw first. Then place the lower tray on your lower jaw. - Page 15 Disengage both trays like mentioned above to remove the upper and the lower tray seperately at night or in the morning. Check the lateral movement by gentle moving your lower jaw to the left and the right. HINT You may also engage the hook of the upper tray with the socket of the lower tray before placing the trays in your mouth.
-
Page 16: Protrusion Adjustment Tap ® -T / Tap ® -T Reverse / Dreamtap Tm
Protrusion Adjustment -T / dreamTAP™ ® Adjustment of the device should only be done with the approval of your prescriber. Note: Operating the activation key is written from the perspective of the patient with the in his/her mouth. ® To pull your lower jaw forward, insert the activation key into the opening on the front of the upper protrusion ad- justment device. - Page 17 If the hook reaches into the “freerun” possible. area during adjustment, it can be removed from the thread by turn the In contrast to the TAP -T device, the acti- activation key in the opposite direction, ® vation bore for the hexagon socket wrench...
-
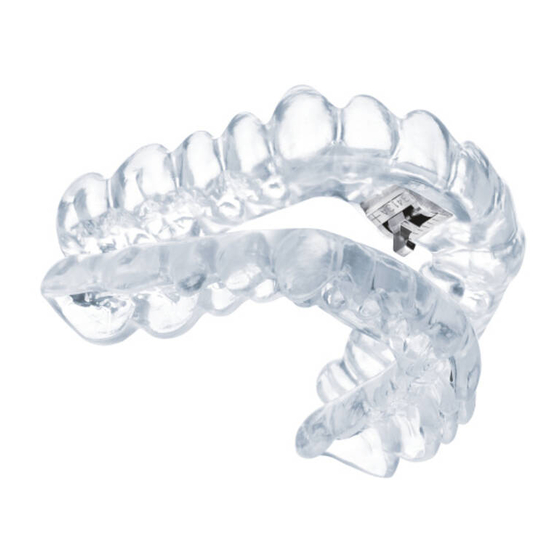
Page 18: Description Dreamtap Tm
Description dreamTAP™ The dreamTAP™ consists of two parts: an upper tray with integrated reinforce- ment and guiding wires and a lower tray with a protrusion adjustment device. Both trays engage via the hook of the pro- trusion adjustment device and the guiding wire in the upper jaw, thus positioning the lower jaw forward to prevent the soft tissue of the throat from collapsing and obstruct-... - Page 19 dreamTAP™ Guiding wire Lower protrusion adjustment device Upper tray Lower tray...
- Page 20 (2) Now place the combined device on the upper dental arch. Then move the lo- wer jaw slightly forward, so that the lower teeth can slide into the lower tray. You can remove the dream TAP™ in reverse order – upper and lower tray combined.
- Page 21 dreamTAP™...
-
Page 22: Occlusion Trainer / Am Aligner
Occlusion trainer Exercise with occlusion trainer When the lower jaw is pulled forward during the night, it may make the jaw muscles sore and temporarily change the bite. The occlusion trainer (Exercise Bite Tabs) are intended to be used as an exer- cise tool to put your jaw back into a normal bite position. - Page 23 AM Aligner™ The AM Aligner being included in the Place the occlusion trainer between the delivery of the dream TAP has to be anterior teeth. Take care that the poste- adapted to your jaw by your dentist or rior teeth are not in contact.
-
Page 24: Care Instructions
TAP device in ® your mouth. Do not use denture cleaning agents! Dry your appliance completely before stor- ing in the container. It may help to leave the container open to ensure that your TAP ® dries thoroughly. -
Page 25: Side Effects
Slight tooth or gingival discomfort due It´s rarely possible that misalignment to pressure of the appliance. of teeth or changes in occlusion appear after long term use of the TAP ® Exess salivation initially. This will im- appliance. prove as you become accustomed to wearing the TAP ®... -
Page 26: Contraindication
Contraindication This device is contraindicated for patients occur due to interactions of metallic dental with loose teeth, loose dental work, dentures fillings/ inlays and metallic denture parts or any other oral conditions which would be (amalgam, chromium cobalt molybdenum adversely affected by wearing dental appli- or any alloys with reduced precious metal ances.
Need help?
Do you have a question about the TAP and is the answer not in the manual?
Questions and answers