Table of Contents
Advertisement
Quick Links
Advertisement
Table of Contents

Subscribe to Our Youtube Channel
Related Manuals for Seiko wiredwena N857


Summary of Contents for Seiko wiredwena N857
- Page 1 wiredwena N857 INSTRUCTION MANUAL...
- Page 2 - Help Guide on the wena support page - QUICK MANUAL of the watch head supplied with the package - The instruction (this document) on the Customer Service page on the Seiko Watch Corporation's website Keep this manual handy for easy reference.
-
Page 3: Table Of Contents
CONTENTS 1. ABOUT THIS PRODUCT 3. Function link with wena 3 Handling Precautions ................. 3 Function Link ..................14 About the Radio Act ................5 How to set the function link ............14 About the Radio Act ..............5 Automatic time synchronization function ....... 15 About Radio frequency ...............5 Sleep &... -
Page 4: About This Product
○ Places of high humidity ○ Places affected by strong magnetism or purchased or SEIKO CUSTOMER SERVICE CENTER. static electricity ○ Dusty places ・ Keep the watch and accessories out of the reach of babies and children. - Page 5 The radio waves may affect pacemakers and the retailer from whom the watch was purchased or electric medical equipment. Do not use it in SEIKO CUSTOMER SERVICE CENTER. crowded places such as packed trains, and inside of medical institutions. ・Do not use this product near automatic control devices Do not leave moisture, sweat and dirt on the watch such as automatic doors and fire alarm systems.
-
Page 6: About The Radio Act
1. ABOUT THIS PRODUCT About the Radio Act ■ ・ If you have any questions or troubles, please contact the SEIKO About the Radio Act CUSTOMER SERVICE CENTER. This product is certified as a low power data [Certification No.] communication system based on the Radio Act ■... -
Page 7: About Bluetooth
Bluetooth SIG, ・ F requency band used: 2.4 GHz band (2,402 to 2,480 MHz) Inc. Seiko Watch Corporation uses this logo mark under license. ・ Modulation method: GFSK (1 MHz) ■ Caution for Use of Bluetooth Connection ・... -
Page 8: Contact Information
Inquiries regarding use, repair, and maintenance of the watch head respective service centers. SEIKO CUSTOMER SERVICE CENTER ※ Before requesting to have your watch head repaired, be sure to 0120-181-671 remove the clasp section (wena 3) in the manner illustrated below. -
Page 9: Removing And Attaching The Clasp Section (Wena 3)
1. ABOUT THIS PRODUCT Removing and attaching the clasp section (wena 3) ■ ■ How to remove the clasp section (wena 3) How to attach the clasp section (wena 3) ① ① Using the included tool, push out the pin in the direction of the Securely insert the spring bar into the inner hole as shown in the arrow marked on the underside of the link. -
Page 10: Features
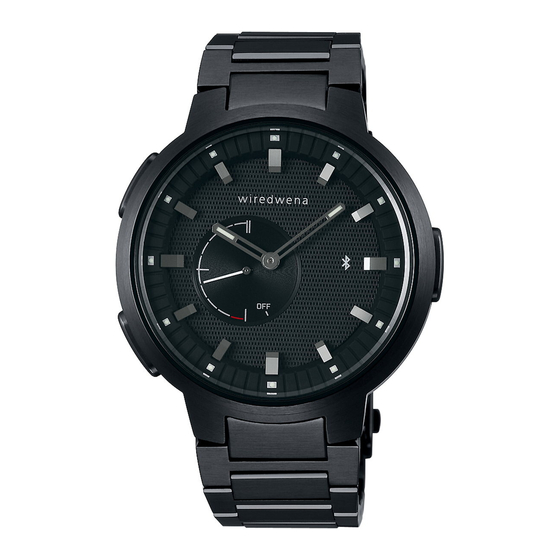
1. ABOUT THIS PRODUCT Features Names of Parts This product includes wena 3 provided by Sony Corporation and a watch head capable of operating and displaying the wena 3 functions. The wena 3 app installed on the smartphone can be set to display the information of wena 3 in a simple way using the indicator hand and to operate part of the functions of wena 3 with the watch head buttons. -
Page 11: Functions Of This Watch
1. ABOUT THIS PRODUCT Functions of This Watch ● Ⓐ Ⓑ Ⓒ With Button , Button , and Button , the operations shown in the illustration below can be performed. When wena 3 is not connected When wena 3 is connected ■ Ⓐ... -
Page 12: Connection Of Wena 3 And The Watch Head
2. Connection of wena 3 and the watch head Initial Settings (1) ■ ■ Remarks on pairing Initial setting procedure Please note the following when pairing wena 3 with the watch head When using this product for the first time, perform the following operations and settings. -
Page 13: Step 4: Pair Wena 3 With The Watch Head
2. Connection of wena 3 and the watch head Initial Settings (2) ■ ③ STEP 4: Pair wena 3 with the watch head. Press the power button of wena 3 to display the home screen. Power button Pairing between wena 3 and the watch head cannot be performed if registration information is left on either of the devices. -
Page 14: How To Disconnect, Reconnect, And Delete Pairing
2. Connection of wena 3 and the watch head How to Disconnect, Reconnect, and Delete Pairing ■ ■ Turning off the connection with wena 3 When connection with wena 3 cannot be achieved To adjust the time manually (refer to P.17), correct the hand positions (refer to P.19), and delete pairing (refer to P.13), the When connection of the watch head with wena 3 cannot be achieved, connection with wena 3 must be turned off. -
Page 15: Function Link With Wena
The wena 3 app can be used to set the contents to be indicated by the indicator hand, as well as the functions to be activated when the wiredwena N857 watch button is pressed once or is pressed and held for 1 second or more. -
Page 16: Automatic Time Synchronization Function
- find your phone screen - notification screen The function to be enabled by pressing each button can be set. - Qrio Lock screen - Suica balance screen wiredwena N857 - weather screen - Edy balance screen - schedule screen - alarm screen... -
Page 17: How To Use The Function Link
3. Function link with wena 3 Function Link (3) ■ How to use the function link ● Example of indicating the information of wena 3 on the watch head ● ● Displaying the account balance ratio of electronic Displaying the target achievement rate for the goal of money on the watch head steps to be taken per day on the watch head From the “Connect watch head setting”... -
Page 18: Manual Time Adjustment Function
4. MANUAL TIME ADJUSTMENT FUNCTION How to Adjust Time Manually (1) ● If for some reason the time synchronization function by Bluetooth communication with wena 3 cannot be used, such as when the battery of wena 3 runs out, the time can be adjusted on the watch head alone. ※ To adjust the time manually, the connection with wena 3 must be turned off. -
Page 19: Operation Method
4. MANUAL TIME ADJUSTMENT FUNCTION How to Adjust Time Manually (2) ■ Operation Method ① ⑤ Check that the indicator hand points to the OFF position and P ress Button Ⓐ Ⓑ to set the hour hand. wena 3 and the watch head are disconnected. ※... -
Page 20: Hand Position Adjustment
5. HAND POSITION ADJUSTMENT How to Adjust Hand Position (1) ● In the following cases, the positions of the hands stored in the built-in IC of the watch head and the actually displayed positions of the hands may be misaligned. Follow the procedure below to check and adjust the hand positions. -
Page 21: Operation Method
5. HAND POSITION ADJUSTMENT How to Adjust Hand Position (2) ■ Operation Method ④ ① After the indicator hand position adjustment is completed, press Check that the indicator hand points to the OFF position and Ⓒ Button wena 3 and the watch head are disconnected. If the watch head is connected to wena 3, press and hold Button The minute hand moves to indicate that it is ready for minute Ⓒ... -
Page 22: To Preserve The Quality Of Your Watch
6. TO PRESERVE THE QUALITY OF YOUR WATCH Daily Care Performance and Type ● ● The watch requires good daily care. The case back shows the caliber No. and performance of your watch. ・ Wipe away moisture, sweat or dirt with a soft cloth. ・... -
Page 23: Water Resistance
6. TO PRESERVE THE QUALITY OF YOUR WATCH Water Resistance Refer to the table below for the water resistant performance of your watch before use. (Refer to P.21.) Indication on the Case Back Water Resistant Performance Condition of Use No indication Non-water resistance Avoid drops of water or sweat The watch withstands accidental... -
Page 24: Band
6. TO PRESERVE THE QUALITY OF YOUR WATCH Band ● The band touches the skin directly and becomes dirty with sweat Silicone band or dust. Therefore, lack of care may accelerate deterioration of ・ As for material characteristics, the band is easily dirtied, and may the band or cause skin irritation or stain on the sleeve edge. -
Page 25: Remarks On Battery
(refer to P.13). a new one at the retailer from whom the watch was purchased, specifying a genuine SEIKO battery. ● Do not open the case back to take out the battery. ・ I f the old battery is left in the watch for a long time, a malfunction ● If the battery is removed from the case back for... -
Page 26: After-Sales Service
Disassembly and cleaning (overhaul) for checking and adjustment purpose ・ Contact the retailer from whom the watch was purchased or SEIKO It is recommended that disassembly and cleaning (overhaul) for checking CUSTOMER SERVICE CENTER for repair or overhaul. -
Page 27: Troubleshooting
7. TROUBLESHOOTING Troubleshooting (1) ■ Basic Operations Problem Possible Cause Solution Refer to The watch has stopped The battery has run down. Immediately request the retailer from whom the watch was purchased to replace P.11, 30 of this operating. the battery with a new one. Instruction Manual After replacing the battery, perform a system reset of the watch head and delete The indicator hand points... - Page 28 7. TROUBLESHOOTING Troubleshooting (2) Problem Possible Cause Solution Refer to wena 3 is disconnected. Pairing is incorrect. Delete the pairing information from the watch head and wena 3 respectively, and P.12, 13 of this The indicator hand points try the pairing operation again. Instruction Manual the OFF position.
- Page 29 7. TROUBLESHOOTING Troubleshooting (3) Problem Possible Cause Solution Refer to Pairing deletion is not The watch head is connected with Disconnect the watch head from wena 3 and delete the pairing. P.13 of this possible. wena 3. Instruction Manual The indicator hand points to Immediately request the retailer from whom the watch was purchased to replace P.11, 30 of this 3 o'clock.
- Page 30 7. TROUBLESHOOTING Troubleshooting (4) ■ Button Functions Problem Possible Cause Solution Refer to Button functions are not The function selected in wena 3 is Set the button function in the wena 3 app again and press the update P.15 of this executed. not set correctly.
-
Page 31: How To Reset Built-In Ic (System Reset) (1
7. TROUBLESHOOTING How to Reset Built-In IC (System Reset) (1) ● If the watch behaves abnormally or if the battery has been replaced, perform a system reset using the following procedure. After the system reset is performed, the time returns to its default setting. Be sure to set the time properly before use. [ Before system reset ] [ Hand position Follow the procedure... - Page 32 7. TROUBLESHOOTING How to Reset Built-In IC (System Reset) (2) ● When connection with wena 3 cannot be achieved ● When connection with wena 3 can be achieved When connection with wena 3 cannot be achieved, set the correct When connection with wena 3 can be achieved, pair the watch head time manually.
-
Page 33: Specifications
8. SPECIFICATIONS Specifications 1. Basic functions ・ Basic watch function (hour and minute hands) ・ Bluetooth link function with wena 3 Indicating the information of wena 3 Operating wena 3 with the watch buttons Auto time-synchronization with wena 3 2. Frequency of crystal oscillator..32,768 Hz (Hz = Hertz ... Cycles per second) 3. - Page 34 Repair inquiries for wena 3 Inquiries regarding use, repair, and maintenance of the watch head Repair Service Center Toll-free : 0120-252-645 SEIKO CUSTOMER SERVICE CENTER 0120-181-671 Mobile phone/PHS/some IP phones : 050-3754-9592 Reception hours: 9:30-17:30 (Monday through Friday) Reception hours: 9:30-18:00 (Monday through Friday)
Need help?
Do you have a question about the wiredwena N857 and is the answer not in the manual?
Questions and answers