Advertisement
Quick Links
Use this Manual for Safety Instructions and Operating Instructions.
Make sure everyone who operates this machine has read the manual completely.
I
M
P
O
R
T
A
N
T
: The Mower Carrier is designed to operate with Disc Mowers up to
I
M
P
O
R
T
A
N
T
:
10 ½' in size. In order to insure safe operation it may be necessary to install the
optional Weight Box for additional counter balance.
W
A
R
N
I
N
G
: DO NOT DISCONNECT MOWER CARRIER FROM
W
A
R
N
I
N
G
TRACTOR UNLESS MOWER CUTTERBAR IS LOWERED TO THE
M
o
d
e
M
o
d
e
M
O
W
E
M
O
W
E
I
n
s
t
r
u
c
I
n
s
t
r
u
c
P
a
P
a
Save for future reference.
:
O
g
d
e
n
O
g
d
e
n
301 N. Marilyn Ave.
Ogden, IL 61859
217-582-2552
Fax 217-582-2746
email: ogdenmetalworks@ogdenmetalworks.com
www.ogdenmetalworks.com
l
B
C
H
6
l
B
C
H
6
R
C
A
R
R
R
C
A
R
R
t
i
o
n
M
a
n
t
i
o
n
M
a
n
a
n
d
a
n
d
r
t
s
L
i
s
t
r
t
s
L
i
s
t
GROUND
M
e
t
a
l
w
o
r
k
s
I
n
M
e
t
a
l
w
o
r
k
s
I
n
PO Box 128
5-19
1
0
1
0
I
E
R
I
E
R
u
a
l
u
a
l
c
.
c
.
Advertisement

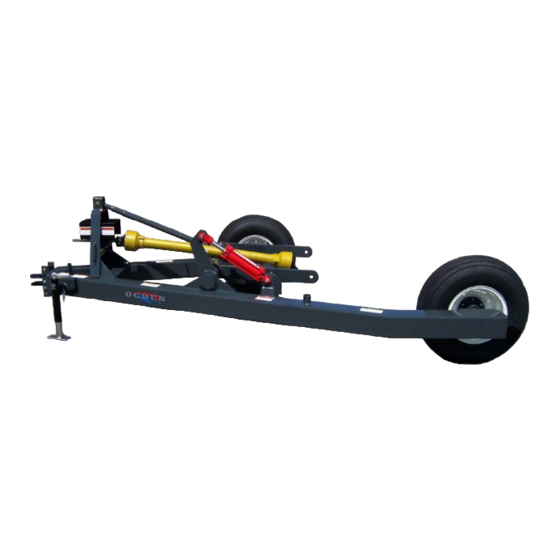
Summary of Contents for Ogden BCH610
- Page 1 Weight Box for additional counter balance. : DO NOT DISCONNECT MOWER CARRIER FROM TRACTOR UNLESS MOWER CUTTERBAR IS LOWERED TO THE GROUND 301 N. Marilyn Ave. PO Box 128 Ogden, IL 61859 217-582-2552 Fax 217-582-2746 email: ogdenmetalworks@ogdenmetalworks.com www.ogdenmetalworks.com 5-19...
- Page 3 Mower Carrier Table of Contents Page 2 Introduction Page 3 Safety Page 4 Decals Page 5 Assembly Instructions Page 8 Attaching Mower Page 9 Operation Page 10 Transport Page 11 Maintenance Page 12 Mower Carrier Parts List Page 15 Warranty Card...
- Page 4 It is important that you thoroughly understand the operation of the Mower Carrier before use. Read through this manual completely, watching especially for safety symbols (see illustration below). This safety alert symbol is used throughout this manual to identify possible safety hazards. It is the user’s responsibility to read the operator’s manual and comply with all the instructions pertaining to operation and maintenance.
- Page 5 CAUTION: This machine should never be operated by anyone who is not familiar with the product and has not read the instruction manual. Do not allow children to operate the Mower Carrier. All persons operating this machine Disengage PTO, apply parking brake should read understand...
- Page 6 Important: Many of the following Decals are located on your Disc Mower Carrier. Before you operate the Disc Mower Carrier, read and understand the purpose for each Decal. Replace any damaged Decals. Keep all Decals clear and readable.
- Page 7 CAUTION: Wear proper protective equipment such as Safety Glasses and protective shoes when assembling. Lay out all parts so location and verification will be easier. Make sure all parts were received before proceeding with the assembly. Install the two Tire and Wheel Assemblies onto the Hub Assemblies and properly tighten Lug Bolts or Lug Nuts.
- Page 8 Attach the Top Link using Pin and Hairpin. Attach the Tongue Clevis using two 5/8” x 6” Capscrews and Nylock Nuts. WARNING: Always wear protective eye goggles and use a magnifying Glass or hold a piece of wood on suspected leaks. Pinhole hydraulic leaks can penetrate skin.
- Page 9 CAUTION: The Mower Carrier is designed to operate with Disc Mowers up to 10’ 6” in size. However in order to insure safe operation it may be necessary to install the optional Weight Box for additional counter balance. Before attaching the Mower Carrier to a Tractor, it is very important to adjust the Tractor Drawbar and Clevis Hitch on the Mower Carrier.
- Page 10 CAUTION: When attaching the PTO Driveline make sure the yoke is properly locked on the shaft. Always have the Mower in the working position when attaching to the Mower Carrier and always have the Mower Carrier attached to a Tractor. Attach the Mower to the lift arms on the Mower Carrier.
- Page 11 Make sure all Bolts and Nuts are tight. Recheck after a few hours of operation. Check Tires and inflate to proper pressure. Grease Drivelines, Bearings and Grease Zerks on Pivot Assembly. To insure safe operation with heavy or larger Disc Mowers a bolt-on Weight Box is available to add counter balance.
- Page 12 Make sure you are in compliance with all local regulations regarding the transporting of agriculture equipment on public roads and highways. Consult your local law enforcement agency for further details. Ensure that the Slow Moving Emblem (SMV) and all reflectors and lights required by the local highway and transport authorities are in place and are clean and visible by overtaking and oncoming traffic.
- Page 13 Notes...
- Page 15 BCH610 Parts List Item No. Part No. Description Qty. BCH102 Tongue Clevis BCH107 Drive Shaft Support Weldment BCH100 Main Frame Weldment MC109 Flange Bearing, 1 3/8” MC138 Bearing Spacer *See note below MC108L Spline Shaft BCH111 Driveline Shield BCH112 Top Link...
- Page 16 Notes...
- Page 17 This warranty is extended solely to the original purchaser and is not transferable. This warranty is not valid unless the warranty card has been returned to Ogden Metalworks, Inc. within 30 days from the date of purchase by the end user.

Need help?
Do you have a question about the BCH610 and is the answer not in the manual?
Questions and answers