Advertisement
Quick Links
Sequoia Professional
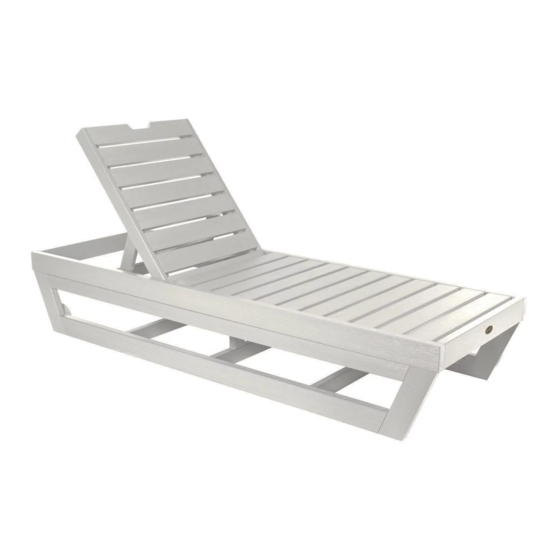
Pinehurst Chaise Lounge
Assembly Guide
1) Place (4) "D" Flanged Washers
into Both Sides of Holes in Back
Support as Shown.
D
2) With Seat Assembly
Facing Downward, Attach Back
Support Using (2) "B" Bolts
as Shown.
SEQUOIA
PROFESSIONAL
by
highwood
BACK SUPPORT
D
BACK SUPPORT
B
For information on Care and Cleaning or to register your
PROFESSIONAL
www.highwood-usa.com.
A
B
C
D
SEAT ASSEMBLY
product by highwood , please visit
HARDWARE
x16
1/4"-20 X 1-1/4"
x2
1/4"-20 X 2"
1/4"-20 X 3"
x4
Flanged Washer
IMPORTANT!
DO NOT fully tighten the bolts until all
bolts are started. Once all bolts are inserted,
go back & tighten all the bolts.
Retain these instructions for future reference
INCLUDED TOOLS
5/32" HEX KEY
SEQUOIA
x8
CM-LNGSQ61
03.05.19
PAGE 1 OF 2
Advertisement

Related Manuals for Sequoia Professional Pinehurst

Summary of Contents for Sequoia Professional Pinehurst
- Page 1 Sequoia Professional HARDWARE Pinehurst Chaise Lounge 1/4"-20 X 1-1/4" Assembly Guide 1/4"-20 X 2" 1) Place (4) "D" Flanged Washers 1/4"-20 X 3" into Both Sides of Holes in Back BACK SUPPORT Support as Shown. Flanged Washer IMPORTANT! DO NOT fully tighten the bolts until all bolts are started.
- Page 2 Sequoia Professional 3) Attach Right & Left Leg Assemblies Pinehurst Chaise Lounge to Seat Assembly Using (8) "C" Bolts as Shown. Assembly Guide RIGHT LEG ASSEMBLY LEFT LEG ASSEMBLY LEFT LEG ASSEMBLY SEAT ASSEMBLY 4) Attach Mid Leg Support to Left Leg Assembly Using (4) "A"...
Need help?
Do you have a question about the Pinehurst and is the answer not in the manual?
Questions and answers