
Subscribe to Our Youtube Channel
Related Manuals for Little Tikes First Market Kitchen


Summary of Contents for Little Tikes First Market Kitchen
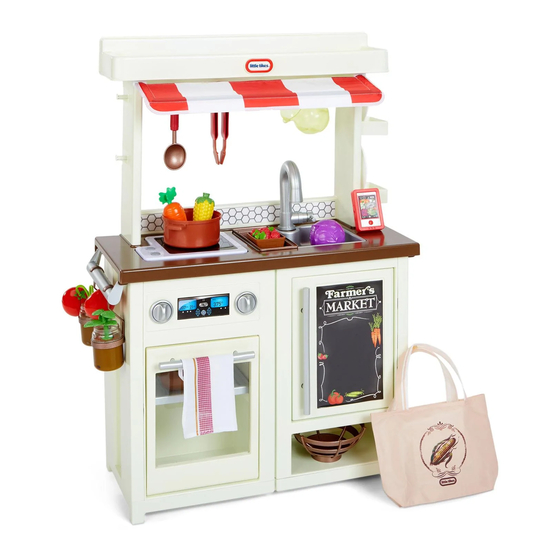
- Page 1 First Market Kitchen ™ ASSEMBLY INSTRUCTIONS #654480M Adult assembly required. Approx. assembly time: 30 min. Look for video of assembly at littletikes.com/videoinstructions XIM654480-R1 - 9/20...
- Page 2 • Clear a flat surface to lay out all the materials so everything is close at hand. • You will need a Phillips head screwdriver (not included) to assemble the First Market Kitchen™. - When installing screws, be sure screws are tightened snugly, but do NOT OVERTIGHTEN.
- Page 3 The Little Tikes Company makes fun, high quality toys. We warrant to the original purchaser that this product is free of defects in materials or workmanship for one year * from the date of purchase (dated sales receipt is required...
- Page 4 Some packages of hardware may have extras pieces. ” (1,27 cm) (12) Actual size Questions? We’re here to help. Little Tikes customer service team at 1-800- 321-0183. Hole plugs Front wall -- left side (1) Front wall -- right side (1) Top back wall (1)
- Page 5 Refrigerator door handle (1) Burner module (1) Oven door (1) Sides (2) Refrigerator door (1) Faucet (1) Towel bar (2) Faucet fastener (1) Knobs (2) Oven rack (1) Accessories (1) Decal sheet is located in the Illustrations are for reference only. hardware pack.
- Page 6 Ready...let’s start! Tool required (not included) Battery installation MUST be completed by an adult: 1. Using a Phillips screwdriver (not included) remove the screws and battery compartment cover (1) located on the burner module (K). 1.5V AA/LR06 2. Install three (3) fresh AA alkaline batteries (not included), making sure 1.5V AA/LR06 the (+) and (-) ends face the proper...
- Page 7 Two parts make one First, place the Left side - front wall (part B) onto the Right side - front wall (part A). Second, secure using (2) ” (1,27 cm) screws. " (1,27 cm) (view from the back)
- Page 8 Get snappin’ Snap (1) side (part J) onto the assembled front walls. Make sure ALL (4) tabs line up before snapping! WAIT! If they don’t line up - flip the side around. Snap (1) side (part J) onto the opposite side of assembled front walls.
- Page 9 Flip it Turn the unit upside down and snap on the bottom platform (part F). Align indents Get cookin’ First, fit the burner module (part K) into the countertop (part G). Second, flip the countertop over and secure using (2) ”...
- Page 10 SINK it! Snap the sink (part I) into the countertop. The countertop is a SNAP! Turn the unit right side up and snap on the countertop (part G). WAIT! Make sure ALL the tabs line up and SNAP! If they don’t, the countertop may appear wobbly.
- Page 11 You gotta have a faucet! Insert faucet (part N1) into the countertop and secure by attaching the faucet fastener (part N2) under the countertop from the back of the unit. (view from the back) Sticker it up Time to apply the decals 1 & 2 to the top back wall (part C).
- Page 12 A little shade Slide the canopy fasteners (part D2) into the pockets at each end of the canopy (part D1). Be sure the open end of the fastener is facing inward. Snap assembled canopy fasteners into the top back wall.
- Page 13 Get down with it Fit the top back wall (part C) onto the assembled countertop. Top it off First, fit the top shelf (part H) onto the back wall.
- Page 14 Top it off - cont. Second, secure using (6) ” (1,27 cm) screws. " (1,27 cm)
- Page 15 Slide in your shelves Insert the (2) slide-on shelves (part E) into the side of the top. Shelves may need a little push! Handle it First, insert the refrigerator door handle (part M1) into the refrigerator door (part M2). Second, secure using (2 ) ”...
- Page 16 Sticker it up Decal Time to apply decal 4 to the refrigerator door (part M2). 1. Partially pull back the top of decal 4. 2. Line up decal corners to the top corners on the door. 3. As you pull away backing, press down, smoothing the decal from the center to the edge.
- Page 17 Pop it on...again Pop in the left side of oven door (part L) into the kitchen. Then, slide down right side of oven door until it also pops into the kitchen. Insert oven rack (part Q) into the kitchen oven.
- Page 18 Turn it on PUSH in (2) knobs (part O) onto front kitchen panel. Towel bars times 2 Insert towel bars (part P), one on EACH side of the kitchen.
- Page 19 Time for details Locate (2) holes on EACH side of the kitchen. Insert a hole plug into each hole. Hole plug Hole plug Locate (2) holes on EACH side of the kitchen. Insert a hole plug into each hole.
- Page 20 Final 2 decals! Apply decals 3 and 5. Decal 5 Cell phone (1)
- Page 21 Montage par un adulte requis. Durée de montage approximative : 25 min. © Merci d’avoir choisi l’ensemble First Market Kitchen™ de Little Tikes Nous sommes déterminés à fournir un jouet durable et facile à monter, procurant à votre enfant des années de plaisir créatif! •...
- Page 22 Questions? Nous sommes là pour vous aider. 4. Quand le jouet n’est pas utilisé pendant une Appelez notre service à la clientèle au longue période, retirez les piles pour éviter une 1 800 321-0183. fuite possible et le bris du module. Outil requis (non fourni) : Tournevis 5.
- Page 23 à compter de sa date d’achat (le reçu d’achat daté est exigé comme preuve d’achat). Au titre de Étape 13: Faites glisser les étagères la présente garantie, la seule responsabilité de The Little Tikes Company et le seul recours se limitent Insérez les (2) étagères à glissières (partie E) sur au remplacement de la pièce défectueuse ou au remplacement du produit.
- Page 24 • Necesitará un desarmador Phillips (no está incluido) • Para limpiar mejor el producto, usa una tela con para ensamblar First Market Kitchen™. agua y jabón suave o toallitas limpiadoras para la - Al instalar los tornillos, asegúrese de que los piel, las manos o el rostro.
- Page 25 4. Cuando el juguete no se usa durante un período Llame a nuestro equipo de servicio al cliente de de tiempo extendido, retire las baterías para Little Tikes al 1-800-321-0183. impedir una posible fuga y daño a la unidad. Requiere herramientas (no se incluyen) 5.
- Page 26 Es posible que los la fecha de compra (se requiere el recibo de compra fechado como prueba). A exclusiva elección de la compañía Little Tikes, el único remedio disponible bajo esta garantía será el reemplazo de la parte estantes necesiten un ligero empujón.
- Page 27 defectuosa del producto o el reemplazo del producto. Esta garantía es válida solamente si el producto ha sido montado y mantenido según las instrucciones. Esta garantía no cubre abuso, accidente, aspectos cosméticos tales como el descoloramiento o las rayas como consecuencia de un uso normal, ni ningún otro problema que no surja de defectos de material o mano de obra.
Need help?
Do you have a question about the First Market Kitchen and is the answer not in the manual?
Questions and answers