Advertisement
Quick Links
Product Manual
Table of Contents:
Product Contents . . . . . . . . . . . . . . . . 2
Assembly Instructions . . . . . . . . . . .3-4
Operating Instructions . . . . . . . . . . .5-6
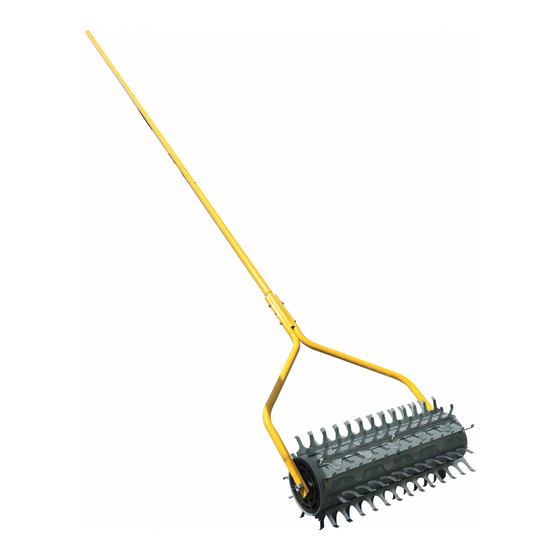
Muck Razer
Item 580136
Replacement Parts . . . . . . . . . . . . . . 7
Product Warranty . . . . . . . . . . . . . . . . 8
Advertisement

Summary of Contents for Jenlis Muck Razer
-
Page 1: Table Of Contents
Product Manual Muck Razer Item 580136 Table of Contents: Product Contents . . . . . . . . . . . . . . . . 2 Replacement Parts . -
Page 2: Product Contents
• The Muck Razer is designed for cutting submerged, partially emergent, or emergent aquatic vegetation from underwater. Any other use is strictly prohibited. Before using the Muck Razer, please read this manual carefully to understand the proper use of the unit. -
Page 3: Assembly Instructions
Notes: Assembly Instructions Tools Required: • 10mm Wrench • Adjustable Wrench • 11mm Wrench • 1/4” Nut Driver Step 1 Insert a Carriage Bolt (G) into the inside of each Drum End Cap (O) and thread on each Thrust Bearing (J). Tighten each Thrust Bearing securely using an adjustable end wrench. - Page 4 Assembly Instructions (con’t) Step 4 Align one Alternating Razer Teeth Row with 13 Teeth (D) on the Razer Drum (N) so that the two outer holes on the teeth row align with two of the outer holes on the drum. Insert a ¼” Hex Head Screw (F) into each of the outer holes making sure that the End Caps (O) are tight up against the Razer Drum (N) when securing each fastener.
-
Page 5: Operating Instructions
Step 1 Stand in a stable location and roll the Muck Razer head into the water. The head will fill with water, adding weight to keep it firmly on the pond or lake bottom. - Page 6 The water may become cloudy creating poor visibility. Therefore, if you can’t see your desired working area, you may need to stop and resume later when the cloudiness has dissipated. Step 3b The Muck Razer should be used regularly until the areas that you wish to address have shown improvement. www.weedrazers.com...
-
Page 7: Replacement Parts
Replacement Parts Replacement parts can be found online at www.weedrazers.com www.weedrazers.com... -
Page 8: Product Warranty
The manufacturer agrees, at its option during the warranty period, to repair any defect in material or workmanship, or to furnish a repaired or refurbished product without charge. All warranty claims must be sent to Jenlis, at the customer’s expense. Return shipping will be pre-paid. All returns must be pre-approved. Please visit www.weedrazer.com/warranty for an RMA number prior to returning product.