Table of Contents
Advertisement
Quick Links
Advertisement
Table of Contents

Subscribe to Our Youtube Channel
Related Manuals for Televes ARANTIA HE-21

Summary of Contents for Televes ARANTIA HE-21
- Page 1 HE-21: User Guide Release 3.20.0...
-
Page 2: Table Of Contents
CONTENTS 1 Introduction Main features ..........Built-in applications . - Page 3 HE-21: User Guide 3.4.5 Licenses ......... . . 39 3.4.6 Shut down/Restart (Power Control) .
- Page 4 Document History and Modi cations Rev. No. Chapter Description of modi cation/changes First review...
-
Page 5: Introduction
Arantia HE-21 Compact Headend - The smart choice for digital service reception. Arantia HE-21 headend is the most e cient solution in the market for the reception and streaming of IPTV channels, allowing operators, hospitality, corporations, airports, ports, transport stations, admin- istrative buildings, and singular projects to distribute IPTV and Digital TV services (DVB-S/S2, DVB-T/T2, DVB-C, ISDB-T, ATSC, etc.) with the highest quality and reliability. -
Page 6: Built-In Applications
The SAP Server application is an integrated server that implements the service announce- ment protocol in the Arantia HE-21 headend. It is used to announce IPTV services to net- worked devices. Networked devices can automatically discover IPTV services. IPTV services may be grouped into play lists to make organization of large channel lists easier. -
Page 7: Accessories
830325 - ITV MDW LITE & ADMIN TV LICENSE ITV MDW LITE & TV ADMIN is an optional application that extends Arantia HE-21 headend functionality. It includes an IPTV lite middleware for the display of IPTV channels on LG TV and Samsung TV devices. -
Page 8: The Equipment
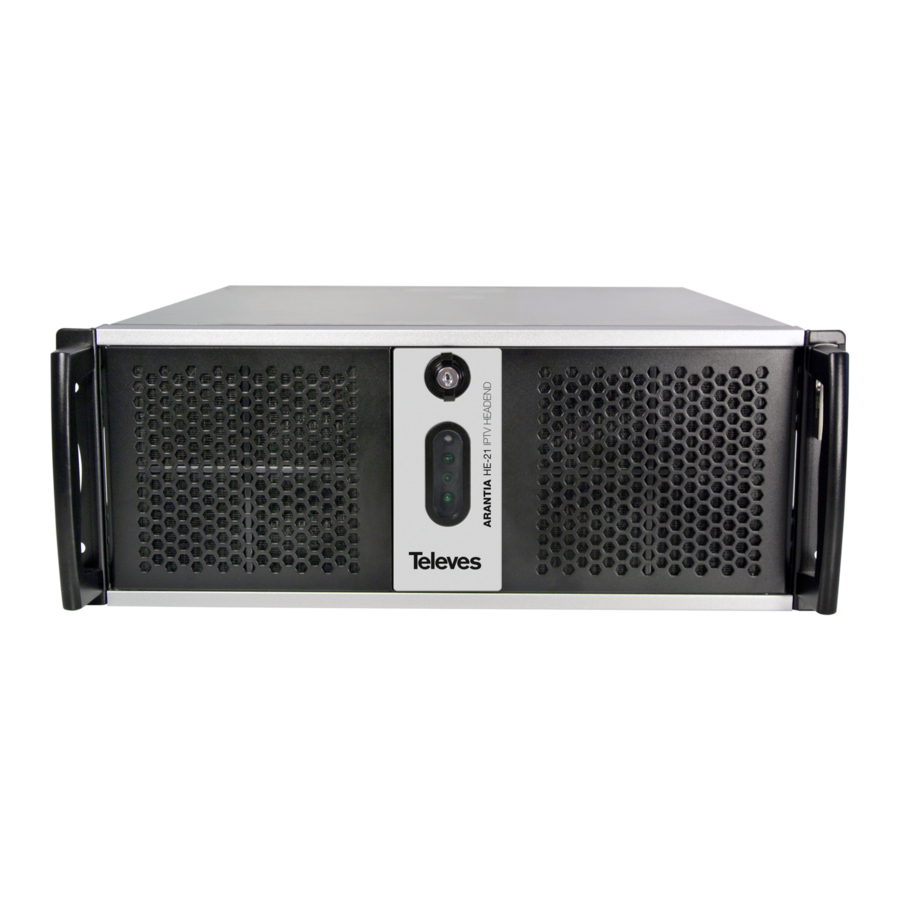
• Modular con guration with up to 7 positions for input modules • Forced ventilation 831011 - ARANTIA HE-21 4U CHASSIS 2xPSU • 19” rack mountable, 4RU • Dimensions (mm): 176 x 430 x 470 (Height x Width x Depth) •... -
Page 9: Assembly And Preliminary Considerations
4 screws. The reinforced and recommended fastening system for chassis 831010 and 831011 includes the instal- lation of 2 side rails (831311 ARANTIA HE-21 Rack Rails) on the vertical parts of the frame and the xing of the equipment on those. -
Page 10: Power Supply
Power supply To power the equipment, the power cord (IEC) provided shall be connected to the IEC C14 female con- nector on the rear of the chassis. Redundant power supply (831011) If you purchased an HE-21 (831011), your equipment includes a redundant power supply; on the rear side of the unit there are two connections. -
Page 11: Network
It will be typically connected to a Layer 3 switch appropriately con gured for the correct management of multicast content. 2.1.4 Input modules 831110 - ARANTIA HE-21 DVB-S/S2 DUAL INPUT • Input frequency range: 950 ~ 2150 MHz • Required signal input level: -85 ~ -20 dBm •... - Page 12 • High-sensitivity DVB-T2 tuner • 75 “F” input female connector • 75- “F” output female connector 831123 - ARANTIA HE-21 DVB-S2/T2/C/ISDB-T CI DUAL INPUT • Required signal input level: -63 ~ -30 dBm • ISDB-T – Bandwidth: 6, 7, 8 MHz...
- Page 13 – Data Burst & Tone Burst compatible • Dual CI slot • 2 x 75 “F” female connectors 831121 - ARANTIA HE-21 ATSC QUAD INPUT • Required signal input level: -63 ~ -20 dBm • Compatible bandwidths 6, 7, 8 MHz •...
- Page 14 • Maximum data input rate: 500 Mbit/s • Connector: RJ45 Note: Maximum supported cards of this type per chassis: 1 831122 - ARANTIA HE-21 HDMI QUAD INPUT • Compatible colour spaces: YV12, NV12, YUY2, RGB24, RGB32 • Compatible input resolutions: –...
-
Page 15: Ip Output Module
HE-21: User Guide · 1920×1080p@30/25/24fps · 1920×1080i@60/50fps · 1280×720p@60/50fps * SD-SDI (SMPTE 259M): · 720×480i@60fps · 720×576i@50fps – Compatible output resolutions: * HD: · 1920×1080p@30/25/24fps · 1920×1080i@60/50fps · 1280×720p@60/50fps * SD: · 720×480i@60fps · 720×576i@50fps – Audio and video input: 4 × SDI –... -
Page 16: Installation Examples
2.2 Installation examples The following diagram shows the different input service sources supported by HE-21. Fig. 4: Installation examples • The DTV inputs allow the reception of DVB-S/S2, DVB-T/T2, DVB-C, ISDB-T, etc. • The IPTV input allows the reception of MPTS from an IPTV operator. •... -
Page 17: Web Tool
HE-21: User Guide 3. WEB Tool Given that it is a web-based tool, it will be accessed using a web browser (Google Chrome recom- mended) together with the URL provided by the system administrator, identical with the IP assigned to the headend. Note: The default IP address to access the administration tool is http://192.168.1.10 The web tool will remain blocked until the booting and initialization process of the headend has been... - Page 18 Menu The left column shows the navigation menu; clicking on each entry will display the sub-menus, if any. The menu structure is described below: • Inputs – Digital TV – Status – CAMs – Digital Video • Outputs – IP List –...
-
Page 19: Input Con Guration
HE-21: User Guide 3.1 Input Con guration The con guration procedure for the different input modules supported by the HE-21 headend is de- scribed below. 3.1.1 Digital TV This section shows a list with the links to the con gurations of all the tuners in each module. Fig. -
Page 20: Digital Television Tuning
• Has Lock (True/False): Tuning status. • Bit Error Rate: The number of errors in the tuned signal during the analysis period. • Signal Strength (dBuV): Measure of the power received at the module’s demodulator. (It doesn’t necessarily have to match the level measured at the antenna cable connector) •... - Page 21 HE-21: User Guide – Input type (Delivery System) This eld allows the selection of a signal reception system among the different systems that are compatible with each card. The options are: DVB-S/S2, DVB-T, DVB-T2, DVB-C and ISDBT. – Frequency Mandatory eld, to be lled in with the frequency in Hertz (Hz). –...
-
Page 22: Dvb-Ip Streaming Reception
It uses a coaxial cable to transmit both bidirectional data/signals and electricity. Any DiSEqC 1.1-compatible equipment can be integrated with this equipment. As an exam- ple, the following Televes’ references have been tested and were perfectly integrated with this equipment. * Ref. 7268. DiSEqC 2.0 selector switch (2 inputs/1 output) * Ref. -
Page 23: Tuned Or Con Gured Channel Streaming
HE-21: User Guide • Channel protocol (UDP/RTP) • Channel source address - Optional (Source IP Address(Optional)): source address that allows an unambiguous identi cation of the multicast address. • Channel source port - Optional (Source Port(Optional)): Address of the source that allows an unambiguous identi cation of the multicast address. - Page 24 Fig. 9: Tuned DVB-T/T2, DVB-S/S2 and multi-standard modules Once we have the list of available channels, we need to select the channels we wish to transmit through the IP streaming output of the headend. There are two options to do this: •...
- Page 25 HE-21: User Guide The data associated to the desired channel will be displayed by clicking on the channel’s name. Fig. 11: Adding a channel in a personalized way The information displayed is automatically produced, so just by pressing the Send button the selected channel will be transmitted to the IP output.
-
Page 26: Digital Video
Finally, the Enable parameter is by default enabled, thus indicating that whenever we press the Send button, the channel will be transmitted via the IP output of the headend. Besides all of these parameters, the HE-21 headend allows the ltering of the different PIDs received with each channel. -
Page 27: Dtv Module Status (Status)
HE-21: User Guide – Audio sampling rate: 48 KHz. To carry out this process, we need to press the “+” symbol next to the channel name. Finally, a con rmation message will display if the process was successful. • Manual channel addition in a personalized way This procedure allows the full con guration of the output for each channel: –... -
Page 28: Cams
Fig. 16: DVB input check result As shown in the image above, we can check the status of each input: whether it is enabled, whether it is operating correctly, the signal level, and the processing required in each case. The FE (FrontEnd) had lock parameter indicates whether the tuner has correctly tuned to the frequency, in which case the value will be True. -
Page 29: Output Streaming (Outputs)
HE-21: User Guide Fig. 18: CAM menu example Los menús disponibles dependen de cada CAM, no siendo generados por Televes. Once we are done working with this menu, it is recommended that the connection with that CAM is closed using the link provided underneath the command window. - Page 30 • Service name (service) and associated service identi er (SID). • Input and module through which the channel is being received (Card) • Streaming process status (Enable). Three possible actions may be performed: • Displaying all the information associated with the service, including a real-time screenshot. (Info) Fig.
-
Page 31: Status Of The Output Streams Coming From Dtv Inputs (Dtv Monitoring)
HE-21: User Guide Fig. 22: Manually adding a service First of all, we need to select the input through which the service is received and ll in the rest of the required parameters. 3.2.2 Status of the output streams coming from DTV inputs (DTV Monitoring) In the Outputs menu, we can nd the module in charge of monitoring the output streaming quality, which allows a quick check of the main channel quality indicators together with the errors found. -
Page 32: Output Bandwidth (Streaming Bandwidth)
Fig. 23: DTV Monitoring A quick check is automatically launched upon accessing this module, to assess the last few hours of operation. More accurate analysis may be carried out using the following time intervals: 1h, 2h, 4h, 8h, 12h, 24h, and 72h. At the top of the screen a summary of the channels with errors is displayed and classi ed as: •... -
Page 33: Corporate Channel
HE-21: User Guide Once this option is selected, we need to wait for the measurement to display without pressing any other option. The measurement shouldn’t take longer than 2 seconds to display. Fig. 25: Result of the output streaming bandwidth calculation 3.3 Corporate Channel This option allows the user to upload videos into the system for further transmission over the IPTV network. -
Page 34: Channels
– Download videos either individually or as a set. (Download) – Edit video description (Edit) – Delete video (Delete) There are two options for adding videos: • WEB-based video upload (Upload Video): it consists of a very simple form in which we need to enter the video and the name we wish to assign it for its storage in the system. - Page 35 HE-21: User Guide Fig. 28: Retrieving the channel’s detailed information • Editing service information. In this case, the parameters to be edited are identical with the param- eters in the channel streaming con guration. (Edit) Fig. 29: Manually editing a service •...
- Page 36 Fig. 30: Manually editing a service The details of the parameters to be lled in in order to complete the process of adding a channel are described below. • Enabled (Enable): it is a check box to specify whether we wish for the channel to be active (trans- mitting on multicast) or inactive (no transmission).
-
Page 37: System Settings
HE-21: User Guide 3.4 System settings The System Settings menu includes 6 sub-menus: • Account • Network • Time • Backup • Licenses • Power Control The sections below describe the functionality of each sub-menu. 3.4.1 Account management (Account) This menu allows us to modify the password of the headend’s management tool. Fig. - Page 38 – Connectivity – Connection speed – IP address – Network mask – Gateway – Function [Control/Streaming] • DNS servers – Primary DNS – Secondary DNS • Host name – Host name Three possible actions may be performed: • Editing the network interface con guration To access the speci c menu for network interface con guration, we need to click on the pencil next to its name.
-
Page 39: Date And Time
HE-21: User Guide • Editing the host name To access the speci c menu for the host name edition, we need to click the pencil next to the current name. Fig. 35: Host name con guration form Once the required elds are lled in, we need to press the “Submit” button for the changes to take effect. -
Page 40: Backup
To access the speci c form for NTP server con guration, we need to press the pencil next to the current NTP Server name. Fig. 37: NTP Server con guration form Once the required elds are lled in, we need to press the “Submit” button for the changes to take effect. - Page 41 HE-21: User Guide Fig. 39: Backup section • Saving a con guration Once the headend is con gured, it is recommended that a backup con guration is al- ways stored, in case of any eventuality, or in case we wish to install a new headend with that same con guration.
-
Page 42: Licenses
Fig. 40: Loading a backup • Restoring a con guration This functionality allows us to restore the headend’s factory settings. To do this, we have to press the Restore Factory Defaults link, in the third sub-menu of the Backup interface. •... -
Page 43: Shut Down/Restart (Power Control)
HE-21: User Guide • Active licenses. Displays the licenses that are currently active. • License form. Allows us to upload license les to activate new functionalities. • Contact information and s/n. Information for license and equipment serial number request. 3.4.6 Shut down/Restart (Power Control) This sub-menu allows us to remotely shut down or restart the headend. -
Page 44: Http-To-Udp (Udp To Http) Encapsulator
Fig. 43: SAP server form We will be able to specify the update interval for this service by means of the SAP Delay eld. In addition, we have to select the Enable check box for the SAP announcement information to be transmitted on the network. - Page 45 HE-21: User Guide Fig. 45: UDP to HTTP By clicking on the HTTP section of the menu we access the con guration section. If we click on Tutorial a small window will display with the instructions on how to con gure the service. 1.
-
Page 46: Upnp Server
Once the UDP-to-HTTP Proxy is enabled, and once some clients are remotely connected via HTTP, if we refresh the page (by pressing F5) we see Server Status at the bottom and the number of clients connected at a given time, as well as the streams and bandwidths they are using. 3.7 UPnP server The Universal Plug and Play server allows the publishing on the local network of announcements rel- ative to the different streams available in the headend. -
Page 47: Web Server
HE-21: User Guide Fig. 49: UPnP activation form Once we check the Enable check box and press Submit the UPnP server will start announcing services. UPnP clients In order to nd the services announced by the UPnP server the client device must be equipped with an UPnP client. -
Page 48: Snmp
Once the Enable box is checked, we need to press the Send button, and the con guration will be com- pleted. By clicking on the URL, we will gain access to the appropriate directory. Fig. 52: Example “index of” web server 3.9 SNMP The IPTV HE-21 Headend is equipped with a basic SNMP version, which can provide the following infor- mation:... -
Page 49: Logout
HE-21: User Guide 3.10 Logout We can close the session by pressing the Logout menu, on the left-hand side of the management inter- face. The next screen is described below; it allows us to go back to the main interface, in which we can re-enter the access data. - Page 50 RATION DE CONFORMITE • DICHIARAZIONE DI CONFORMITÀ • DEKLARACJA ZGODNOŚCI • KONFORMITÄTSERKLÄRUNG • ΠΙΣΤΟΠΟΙΗΤΙΚΟ ΣΥΜΜΟΡΦ ΣΗΣ • ДЕКЛАРАЦИЯ СООТВЕТСТВИЯ • FÖRSÄKRAN OM ÖVERENSSTÄMMELSE • https://doc.televes.com July , 2019 This document describes components that undergo continual development. The information in this document is subject to...
Need help?
Do you have a question about the ARANTIA HE-21 and is the answer not in the manual?
Questions and answers