
Related Manuals for Prior Scientific OptiScan II ES111


Summary of Contents for Prior Scientific OptiScan II ES111
- Page 1 sales@artisantg.com artisantg.com (217) 352-9330 | Click HERE Find the Prior ES9 at our website:...
- Page 2 O p t i S c a n II ™ Motorized Microscope Stages Operating Instructions Artisan Technology Group - Quality Instrumentation ... Guaranteed | (888) 88-SOURCE | www.artisantg.com...
- Page 3 Artisan Technology Group - Quality Instrumentation ... Guaranteed | (888) 88-SOURCE | www.artisantg.com...
- Page 4 qaÄäÉ=çÑ=`çntÉntë= Important Safety Information Unpacking The System Other Accessories Installation Removing an Existing Stage Fitting the OptiScan II Stage Cable Connections Focus Drive Installation Installing Filters Mounting Filter Wheels and Shutters Getting Started USB Operation Using The Joystick (CS152DP) Using the Z Axis Digipot (CS152Z) Using the Filter Wheel Keypad (CS100K) Touch Screen Keypad (CS152KB) Advanced Operation...
- Page 5 Troubleshooting System Specifications Returns and Repairs Appendices Non Standard Focus Drive Installations 9.2 Direct Coupling Focus Installation How to Run HyperTerminal Prior Scientific Artisan Technology Group - Quality Instrumentation ... Guaranteed | (888) 88-SOURCE | www.artisantg.com...
- Page 6 Iãpçêtant=SaÑÉtó=InÑçêãatiçn= SÉctiçn=N OptiScan II ™ Artisan Technology Group - Quality Instrumentation ... Guaranteed | (888) 88-SOURCE | www.artisantg.com...
- Page 7 Prior Scientific Artisan Technology Group - Quality Instrumentation ... Guaranteed | (888) 88-SOURCE | www.artisantg.com...
-
Page 8: Important Safety Information
Important Safety Information Keep this manual in a safe place as it contains important safety information and operating instructions. Before using the stage system, please follow and adhere to all warnings, safety and operating instructions located either on the product or in this User’s Manual. Do not expose the product to water or moisture. - Page 9 Prior Scientific Artisan Technology Group - Quality Instrumentation ... Guaranteed | (888) 88-SOURCE | www.artisantg.com...
- Page 10 rnpacâinÖ=qÜÉ=SóëtÉã SÉctiçn=O OptiScan II ™ Artisan Technology Group - Quality Instrumentation ... Guaranteed | (888) 88-SOURCE | www.artisantg.com...
- Page 11 Prior Scientific Artisan Technology Group - Quality Instrumentation ... Guaranteed | (888) 88-SOURCE | www.artisantg.com...
-
Page 12: Unpacking The System
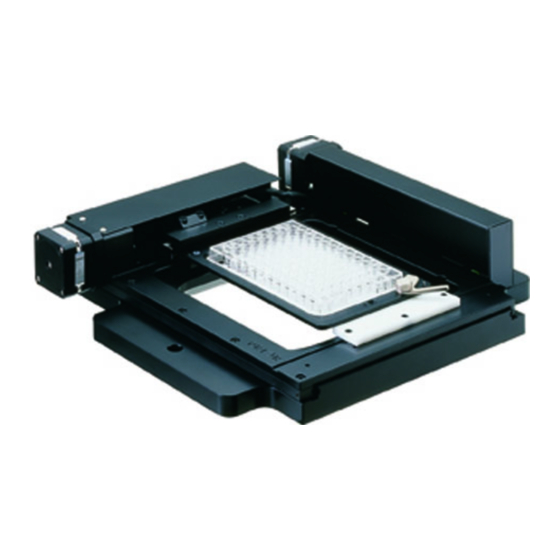
Unpacking The System The OptiScan II System consists of the OptiScan II Controller and one or more of the following components A-G. Component Component Description Model CS152Z Digipot, Z only Model ES111 Stage for Upright Microscopes includes 15 pin cable Model ES107 Stage for Inverted Microscopes includes 15 pin cable Model H122 Focus Drive Model H122AXIO Focus Drive... -
Page 13: Other Accessories
Note: Make sure that all of the components that should be included with your OptiScan II System have been supplied. If parts are missing, please contact your local Prior Dealer. Prior Scientific Artisan Technology Group - Quality Instrumentation ... Guaranteed | (888) 88-SOURCE | www.artisantg.com... - Page 14 Inëtaääatiçn SÉctiçn=P OptiScan II ™ Artisan Technology Group - Quality Instrumentation ... Guaranteed | (888) 88-SOURCE | www.artisantg.com...
- Page 15 Prior Scientific Artisan Technology Group - Quality Instrumentation ... Guaranteed | (888) 88-SOURCE | www.artisantg.com...
-
Page 16: Installation
Installation 3.1 Removing an Existing Stage To avoid damage to the optics when removing an existing stage, ensure that the distance between the objectives and stage is maximised, and that the condenser is clear of the stage. Removal of the stage is normally a straightforward procedure, in most cases just by the removal of fixing screws or the loosening of a clamp screw. -
Page 17: Cable Connections
Filter Wheel 1 RS 232 (1) Connection XY Sta g e Z-Axis USB Socket Power Input Jo y stick/Di g i p ot Figure 4.3 Prior Scientific Artisan Technology Group - Quality Instrumentation ... Guaranteed | (888) 88-SOURCE | www.artisantg.com... - Page 18 3.4 Focus Drive Installation For installation procedure for Zeiss Axio range (H122AXIO and H122AXIE), Leica DML range (H122LB), and direct coupling models, see Appendix A. The following instructions refer to the standard split sleeve mounting. 1. Loosen the clamp screw on the focus motor assembly and remove the focus motor from the focus adapter.
- Page 19 8. Confirm that the controller is switched off before connecting the 9 way D type plug on the focus motor lead to the socket on the rear of the controller as shown in fig.4.3. Prior Scientific Artisan Technology Group - Quality Instrumentation ... Guaranteed | (888) 88-SOURCE | www.artisantg.com...
-
Page 20: Installing Filters
3.5 Installing Filters It is recommended that filters are installed before mounting the filter wheel on to a microscope. 1. Select filter position required for loading, by checking the number displayed in the load position indicator window (A) (see fig.4.5). 2. - Page 21 (Part No. HF207) allows these units to be mounted to a microscope camera port, if required. Confirm that the OptiScan II controller unit is switched off before connecting filter wheels to the controller with leads provided (see fig.4.3). Prior Scientific Artisan Technology Group - Quality Instrumentation ... Guaranteed | (888) 88-SOURCE | www.artisantg.com...
- Page 22 dÉttinÖ=StaêtÉÇ SÉctiçn=Q OptiScan II ™ Artisan Technology Group - Quality Instrumentation ... Guaranteed | (888) 88-SOURCE | www.artisantg.com...
- Page 23 Prior Scientific Artisan Technology Group - Quality Instrumentation ... Guaranteed | (888) 88-SOURCE | www.artisantg.com...
-
Page 24: Getting Started
Getting Started Switch the OptiScan II controller unit on using the on/off rocker switch located on the front panel. There are three LED’s on the bottom left of the front panel. The ‘running’ LED should be illuminated to indicate correct operation. If this is not the case refer to section 7. The 'TX' (transmit) LED will flash rapidly when data is being transmitted by the controller and 'RX' (receive) LED flashes rapidly when receiving data from computer RS232. -
Page 25: Usb Operation
Expand Ports (COM & LPT). You should see C C ypress USB-HID -> COM device (COM n ) listed, where n is the COM number assigned to the port. Prior Scientific Artisan Technology Group - Quality Instrumentation ... Guaranteed | (888) 88-SOURCE | www.artisantg.com... - Page 26 If installation fails: 1. With the controller still on, expand H H uman Interface Devices in the Device Manager window. Right-click on U U SB Human Interface Device and select P P roperties. (If there is more than one occurrence of ‘USB Human Interface Device’ in the list, select one and continue.) Click on the D D river tab and select U U pdate Driver.
- Page 27 This device controls the focus motor on a 3 axis system. It is not proportional, but is designed to closely match the normal response of the fine focus knob on a microscope. Prior Scientific Artisan Technology Group - Quality Instrumentation ... Guaranteed | (888) 88-SOURCE | www.artisantg.com...
- Page 28 4.3 Using the Z Axis Digipot (CS152Z) This device is normally used for OptiScan II systems where motorised focus is required but a motorised stage is not. It provides control of the focus motor only. The digipot control drives the focus motor directly. Rotating the control knob in opposite directions will drive the focus motor in opposite directions.
- Page 29 (current position –1) positions respectively. The button labelled ‘Home’ can be used to re-initialise the system by driving it to the home position and then to position 1. Prior Scientific Artisan Technology Group - Quality Instrumentation ... Guaranteed | (888) 88-SOURCE | www.artisantg.com...
- Page 30 4.5 Touch Screen Keypad (CS152KB) The Touch Screen Keypad provides a programmable terminal which can be used to control the whole of the OptiScan II system. Detailed operating instructions are provided in a separate dedicated operating manual (Part No. W2518) that accompanies the unit. OptiScan II ™...
- Page 31 Prior Scientific Artisan Technology Group - Quality Instrumentation ... Guaranteed | (888) 88-SOURCE | www.artisantg.com...
- Page 32 ^ÇîancÉÇ=OpÉêatiçn SÉctiçn=R OptiScan II ™ Artisan Technology Group - Quality Instrumentation ... Guaranteed | (888) 88-SOURCE | www.artisantg.com...
- Page 33 Prior Scientific Artisan Technology Group - Quality Instrumentation ... Guaranteed | (888) 88-SOURCE | www.artisantg.com...
- Page 34 Advanced Operation 5.1 RS232 Command Set The OptiScan II controller can accept commands from either serial port or USB port (with appropriate divers installed on PC). The ports (RS232-1 & RS232-2) default to a baud rate of 9600, this can be increased to 38400 if desired (see BAUD below). The ports can have different BAUD speeds and different compatibility mode (See COMP Command) Commands are terminated with a Carriage Return code <CR>...
- Page 35 Commands are now queued (Standard mode only) if the system is already in use. Prior Scientific Artisan Technology Group - Quality Instrumentation ... Guaranteed | (888) 88-SOURCE | www.artisantg.com...
- Page 36 5.2 Macro and Soak MACRO - a set of commands can be entered and started in a block by the use of the MACRO command. Example of MACRO To close a shutter, move the filter wheel to a new position then open the shutter. Command Response Notes...
-
Page 37: General Commands
Stage is for x, y axis; F is for filters and would return 0 to 3 depending on if they are in use. Prior Scientific Artisan Technology Group - Quality Instrumentation ... Guaranteed | (888) 88-SOURCE | www.artisantg.com... - Page 38 None Text string Reports information about the peripherals currently connected to the controller. E.g. DRIVE CHIPS 10011 means Z and F1 chips missing, SHUTTERS = 110 means shutter 1 not connected. The information end is always a line saying END This allows for the addition of extra fields of information without effecting application software.
- Page 39 Reports the units software version number as a 3 figure number eg 041 is Version 0.41 WAIT Inserts a wait of t milliseconds in a macro/soak routine. Prior Scientific Artisan Technology Group - Quality Instrumentation ... Guaranteed | (888) 88-SOURCE | www.artisantg.com...
- Page 40 5.5 Stage Commands Command Arguments Response Description (All end with <cr>) None Moves back by one step as defined by the ‘X’ command below Moves back by y steps. BLSH Sets the stage backlash value for Host moves to b in microsteps. s = 1 enables backlash s=0 disables backlash BLSH Enables / Disables the Stage (XY) backlash.
- Page 41 Moves stage and focus to zero ( 0,0,0 ) Sets the speed of the stage under joystick control. s is percentage in range 4 to 100. Prior Scientific Artisan Technology Group - Quality Instrumentation ... Guaranteed | (888) 88-SOURCE | www.artisantg.com...
- Page 42 None Reports value of O allowing for joystick speed buttons effect (if the button speed is ½ and O is set to 50 the returned value will be 25) None x,y,z Reports position of x, y, and z axis x, y, z Sets Absolute position of x, y, and z axis, No axis can be moving for this command to work.
- Page 43 Range is -30000 to 30000 microns per second. It is the users’ responsibility to set speeds which do not stall the motors. The recommended value for OptiScan II stages is -8000 to 8000. Prior Scientific Artisan Technology Group - Quality Instrumentation ... Guaranteed | (888) 88-SOURCE | www.artisantg.com...
- Page 44 None Reports the current step size in x and y for the stage, used in conjucion with L,R,F,B. Sets the current step size for the stage, used in conjucion with L,R,F,B. None Sets the stage and focus to absolute position to ZERO (0,0,0). none Set Index of stage.
- Page 45 Users should always read lines in until the END is seen to keep in sync. Example FOCUS = NORMAL TYPE = 0 MICRONS/REV = 100 Prior Scientific Artisan Technology Group - Quality Instrumentation ... Guaranteed | (888) 88-SOURCE | www.artisantg.com...
- Page 46 None Turns OFF the joystick (Stage and Z axes) after completion of any current joystick move. Joystick is re-enabled using ‘J’ Command below. The joystick is re-enabled each time the controller is powered up. None Gracefully stops movement and returns to the position the interrupt was entered at.
- Page 47 Sets direction of rotation of focus motor. Defaults to 1 and is correct for motor fitted on right hand side of microscope. d=-1 Direction of rotation of focus motor opposite to above. None Returns d Prior Scientific Artisan Technology Group - Quality Instrumentation ... Guaranteed | (888) 88-SOURCE | www.artisantg.com...
-
Page 48: Filter Wheel Commands
5.7 Filter Wheel Commands Command Arguments Response Description (All end with <cr>) w, f if f = F the If f is a number move filter wheel w to filter position f. current filter if f is a ‘N’ move filter wheel w to next filter. else R If no If f is a ‘P’... -
Page 49: Shutter Commands
Users should always read lines until the END is seen in order to maintain compatibility. Example SHUTTER_3 = NORMAL Prior Scientific Artisan Technology Group - Quality Instrumentation ... Guaranteed | (888) 88-SOURCE | www.artisantg.com... -
Page 50: Pattern Commands
5.9 Pattern Commands Command Arguments Response Description (All end with <cr>) None Sets the origin for the pattern to the current position. Zeros the pattern X and Y counter. Fixes the number n of X and number m of Y steps for the pattern None Reports number of X and Y steps. - Page 51 None Move to next position of Rectangular Snake. Step number of scan. Moves to nth cell in X and mth cell in Y Prior Scientific Artisan Technology Group - Quality Instrumentation ... Guaranteed | (888) 88-SOURCE | www.artisantg.com...
- Page 52 5.10 H127/H128 Compatible Commands The Commands below also exist but will only operate in C C ompatibility mode (COMP,1). Equivalent commands in standard mode are described earlier. The Commands below allow Compatibility with previous generations of Prior Controllers H127/H128. Command Argument Response Description Including<...
- Page 53 OptScan cannot move Z motor at same time as the stage. axis does not exist in OptiScan II. 6 axes are displayed for compatibility with ProScan. Prior Scientific Artisan Technology Group - Quality Instrumentation ... Guaranteed | (888) 88-SOURCE | www.artisantg.com...
- Page 54 I (no<CR>) None R when Stops stage in a controlled manner. motors stopped (if motors moving) response at all if motors already stationary ZBLPC None Reports back the Z backlash value for host moves in form s,b (see above) OptiScan II ™...
- Page 55 Stepper moves will be faster than moves under encoder control due to the feedback, checking, and adjusting required for the closed loop system. Prior Scientific Artisan Technology Group - Quality Instrumentation ... Guaranteed | (888) 88-SOURCE | www.artisantg.com...
- Page 56 The SERVO,b command gives the option for the controller to constantly read the encoder position (when stationary) and correct for any position drift. b=4 SERVO on b=0 SERVO off. With SERVO off, the axis still moves to its destination positions measured by the encoder but will not correct for any drift once the destination has been reached.
-
Page 57: Error Codes
ARG5 OUT OF RANGE ARG6 OUT OF RANGE INCORRECT STATE WHEEL NOT FITTED QUEUE FULL COMPATIBILITY MODE SET SHUTTER NOT FITTED INVALID CHECKSUM ENCODER ERROR ENCODER RUN OFF Prior Scientific Artisan Technology Group - Quality Instrumentation ... Guaranteed | (888) 88-SOURCE | www.artisantg.com... - Page 58 5.13 CS152 (Joystick Configuration) CS152 Z Z only digipot 2 axis joystick with digipot for Z axis. CS152DP The BUTTON Command described below can be used to change the function of any of the buttons of the joystick. Command Argument Response Description (including...
- Page 59 Left button (b=2) toggles Stage speed 100% 50% 25% Right button (b=1) toggles Z motor speed.100% 50% 25% BUTTON,3,0 BUTTON,2,0 BUTTON,1,0 BUTTON,0,0 BUTTON,2,5 BUTTON,1,4 BUTTON,0,0 Prior Scientific Artisan Technology Group - Quality Instrumentation ... Guaranteed | (888) 88-SOURCE | www.artisantg.com...
- Page 60 qêçìÄäÉëÜççtinÖ SÉctiçn=S OptiScan II ™ Artisan Technology Group - Quality Instrumentation ... Guaranteed | (888) 88-SOURCE | www.artisantg.com...
- Page 61 Prior Scientific Artisan Technology Group - Quality Instrumentation ... Guaranteed | (888) 88-SOURCE | www.artisantg.com...
-
Page 62: Troubleshooting
For Installation see section 4. Check that the controller is switched on. Check that the green “Running” light is on. If it is not, return unit to your local Prior Scientific dealer for servicing. There is no external fuse that can be replaced. - Page 63 Make sure that your computer is not sending an extra line feed command at the end of each command being sent. If you are using HyperTerminal, check that the set up is correct using Appendix C. Prior Scientific Artisan Technology Group - Quality Instrumentation ... Guaranteed | (888) 88-SOURCE | www.artisantg.com...
- Page 64 Problem: The focus motor turns but the microscope fine focus knob does not. Suggestions: The focus drive may not be properly positioned against the fine focus knob. Loosen the knurled screw that holds the focus motor and press it gently against the fine focus knob.
- Page 65 There are 3 shutter connections in the back of the OptiScan II Controller labelled Shutter '1', '2' and '3'. Ensure you are sending the correct commands for the connection being used. Prior Scientific Artisan Technology Group - Quality Instrumentation ... Guaranteed | (888) 88-SOURCE | www.artisantg.com...
- Page 66 SóëtÉã=SpÉciÑicatiçnë SÉctiçn=T OptiScan II ™ Artisan Technology Group - Quality Instrumentation ... Guaranteed | (888) 88-SOURCE | www.artisantg.com...
- Page 67 Prior Scientific Artisan Technology Group - Quality Instrumentation ... Guaranteed | (888) 88-SOURCE | www.artisantg.com...
-
Page 68: System Specifications
System Specifications Max. Speeds STAGE 8mm/sec FOCUS DRIVE 8 revs/sec FILTER WHEEL 120msec (Position to Position) SHUTTER 14msec (for open/close cycle) Stage Travel Ranges ES111 125 x 75 ES107A 115 x 75 Power Universal external power supply Input: 110 – 240V, 50/60Hz 60W Output: 24VDC 2.5A Specifications subject to change without notice. - Page 69 Prior Scientific Artisan Technology Group - Quality Instrumentation ... Guaranteed | (888) 88-SOURCE | www.artisantg.com...
- Page 70 oÉtìênë=anÇ=oÉpaiêë SÉctiçn=U OptiScan II ™ Artisan Technology Group - Quality Instrumentation ... Guaranteed | (888) 88-SOURCE | www.artisantg.com...
- Page 71 Prior Scientific Artisan Technology Group - Quality Instrumentation ... Guaranteed | (888) 88-SOURCE | www.artisantg.com...
-
Page 72: Returns And Repairs
Return Material Authorisation (RMA) number must be obtained from the appropriate Prior Scientific office before returning any equipment. For North and South America contact Prior Scientific Inc. and for the rest of the world call Prior Scientific Instruments Limited on the telephone numbers shown below. - Page 73 Prior Scientific Artisan Technology Group - Quality Instrumentation ... Guaranteed | (888) 88-SOURCE | www.artisantg.com...
- Page 74 ^ppÉnÇicÉë SÉctiçn=V OptiScan II ™ Artisan Technology Group - Quality Instrumentation ... Guaranteed | (888) 88-SOURCE | www.artisantg.com...
- Page 75 Prior Scientific Artisan Technology Group - Quality Instrumentation ... Guaranteed | (888) 88-SOURCE | www.artisantg.com...
- Page 76 Appendices Appendix A 9.1 Non Standard Focus Drive Installations Notice: This installation should only be attempted by a qualified technician. It involves some minor disassembly of critical mechanical components. If you are not familiar with this type of mechanical assembly do not attempt this installation, consult your local microscope representative.
- Page 77 2. Using the 14mm spanner or socket to remove the lock nut. The coarse knob can now be removed by turning anti-clockwise and unscrewing from the coarse focus shaft. Prior Scientific Artisan Technology Group - Quality Instrumentation ... Guaranteed | (888) 88-SOURCE | www.artisantg.com...
- Page 78 3. A black plastic cover should now be visible (see fig. 3). If this is not the case, check the introduction to ensure you removed the knobs from the correct side. It is very important that you replace both coarse and fine knobs before removing the knobs on the opposite side.
- Page 79 M4 cap head screws. The anti-backlash gear has two gears, one fixed, the other spring loaded and free to rotate. Rotate this gear approximately 6 teeth before aligning with the motor gear. Prior Scientific Artisan Technology Group - Quality Instrumentation ... Guaranteed | (888) 88-SOURCE | www.artisantg.com...
- Page 80 7. Replace the cover and attach the lead. 8. If the focus drive unit appears to drive in the wrong direction, i.e. you ask the controller to move up and the stage moves down, then the switch is set to the wrong position.
- Page 81 There should be approximatley 13mm shaft length protruding from the brass boss (figure 2). Ensure that the small spring washer is still on the shaft. Prior Scientific Artisan Technology Group - Quality Instrumentation ... Guaranteed | (888) 88-SOURCE | www.artisantg.com...
- Page 82 3. Fit the large adapter ring over the brass boss. Note that the orientation of the adapter ring should be such that the grub screw in the adapter ring screws down onto the centre of the radius (curved part of the brass boss) - (figure 3) 4.
- Page 83 Components Installation on 'DMR' Step 1 Using a 1.27mm Hexagonal key, undo the fine focus set screw. The knob can then be pulled off. Prior Scientific Artisan Technology Group - Quality Instrumentation ... Guaranteed | (888) 88-SOURCE | www.artisantg.com...
- Page 84 Step 2 Place the spring over the fine focus shaft and place a coupling hub on the shaft whilst holding the opposite focus knob in position, or it may disengage from gears. Compress the spring by 3-6mm and clamp the hub using the 2mm hexagon key. Note: Only one of the coupling hubs will fit the fine focus shaft.
- Page 85 2mm hexagon key on the set screw. Continue with steps 2, 3 and 4 as for 'DMR' series. Prior Scientific Artisan Technology Group - Quality Instrumentation ... Guaranteed | (888) 88-SOURCE | www.artisantg.com...
- Page 86 Appendix C 9.3 How to Run HyperTerminal Instructions for using Windows Terminal Emulation Program (Windows 3.11) for communication to Prior Controller. 1) Double-click the ACCESSORIES Group symbol in WINDOWS 3.11 2) Double-click the TERMINAL Icon. 3) From the SETTINGS menu select COMMUNICATIONS. Choose: - Baud Rate 9600...
- Page 87 2) Select Settings tab. 3) Press ASCII Setup... 4) Select "Echo typed characters locally" and "Append line feeds to incoming line ends" 5) Press OK. 6) Press OK. Prior Scientific Artisan Technology Group - Quality Instrumentation ... Guaranteed | (888) 88-SOURCE | www.artisantg.com...
- Page 88 Instructions for using Windows HyperTerminal Emulation Program (Windows NT) for communication to Prior Controller. 1) Click Start, then Programs, then Accessories, then HyperTerminal. 2) Select the “HyperTerminal” icon. 3) In the “Connection description” dialog box enter filename e.g. prior, select an icon and press OK.
- Page 89 11) Select "Echo typed characters locally" and "Append line feeds to incoming line ends". (You will also notice that “Wrap lines that exceed terminal width” will already be selected). 12) Press OK. 13) Press OK. Prior Scientific Artisan Technology Group - Quality Instrumentation ... Guaranteed | (888) 88-SOURCE | www.artisantg.com...
- Page 90 OptiScan II ™ Artisan Technology Group - Quality Instrumentation ... Guaranteed | (888) 88-SOURCE | www.artisantg.com...
- Page 91 Specification subject to change without notification Part No. W2516 Issue 2 03/06 Prior Scientific Artisan Technology Group - Quality Instrumentation ... Guaranteed | (888) 88-SOURCE | www.artisantg.com...
- Page 92 Artisan Technology Group - Quality Instrumentation ... Guaranteed | (888) 88-SOURCE | www.artisantg.com...
- Page 93 Artisan Technology Group - Quality Instrumentation ... Guaranteed | (888) 88-SOURCE | www.artisantg.com...
Need help?
Do you have a question about the OptiScan II ES111 and is the answer not in the manual?
Questions and answers