Table of Contents
Advertisement
Quick Links
Advertisement
Table of Contents

Subscribe to Our Youtube Channel
Related Manuals for Amina BackboxSW345

Summary of Contents for Amina BackboxSW345
- Page 1 Installation Guide BackboxSW V1.4 July 2013 345/300/200...
- Page 2 Caution: Read before installing this product > > T o ensure correct installation, please read this Ensure that all installation mounting surfaces guide carefully and keep in a safe place for are able to support the weight of the future reference. BackboxSW with that of your chosen speaker.
- Page 3 Contents Packaging / Introduction / Overview Installation steps 1 + 2 Installation steps 3, 4 + 5 Alignment for feathered skim Alignment for patch plastering Alignment for full wet skim Further details Warranty, copyright, contact information...
-
Page 4: Part Numbers
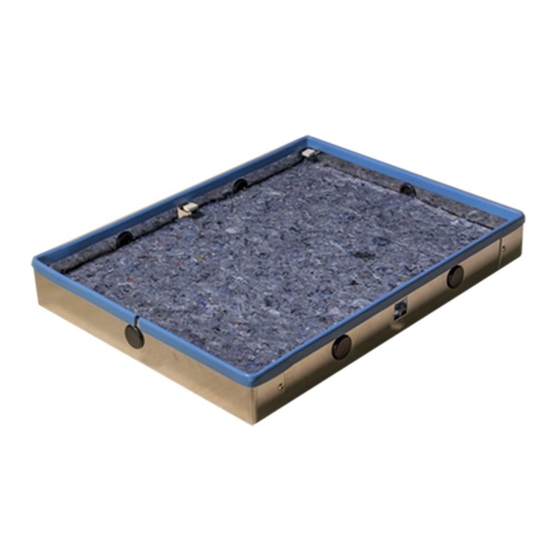
The BackboxSW outer carton is made up of 80% recycled single wall board. Introduction Thank you for purchasing the Amina T echnologies BackboxSW. This product has been designed for the installation of Amina Series Invisible Loudspeakers into solid (eg. brick, concrete) walls and ceilings. - Page 5 Fitting the BackboxSW BackboxSW installation Create aperture in brickwork / concrete Check which version of the BackboxSW you have before following this section. Create 460mm x 205mm (18.1” x 8.1“) aperture. (SW200) Create 460mm x 305mm (18.1” x 12“) aperture. (SW300) Create 460mm x 450mm (18.1”...
- Page 6 BackboxSW installation continued... Install BackboxSW no render Make a small hole in one of the rubber grommets and pull the speaker cable through it and into the BackboxSW. There are Mineral Wool four slots in the base of the BackboxSW and using suitable screws (not supplied), fix the BackboxSW to the brickwork/concrete within Expanding foam...
- Page 7 Alignment and plastering preparation Retrofit / pre-skimmed solid wall Feathered skim finish For solid walls /ceilings that hav e already been plast ered and paint ed. Backbox alignment required for plastering Use shims between the back of the existing render and plaster skim BackboxSW and the inside of the cavity to align the front edge of the BackboxSW with...
- Page 8 This method positions the speaker to be patch plastered with a 2mm (5/64”) skim across the speaker front and blended with the existing plaster. Amina recommend British Gypsum Easi-fill® which allows a smooth accurate finish using fine sandpaper or a wet sponge. 30-50mm...
- Page 9 New Build / new solid wall Full wet skim finish For solid walls /ceilings that hav e already been rendered but not yet plast er skimmed. Backbox alignment required for plastering Use shims between the back of the BackboxSW and the inside of the cavity to align the front edge of the BackboxSW with Render coat face of the rendered wall.
-
Page 10: Further Details
BackboxSW with a sharp knife and pull the BackboxSW out of the cavity. If any products become damaged when removing, please return them to Amina T echnologies Ltd where the product can be repaired or replaced. -
Page 11: Warranty Information
At the end of the product’s useful life it should be returned to your supplier, or directly to Amina for recycling. If you have any questions please contact Amina T echnologies Ltd. - Page 12 Amina T echnologies Ltd Cirrus House, Glebe Road Huntingdon, Cambs, PE29 7DL England T: + 44 1480 354390 / F: + 44 1480 356564...
Need help?
Do you have a question about the BackboxSW345 and is the answer not in the manual?
Questions and answers