
Related Manuals for 4RF Aprisa LTE

Summary of Contents for 4RF Aprisa LTE
- Page 1 Quick Start Guide Contents Follow these steps to operate your Aprisa LTE router: Check the box contents Install the Aprisa LTE and connect the protection earth Set up and apply power to the Aprisa LTE Connect to the Aprisa LTE...
- Page 2 Page 2 Aprisa LTE Quick Start Guide 1.2.0 © 2020 4RF Limited. All rights reserved. This document is protected by copyright belonging to 4RF Limited and may not be reproduced or republished in whole or part in any form without the prior written permission of 4RF Limited.
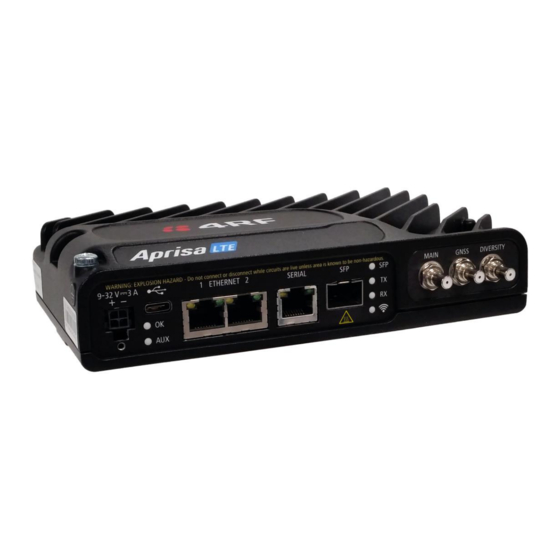
- Page 3 One power connector locking plate and screw (secures the power connector to the Aprisa LTE). 2. Install the Aprisa LTE and connect the protection earth The Aprisa LTE has four threaded holes (M4) in the base and two holes (for M5 screws) through the enclosure for mounting. Mounting options include: •...
- Page 4 The Aprisa LTE OK LED will light green when the router is ready to operate. For vehicle installation, the Aprisa LTE power connector pin 3 is used as an ignition sense line and should be connected to a source of +12 or +24 volts that comes on when the vehicle is running. No connection is required for stationary applications.
- Page 5 Page 5 4. Connect to the Aprisa LTE The Aprisa LTE has a factory default IP address of 192.168.4.1 with a subnet mask of 255.255.255.0. • If your PC is set for DHCP (obtains an IP address automatically) you do not need to manually set an IP address.
- Page 6 Go to Supervisor > Services > Date & Time and set the time zone offset, and format. Verify that the Aprisa LTE active software and LTE module are correct for the provider. Go to SuperVisor > Cellular > Summary to view the currently supported bands.
- Page 7 Test DNS connectivity by pinging a well know DNS address e.g. 4rf.com. • Try browsing the internet from the configuration PC. For more information, please refer to the ‘Aprisa LTE User Manual’ available from the 4RF website www.4rf.com/secure/ (login required).
Need help?
Do you have a question about the Aprisa LTE and is the answer not in the manual?
Questions and answers