
Related Manuals for Techly ICA-LCD 502BK


Summary of Contents for Techly ICA-LCD 502BK
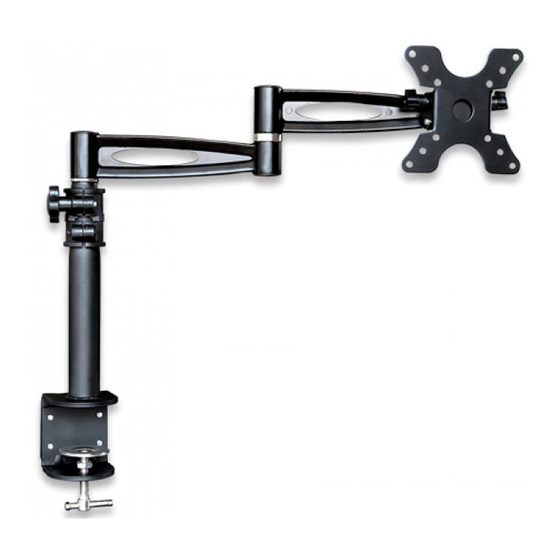
- Page 1 Desktop Monitor Arm with Clamp Istruzioni installazione Installation Instruction ICA-LCD 502BK www.techly.it...
- Page 2 Desktop Monitor Arm with Clamp Gentile Cliente, Dear Customer, grazie per aver scelto un prodotto Techly. thanks for choosing a Techly product. Enjoy the using. Istruzioni disimballaggio Unpacking Instructions • Aprire il cartone con cura, rimuovere il contenuto e distenderlo su • Carefully open the carton, remove contents and lay out on card- un cartone o altro materiale protettivo per evitare danni. board or other protective surface to avoid damage. • Verificare che il contenuto della confezione corrisponda alla li- • Check package contents against the Supplied Parts List in the...
- Page 3 Desktop Monitor Arm with Clamp LISTA DELLE PARTI FORNITE | SUPPLIED PARTS LIST (1) Supporto da scrivania assemblato-a (1) Supporto monitor-b (1) Desk bracket assembled –a (1) Monitor bracket –b (4) M4x12 vite-c (4) M4x30 Vite-d (8) M4 Rondella-e (4) M4x12 Bolt-c (4) M4x30 Bolt-d (8) M4 Washer-e (4) M4 Distanziatore-f (2) Manopola di sicurezza-g (1) Anello passacavo-h (4) M4 Space-f (2) Safety knob-g (1) Cable ring-h 2x Vite a brugola (i) 2x Rondella dentellata (j) 1x Chiave a brugola (k) (2) M6 Rondella (l) 2x Allen Bolt (i) 2x Spring Washer (j) 1x Allen Key (k) (2) M6 Washer (l) STEP 1 Montaggio del supporto alla scrivania | Mounting the bracket to the Desk Regolare l’estensione svitando e poi stringendo la manopola Make the tube extension by loose...
- Page 4 Fissare il monitor al supporto da scrivania e aggiungere la manopola | STEP 3 Attaching monitor to desktop bracket and additing the knobs Nota: e’ possibile utilizzare le 2 viti a brugola (i) invece della manopola di plastica se avete difficoltà a fissare l’angolo di inclinazione della TV. Remarks: You can use the supplied 2pcs Allen Bolt (i) to instead of plastic knobs if you have problem to fix the TV tilting angle. STEP 4 Installare l’anello passacavi sul braccio | Install the Cable Management Ring on the Arm www.techly.it...
Need help?
Do you have a question about the ICA-LCD 502BK and is the answer not in the manual?
Questions and answers