
Related Manuals for Jump Star Round Trampoline 8"

Summary of Contents for Jump Star Round Trampoline 8"
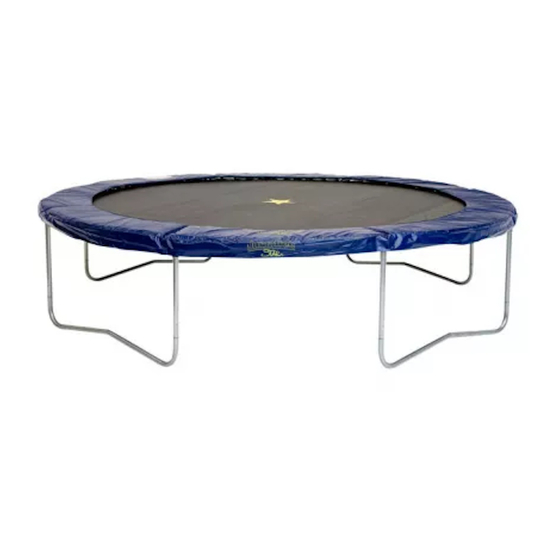
- Page 1 Assembly Instructions JumpStar Round Trampolines Trampoline Specifications: Maximum User’s Size: Springs: Legs: Weight : 8” (244cm) 100kg 10” (305cm) 130kg 12” (366cm) 150kg 14” (427cm) 16” (488cm)
- Page 2 WARNING NO MORE THAN ONE PERSON AT A TIME ON THE TRAMPOLINE! MULTIPLE JUMPERS INCREASE THE RISK OF INJURY SUCH AS BROKEN HEAD, NECK, LEG, OR BACK PARALYSIS OR DEATH CAN RESULT IF YOU LAND ON YOUR HEAD OR NECK! DO NOT PERFORM SOMERSAULTS (FLIPS AS THIS WILL INCREASE YOUR CHANCES OF LANDING ON YOUR HEAD OR NECK Round Trampoline...
-
Page 3: Safety Precautions
SAFETY PRECAUTIONS Trampolines are amazing fun for the whole family if care is taken and children are taught the right and safe way to use them. Trampolining is a popular activity which provides children with both physical exercise and enjoyment. The injury risks associated with trampolining are high, and can have serious consequences Trampolines are a fun way to exercise and help to develop co-ordination, balance and motor skills. - Page 4 any foreign objects in your hand and DO NOT place any objects on the trampoline while anyone is playing on it. Please be aware of what is overhead when you are playing on the trampoline. Tree limbs, wires, or other objects located over the trampoline will increase your chances of getting injured.
-
Page 5: Windy Conditions
SUPERVISORS Educate yourself with the basic jumps and safety rules. To prevent and reduce the risk of injuries, enforce all safety rules and ensure that new jumpers learn the basic bounces before trying more difficult and advanced jumps • All jumpers need to be supervised, regardless of skill level or age. •... -
Page 6: Trampoline Placement
TRAMPOLINE PLACEMENT The minimum overhead clearance required is 24 feet (7.3 meters) and a clearance of 2m around the perimeter of the trampoline. In terms of horizontal clearance, please ensure that no hazardous objects are near the trampoline such as tree limbs, other recreational objects (i.e. -
Page 7: Parts List
ASSEMBLY INSTRUCTIONS To assemble this trampoline all you need is our special spring loading tool provided with this product. During periods of non-use. This trampoline can be easily disassembled and stored. Please read the assembly instructions before beginning to assemble the product. PRIOR TO ASSEMBLING Please refer to page for part descriptions and numbers. -
Page 8: Step 1- Frame Layout
STEP 1- Frame Layout There are a total of 20 pieces of steel tubing parts that is needed to assemble the frame. All parts with the same part number are interchangeable and have no “right or “left” orientation, To connect the parts, simply slide a section (male) tubing that is smaller on one end into the adjacent section (female) that has a larger opening. - Page 9 STEP 3 - Top Rail Assembly A. Two people will be necessary at this point to assemble the trampoline. PERSON I : Lifts the Support Assembly from step 2 to a standing (vertical) position and inserts one of the sockets of the Top Rail with Sockets (3) into the Vertical Leg Extension portion of the Support Assembly.
- Page 10 Spring Loading instruction: 1. WARNING - Wear heavy duty working gloves to protect your hand. 2. Use the special spring loading tool (REF-9) included 3. Hold and align spring so the hook of the spring lines up with hole on the steel frame. 4.
-
Page 11: Step 5 - Frame Padding Assembly
Attach a spring (REF-7) with spring hooks FACE DOWN to the v-ring of the mat and to the aligned hole of the main frame D. If you notice that you have skipped a hole and V Ring connection, recount and remove or attach any springs required to maintain the count of springs. -
Page 12: Care And Maintenance
CARE AND MAINTENANCE This trampoline was designed and manufactured with quality materials and craftsmanship. If proper care and maintenance is provided, it will provide all jumpers with years of exercise, fun, and enjoyment as well as reduce the risk of injury. please follow the guidelines listed below: This trampoline is designed to withhold a certain amount of weight and use.
Need help?
Do you have a question about the Round Trampoline 8" and is the answer not in the manual?
Questions and answers