Table of Contents
Advertisement
Advertisement
Table of Contents

Related Manuals for Asus REPUBLIC OF GAMERSROG SWIFT PG43UQ


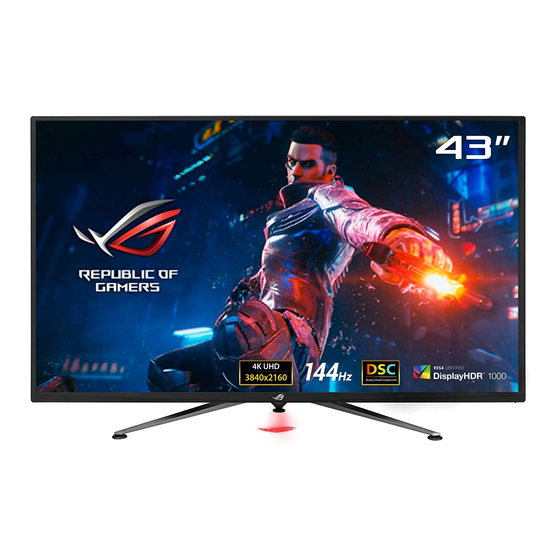
Summary of Contents for Asus REPUBLIC OF GAMERSROG SWIFT PG43UQ
- Page 1 PG43UQ U SE R M AN U AL...
-
Page 2: Table Of Contents
Product warranty or service will not be extended if: (1) the product is repaired, modified or altered, unless such repair, modification of alteration is authorized in writing by ASUS; or (2) the serial number of the product is defaced or missing. -
Page 3: Notices
Notices Federal Communications Commission Statement This device complies with Part 15 of the FCC Rules. Operation is subject to the following two conditions: • This device may not cause harmful interference. • This device must accept any interference received including interference that may cause undesired operation. -
Page 4: Safety Information
Safety information • Before setting up the monitor, carefully read all the documentation that came with the package. • To prevent fire or shock hazard, never expose the monitor to rain or moisture. • Never try to open the monitor cabinet. The dangerous high voltages inside the monitor may result in serious physical injury. - Page 5 • Please use ADP-280BB B of DELTA adapter. WARNING Usage of other than specified head- or earphones can result in hearing loss due to excessive sound pressures. Restriction on Hazardous Substances statement (India) This product complies with the “India E-Waste (Management) Rules, 2016” and prohibits use of Lead, Mercury, Hexavalent Chromium, polybrominated biphenyls(PBBs) and polybrominated diphenyl ethers(PBDEs) in concentration exceeding 0.1% by weight in homogenous materials and 0.01% by weight in homogenous materials for cadmium, except of...
-
Page 6: Care & Cleaning
Care & Cleaning • Before you lift or reposition your monitor, it is better to disconnect the cables and power cord. Follow the correct lifting techniques when positioning the monitor. When lifting or carrying the monitor, grasp the edges of the monitor. Do not lift the display by the stand or the cord. • Cleaning. - Page 7 Refer to the following sources for additional information and for product and software updates. ASUS websites The ASUS websites worldwide provide updated information on ASUS hardware and software products. Refer to http://www.asus.com Optional documentation Your product package may include optional documentation that may have been added by your dealer.
-
Page 8: Welcome
® Thank you for purchasing the ASUS LCD monitor! The latest widescreen LCD monitor from ASUS provides a crisper, broader, and brighter display, plus a host of features that enhance your viewing experience. With these features, you can enjoy the convenience and delightful visual... -
Page 9: Remote Control
Remote Control Press to switch power on and off. Change the signal input source. Adjust the OSD menu/ Turn up the values. Return to previous OSD level. Access the OSD menu. Confirm the OSD adjustment. Adjust the OSD menu / Turn down the values. Confirm the OSD ENTER adjustment. - Page 10 Please make sure that used batteries are disposed of correctly. Do not burn or incinerate. • Do not expose the batteries(battery pack or batteries installed) to excessive heat such as sunshine, fire or the like. ASUS LCD Monitor PG Series...
-
Page 11: Assembling The Monitor
Assembling the monitor To assemble the monitor: Take out four box handle from bottom of carton box. Take out upper carton box. Take out accessory carton box from upper EPS. Chapter 1: Product Introduction... - Page 12 Take out upper EPS. Take out monitor. ASUS LCD Monitor PG Series...
- Page 13 Use screwdriver to install AuraSync Projecter. Chapter 1: Product Introduction...
-
Page 14: Connect Cables
Rear of the LCD monitor HDMI-1 DCIN Audio in Earphone Jack USB Downstream Port (2.4A) USB Downstream Port USB Upstream Port HDMI-2 Port HDMI-1 Port DisplayPort-2 Port DisplayPort-1 Port 10. AURA SYNC Port 11. DC-IN Port 12. Kensington Lock ASUS LCD Monitor PG Series... -
Page 15: Monitor Introduction
Monitor introduction 1.6.1 Using the Controls button Use the control button on the back of the monitor to adjust the monitor settings. Power Indicator: • The color definition of the power indicator is as the below table. Status Description White Amber Standby mode Power Button:... -
Page 16: Adjusting The Monitor
Adjusting the monitor • For optimal viewing, we recommend that you look at the full face of the monitor, then adjust the monitor to the angle that is most comfortable for you. • Hold the stand to prevent the monitor from falling when you change its angle. -
Page 17: Outline Dimension
名稱:ROG LOGO 顏色:深鈦色 顏色:銀色 名稱:IR location 顏色:follow ASUS CG 材質:塑膠 材質:電鍍銘版 材質:塑膠 表面處理: Hairling Area #1700 / 150 % 表面處理: 電鍍銘版 表面處理: 拋光 名稱: 按鍵印刷(中框) 名稱:後蓋太空紋(Door裡面的平面) 顏色:Pantone 8403C 顏色:深鈦色 材質:油墨 材質:塑膠 表面處理:消光印刷 表面處理:凹刻寬0.5mm, 深0.4mm 底部拋亮8000番 ASUS LCD Monitor PG Series... -
Page 18: Detaching The Arm/Stand (For Vesa Wall Mount)
Detach the stand (arm and base) from the monitor. • The VESA wall mount kit ( 100 x 100 mm) is purchased separately. • Use only the UL Listed Wall Mount Bracket with minimum weight/load 28.8 kg (Screw size: M4 x 10 mm). ASUS LCD Monitor PG Series... -
Page 19: Osd (On-Screen Display) Menu
Press the Right key or the Central button to enter the slide bar, and then use the Up or Down keys (depending on the indicators in the menu) to make changes. Press the Left key to return to the previous menu. ASUS LCD Monitor PG Series... -
Page 20: Osd Function Introduction
3.1.2 OSD Function Introduction GameVisual DisplayPort-1 1920x1080@ 60Hz Racing Mode Aura Off PG43UQ HDR OFF GameVisual Scenery Mode GamePlus Racing Mode Color Cinema Mode Image RTS/RPG Mode PBP Settings FPS Mode Input Select sRGB Mode System Setup MOBA Mode MyFavorite User Mode MOVE/ENTER BACK... - Page 21 Display Alignment PBP Settings Input Select System Setup MyFavorite MOVE/ENTER BACK EXIT • Crosshair: Activate Crosshair function. • Timer: Activate Timer function. • FPS Counter: Activate FPS Counter function. • Display Alignment: Activate Display Alignment function. ASUS LCD Monitor PG Series...
- Page 22 Color Select the image color you like from this function. DisplayPort-1 1920x1080@ 60Hz Racing Mode Aura Off PG43UQ HDR OFF Brightness GameVisual Contrast GamePlus Saturation Color Color Temp. Image Gamma PBP Settings Input Select System Setup MyFavorite MOVE/ENTER BACK EXIT • Brightness: The adjusting range is from 0 to 100.
- Page 23 • ELMB: Check to decrease motion blur and minimize ghosting part when on-screen objects are fast moving. • Blur Clarify: Adjust luminance in ELMB mode. • Adaptive-Sync: It can allow a Adaptive-Sync support 48-144Hz under DP mode and support FHD/QHD 48-120Hz under HDMI mode. ASUS LCD Monitor PG Series...
- Page 24 • HDR Max Brightness: Adjust HDR max. brightness to 400 nits, 600 nits, 1000 nits. • HDR: High Dynamic Range. Contains three HDR modes (ASUS Cinema HDR, ASUS Gaming HDR and Console Mode). The HDR mode is selectable when input video is correct HDR source.
- Page 25 “HDMI-1”, “HDMI-2”, “DisplayPort-1” or “DisplayPort-2”. • Color setting: Set GameVisual mode for each PBP window. • To turn on PBP function will disable Adaptive-Sync, Dynamic Dimming and HDR function. • PBP function is supported below 60Hz. ASUS LCD Monitor PG Series...
- Page 26 Input Select Select the input source: • HDMI-1, HDMI-2, DisplayPort-1 and DisplayPort-2. DisplayPort-1 1920x1080@ 60Hz Racing Mode Aura Off PG43UQ HDR OFF GameVisual HDMI-1 GamePlus HDMI-2 DisplayPort-1 Color Image DisplayPort-2 PBP Settings Input Select System Setup MyFavorite MOVE/ENTER BACK EXIT Chapter 3: General Instruction...
- Page 27 Music Mode, Movie Mode, Gaming Mode and User Mode. • DisplayPort Version: Select DP 1.2 or DP 1.4 for graphics card compatibility. • USB Hub: Turn On/Off USB Hub function during the standby mode. ASUS LCD Monitor PG Series...
- Page 28 • Shortcut: Selecting this option allows you to set shortcut key. • OSD Setup: Adjusts the OSD Timeout, DDC/CI, Transparency, Zoom By Remote Control, and Zoom By Hot Key of the OSD screen. • Language: Select OSD language. The selections are: English, French, German, Spanish, Italian, Dutch, Russian, Poland, Czech, Croacia, Hungary, Romania, Portugal, Turkey, Simplified Chinese, Traditional Chinese, Japanese, Korean,...
-
Page 29: Aura
Double-click the AURA program icon on your desktop. Refer to the figure below for information about the AURA program functions. 1 Select the desired AURA lighting effect when the system has been turned on. 2 Adjust AURA lighting options. 3 Click to enable the default settings. ASUS LCD Monitor PG Series 3-11... - Page 30 4 Click to undo the changes. 5 Click to apply the changes. If the USB upstream connection between the monitor and computer is disconnected, to resume the Aura function, you need to re-connect the USB 3.0 upstream port of the monitor to the computer and then restart the computer.
-
Page 31: Usb Update Fw Sop
4. Turn on monitor, then use USB3.0 Cable connect monitor USB Port and PC USB3.0 Port. 5. Open RealtekISPTool, then click ‘Open File’ to choose the new FW from your device, at last click ‘FW Update’. 6. After finish FW update, disconnect USB Cable from monitor and PC. ASUS LCD Monitor PG Series 3-13... -
Page 32: Specifications
3.4 Specifications Model PG43UQ Panel Size 43” W (109.22 cm) Max. Resolution 3840 x 2160 Brightness (Typ.) 750 nits (typical) Intrinsic Contrast Ratio (Typ.) 4000:1 178°(V) /178°(H) Viewing Angle (CR>10) Display Colors 16.7M Response Time 4 ms (G To G ), 1ms (MPRT ) Sound from HDMI HDMI input HDMI2.0 x 2... -
Page 33: Troubleshooting (Faq)
No sound or sound is low • Adjust the volume settings of both your monitor and computer. • Make sure the computer sound card driver is properly installed and activated. • Check the audio source. ASUS LCD Monitor PG Series 3-15... - Page 34 The following function is • To set PBP mode will disable Adaptive-Sync and disabled automatically. HDR decoded automatically. • Adaptive-Sync • Adaptive-Sync is selectable after turn off PBP • HDR mode. • Dynamic Dimming • HDR is enabled automatically in PBP off mode.
-
Page 35: Supported Timing List
Video Timing 576P Video Timing 1280 720P Video Timing 1280 720P Video Timing 1440 480P Video Timing 1440 576P Video Timing 1920 1080P Video Timing 1920 1080P Video Timing 3840 2160 Video Timing 3840 2160 ASUS LCD Monitor PG Series 3-17... - Page 36 HDMI Timing H Pixels V Pixels Frame Rate PC Timing PC Timing PC Timing PC Timing PC Timing PC Timing PC Timing PC Timing PC Timing PC Timing 1024 PC Timing 1024 PC Timing 1024 PC Timing 1152 PC Timing 1280 PC Timing 1280...
- Page 37 * The modes not listed in the above tables may not be supported. For optimal resolution, we recommend that you choose a mode listed in the above tables. ASUS LCD Monitor PG Series 3-19...
Need help?
Do you have a question about the REPUBLIC OF GAMERSROG SWIFT PG43UQ and is the answer not in the manual?
Questions and answers