Advertisement
Assembly, Installation and Use Manual
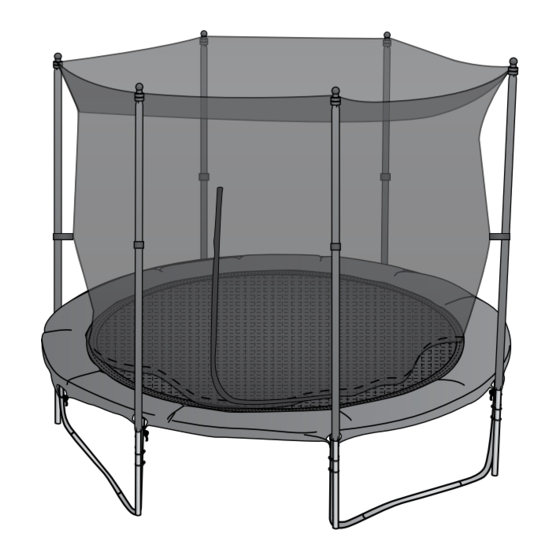
8' (2.4 m) Trampoline and Enclosure Combo
084-0207
Stop
Please read and understand this manual before assembly.
Before beginning assembly of product, make sure all parts are present.
Compare parts with packaging contents list. If any part is missing, or if you
have any questions, contact the vendor's customer service department at
1-866-567-4089.
Version 4
084-0207-Cantire-8ft Trampoline Combo-GB-02.indd 1
11-11-9
4:10
Advertisement

Related Manuals for JumpTek 084-0207


Summary of Contents for JumpTek 084-0207
- Page 1 Before beginning assembly of product, make sure all parts are present. Compare parts with packaging contents list. If any part is missing, or if you have any questions, contact the vendor’s customer service department at 1-866-567-4089. Version 4 084-0207-Cantire-8ft Trampoline Combo-GB-02.indd 1 11-11-9 4:10...
-
Page 2: Table Of Contents
Dear Customer, Thank you for choosing a JumpTek trampoline. We hope it will provide many hours of quality exercise to make you feel better, look better and enjoy life to its fullest. It is proven that a regular exercise program can improve physical and mental health. -
Page 3: Safety Instructions
This is especially important if you are over the age of 35, have never exercised before, are pregnant or suffer from any illness. >7,5 m 084-0207-Cantire-8ft Trampoline Combo-GB-02.indd 3 11-11-9 4:10... -
Page 4: Parts List & Diagram
Lower Pole Foam Washer (pre-installed) Upper Bolt Supporting Pole Vertical Leg Upper Pole Foam Tube (left) (pre-installed) Trampoline Foam Sleeve (with sewn-in V-rings) Spring Allen Key Frame Pad Spring Hook Tool Lower Supporting Pole 084-0207-Cantire-8ft Trampoline Combo-GB-02.indd 4 11-11-9 4:10... - Page 5 DIAGRAM 084-0207-Cantire-8ft Trampoline Combo-GB-02.indd 5 11-11-9 4:11...
-
Page 6: Assembly
(19, 20, 21), T-shaped Joints (4), Vertical Leg Tubes (5, 10) and V-shaped Tubes • (6) on a level surface, as shown in the picture below. This provides an overview of the parts and the way they should be assembled. 084-0207-Cantire-8ft Trampoline Combo-GB-02.indd 6 11-11-9 4:11... - Page 7 Make sure that the locking tabs on the Vertical Leg Tubes (5, 10) go through the openings on the • T-shaped Joints (4) and connection tabs of the Top Rail Tubes (b) and (c). Locking 084-0207-Cantire-8ft Trampoline Combo-GB-02.indd 7 11-11-9 4:11...
- Page 8 Hang the Trampoline Mat (11) on the Top Rail Frame using the provided Springs (12). • Use the Spring Hook Tool (27) to pull and insert the Springs (12) into the openings on the Top Rail • Tubes (19, 20, 21). Sewn-in V-ring 084-0207-Cantire-8ft Trampoline Combo-GB-02.indd 8 11-11-9 4:11...
- Page 9 Connect all six Upper Supporting Poles (23) to the six Lower Supporting Poles (14). Make sure that the • locking tabs “click” into the openings of the Upper Supporting Poles (23). Note: All of the Supporting Poles come with pre-installed Pole Foams (22, 24). Opening Locking tab 084-0207-Cantire-8ft Trampoline Combo-GB-02.indd 9 11-11-9 4:11...
- Page 10 Spanner (not provided). The bottom end of the Foam Sleeve (25) should be at the same height level as the Top Rail Frame. Spacer Wrench Bolt Clamp U-shaped Bolt Locking Nut Lower Supporting Pole Vertical Leg 084-0207-Cantire-8ft Trampoline Combo-GB-02.indd 10 11-11-9 4:11...
- Page 11 Align the eyelets of the Enclosure Net (1) with the V-rings of the bed and untie one of the springs using • the hook tool. Note: It is essential to select the closest eyelet to its respective V-ring. Even small misalignments may cause problems with proper assembly. 084-0207-Cantire-8ft Trampoline Combo-GB-02.indd 11 11-11-9 4:12...
- Page 12 Step 12: Attaching the Frame Pad Place both Frame Pads (13) on the trampoline and tie them using the sewn-in straps. • Align the outer straps with each T-shaped Joint (4). • 084-0207-Cantire-8ft Trampoline Combo-GB-02.indd 12 11-11-9 4:12...
-
Page 13: Information On Trampoline Use
Remove all objects that might interfere with the jumper from the surroundings of the • trampoline. Pay attention to what is above, below and around the trampoline. When it is not in use, keep the trampoline secured to prevent it from being used without • supervision. 084-0207-Cantire-8ft Trampoline Combo-GB-02.indd 13 11-11-9 4:12... -
Page 14: Training With The Trampoline
• and forth between your hands and knees. Develop an even landing on all of the four points. Look slightly in front of your hands when landing. Push to • rebound to your feet. 084-0207-Cantire-8ft Trampoline Combo-GB-02.indd 14 11-11-9 4:12... - Page 15 When you bounce up, keep moving your shoulder in the • direction of the twist. During the twist, place your hands by your sides and hold • your body straight. After the twist, finish in the seat drop position. • 084-0207-Cantire-8ft Trampoline Combo-GB-02.indd 15 11-11-9 4:12...
-
Page 16: Cleaning And Care
For extended periods of disuse, disassemble the enclosure net and trampoline and store them in a • clean and dry place. TECHNICAL DATA 7 x 8' (221 x 244 cm) 249 lb (113 kg) 90 lb (41.1 084-0207-Cantire-8ft Trampoline Combo-GB-02.indd 16 11-11-9 4:12... -
Page 17: Limited Warranty
LIMITED WARRANTY This JumpTek product is guaranteed for one year from the date of original retail purchase against defects in materials and workmanship. Subject to the conditions and limitations described below, this product, if returned to us with proof of purchase within the stated warranty period and if covered under this warranty, will be repaired or replaced (with the same model, or one of equal value or discretion), at our option.
Need help?
Do you have a question about the 084-0207 and is the answer not in the manual?
Questions and answers
Need 2 tubes for 12 ft trampoline with the bend. Looks like 19 in the assembly picture Thank you
The 12 ft JumpTek trampoline with part number 084-0207 uses the following two Top Rail Tubes:
- Top Rail Tube (b), part number 20: Quantity required is 2
- Top Rail Tube (c), part number 21: Quantity required is 2
These are part of the frame assembly.
This answer is automatically generated
Hi, we recently moved and I can't find any of my screws and holds. I have all the large pieces and I have the springs. How can I get another box of the screws and bolts? Washers nuts and that stuff
To obtain a replacement box of screws, bolts, washers, and nuts for JumpTek part number 084-0207, you should call the toll-free number 1-866-567-4089 for assistance.
This answer is automatically generated