Advertisement
Table of Contents
Advertisement
Table of Contents

Related Manuals for Cuisinart Burr Mill DBM8U


Summary of Contents for Cuisinart Burr Mill DBM8U
- Page 1 Burr Mill DBM8U...
- Page 3 Congratulations on your purchase of the Cuisinart Burr Mill. For over 30 years Cuisinart’s aim has been to produce the very finest kitchen equipment. All Cuisinart products are engineered for exceptionally long life, and designed to be easy to use as well as to give excellent performance day after day.
-
Page 4: Table Of Contents
ontents Product Control Guide ..................... 5 Important Safety Cautions ....................6 Instructions for Use ......................8 A Preparing the Grinder ........................8 B Using the Grinder ..........................9 C Disassembling the Bean Hopper ....................9 Hints & Tips ........................10 Cleaning &... -
Page 5: Product Control Guide
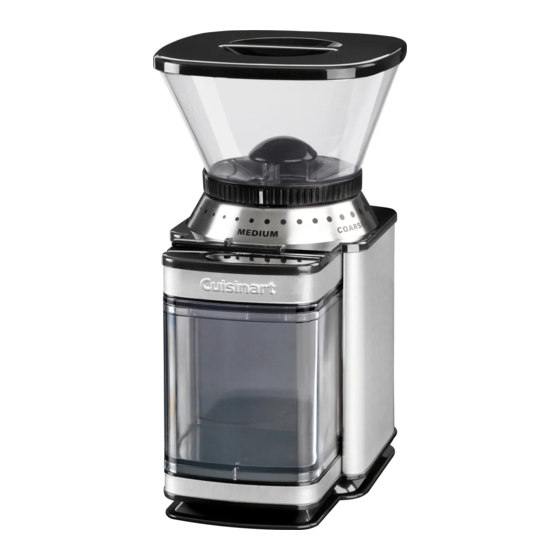
Product Control Guide Bean Hopper Lid Bean Hopper Burr Grinding Plates (not shown) 18 Position Grind Selector Cup Quantity Selector Start Button Housing Base Removable Grind Chamber with Lid Cord Wrap (not shown) -
Page 6: Important Safety Cautions
Do not use if damaged, or if the appliance has been dropped. In the event of damage, or if the appliance develops a fault, contact the Cuisinart Customer Care Line (see “UK After Sales Service” section). n Do not use this appliance if the lead is damaged. In the event of damage, discontinue use immediately. - Page 7 Do not use any attachments other than those recommended or sold by Cuisinart. n Do not touch moving parts whilst in use. n This product complies fully with all appropriate EU and UK legislation and the standards relevant to this type and class of appliance.
-
Page 8: Instructions For Use
Instructions for Use Preparing the Grinder Remove all packaging and plug the appliance into a suitable mains socket. Remove the bean hopper lid and ensure that the bean hopper is securely in place. Fill the bean hopper with beans, making sure that the lid closes securely (see figure 1). N.B. -
Page 9: B Using The Grinder
Slide the cup quantity selector to the desired number of cups, between 4 and 18. (see figure 3). Cup quantity selector Figure 3 Using the Grinder Press and release ‘START’ button to begin grinding. N.B. If the bean hopper and grind chamber are not properly in place, the grinder will not operate. -
Page 10: Hints & Tips
Hints & Tips The following table highlights the general grind settings required for basic types of coffee. As there are 6 settings per grind type, you will have to experiment with different grind settings to determine the right consistency to suit your taste. Grind Position Grind Result Coarse... -
Page 11: Guarantee & After Sales Service
Please contact the Conair Customer Care Line on 03702 406902 (09:00 to 17:00 Monday to Friday) or email support@cuisinart.co.uk for further information on authorised stockists. It is important to retain your proof of purchase. We recommend attaching your receipt to this page. - Page 12 For further advice on using the appliance or should you need to return your product, please contact the Conair Customer Care Line on 03702 406 902 (09:00 to 17:00 Monday to Friday) or email your enquiry to support@cuisinart.co.uk Return address:...
-
Page 13: Wiring Instructions
Safe Disposal The symbol on the product or on its packaging indicates that this product may not be treated as household waste. Instead it should be handed over to the applicable new logo collection point for the recycling of electrical and electronic equipment. By ensuring this product is disposed of correctly, you will help prevent potential negative consequences for the environment and human health, which could otherwise be caused by inappropriate waste handling of this product. - Page 16 IB-4/333J...
Need help?
Do you have a question about the Burr Mill DBM8U and is the answer not in the manual?
Questions and answers