Table of Contents
Advertisement
Quick Links
8 2 V CORDLESS BLOW ER
8 2 V CORDLESS BLOW ER
8 2 V CORDLESS BLOW ER
1 6 9 6 7 7 5 ( SX DBL8 2 )
1 6 9 6 7 7 5 ( SX DBL8 2 )
1 6 9 6 7 7 5 ( SX DBL8 2 )
TOLL-FREE HELPLINE: 1-800-317-7833
Read all saf ety rules and instructions caref ully bef ore operating this tool.
Ow ner' s Manual
w w w .snapper.com
Advertisement
Table of Contents

Related Manuals for Snapper SXDBL82


Summary of Contents for Snapper SXDBL82
- Page 1 1 6 9 6 7 7 5 ( SX DBL8 2 ) 1 6 9 6 7 7 5 ( SX DBL8 2 ) Ow ner’ s Manual TOLL-FREE HELPLINE: 1-800-317-7833 w w w .snapper.com Read all saf ety rules and instructions caref ully bef ore operating this tool.
-
Page 2: Table Of Contents
CONTENTS Contents ..........................2 ......................2 G eneral Saf ety Rules ......................3 Symbols ..........................6 K now Y our Blow er ........................ 8 Assembly ..........................9 ..................................................Operation ...........................1 1 ..................................................Battery & Charger Maintenance..................1 4 ......... -
Page 3: G Eneral Saf Ety Rules
G ENERAL SA F ET Y R U LES READ ALL INSTRUCTIONS BEFORE USING (THIS POWER TOOL) W A R N I N G Read and understand all instructions before using th is product. F ailure to f ollow all instructions listed belo may result in electric shoc , fire, and/or serious personal injury. - Page 4 G ENERAL SA F ET Y R U LES • Maintain tool w ith care. K eep f an area clean f or best and saf est perf ormance. F ollow instructions f or proper maintenance. • K eep all parts of your body aw ay f rom any moving parts and all hot surf aces of the unit. •...
- Page 5 G ENERAL SA F ET Y R U LES • Under extreme usage or temperature conditions, battery lea age may occur. If liquid comes in contact ith your s in, ash immediately ith soap and ater, then neutralize ith lemon juice or vinegar.
-
Page 6: Symbols
S Y MBOLS Some of the f ollow ing symbols may be used on this product. Please study them and learn their meaning. Proper interpretation of these symbols w ill allow you to operate the product better and saf er. SYMBOL NAME DESIGNATION/EXPLANATION... - Page 7 S Y MBOLS The f ollow ing signal w ords and meanings are intended to explain the levels of risk associated w ith this product. SYMBOL SIGNAL MEANING Indicates an imminently hazardous situation, w hich, if not DANGER avoided, ill result in death or serious injury. Indicates a potentially hazardous situation, w hich, if not Indicates a potentially hazardous situation, w hich, if not Indicates a potentially hazardous situation, w hich, if not...
-
Page 8: K Now Y Our Blow Er
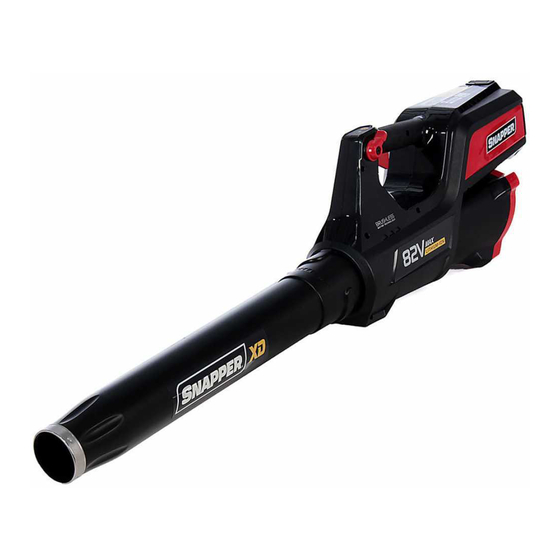
K NO W Y O U R BLO W ER Battery Release Button n/ ff Button Cruise Control Lever Blow er Tube 8 2 V Lithium- 8 2 V Lithium- 8 2 V Lithium- Ion Battery Ion Battery Ion Battery Trigger Trigger Trigger... -
Page 9: Assembly
1 6 9 6 7 7 5 ( SX DBL8 2 ) Ow ner’ s Manual Ow ner’ s Manual TOLL-FREE HELPLINE: 1-800-317-7833 w w w .snapper.com Read all saf ety rules and instructions caref ully bef ore operating this tool. - Page 10 ASSEMBL Y ASSEMBLING THE BLOWER TUBE( S e e F i g u r e 2 . W A R N I N G To prevent accidental starting that could cause serious personal injury, al ays remove the battery pack f rom the tool w hen assembling parts. 1 .
-
Page 11: Operation
OPERATION W A R N I N G Do not allow f amiliarity w ith this product to make you careless. Remember that a careless f raction of a second is sufficient to inflict serious injury. W A R N I N G Alw ays w ear eye protection w ith side shields marked to comply w ith ANSI Z 8 7 .1 , along w ith Alw ays w ear eye protection w ith side shields marked to comply w ith ANSI Z 8 7 .1 , along w ith Alw ays w ear eye protection w ith side shields marked to comply w ith ANSI Z 8 7 .1 , along w ith... - Page 12 OPERATION TO INSTALL/REMOVE BATTERY PACK ( S e e F i g u r e 3 . TO INSTALL • Align the ribs of the battery pack w ith the mounting slots in the blow er’ s battery port. • Insert the battery into the battery opening until the battery release button locks into place. TO REMOVE •...
- Page 13 OPERATION STARTING/STOPPING THE BLOWER ( S e e F i g u r e 4 . • Ensure that the battery is installed in the blow er. • To start the blo er, press the n/ ff Button located on the blo er. ou ill hear t o audible beeps signaling the blow er is active.
-
Page 14: Battery & Charger Maintenance
BATTERY & CH ARG ER MAINTENANCE CHARGING PROCEDURE N O T E : The battery is not shipped fully charged. t is recommended to fully charge before first u s e t o e n s u r e t h a t m a x i m u m r u n t i m e c a n b e a c h i e v e d . - Page 15 BATTERY & CH ARG ER MAINTENANCE CHARGER MOUNTING This charger can be installed hanging on a w all using tw o # 8 screw s ( not included) . Locate the placement f or the charger to be w all mounted. If f astening to w ood studs use 2 w ood screw s ( not included) .
-
Page 16: Maintenance
MAINTENANCE W A R N I N G In order to avoid personal injury and the ris of fire and electric shoc , remove the battery pac before adjusting, inspecting, or cleaning the blo er. Cleaning Remove the battery pack. 1 . -
Page 17: Environmentally Saf E Battery Disposal
ENV IRONMENTALLY SAF E BATTERY DISPOSAL The f ollow ing toxic and corrosive materials are in the batteries used in this blow er battery pack: Lith ium-Ion, a toxic material. W A R N I N G All toxic materials must be disposed of in a specified manner to prevent contamination of the All toxic materials must be disposed of in a specified manner to prevent contamination of the All toxic materials must be disposed of in a specified manner to prevent contamination of the environment. -
Page 18: Troubleshooting
TRO U BLES H OOTIN G PROBLEM POSSIBLE CAUSE SOLUTION Motor f ails to start Battery is not secure. Ensure that the battery is f ully secured in w hen sw itch trigger the blow er. Ref er to Installing the Battery is depressed. - Page 19 This arranty is effective for and is subject to the time periods and conditions stated belo . or arranty service, find the nearest Authorized Service Dealer in our dealer locator map at SNAPPER.com. The purchaser must contact the Authorized Service Dealer, and then make the product available to the Authorized Service Dealer f or inspection and testing.
- Page 20 LIMITED W ARRANTY ABOUT YOUR WARRANTY W arranty service is available only through Snapper Authorized Service Dealers. This w arranty covers only def ects in materials or w orkmanship. It does not cover damage caused by improper use or abuse, improper maintenance or repair, normal w ear and tear, or stale or unapproved f uel.
- Page 21 Briggs & Stratton Power Products Group, LLC P.O. Box 702 Milwaukee, WI 53201 TOLL-FREE HELPLINE: 1-800-317-7833 3 8 8 0 1 1 9 4 7 Rev: 0 0 ( 0 7 - 2 8 - 1 6 )
Need help?
Do you have a question about the SXDBL82 and is the answer not in the manual?
Questions and answers