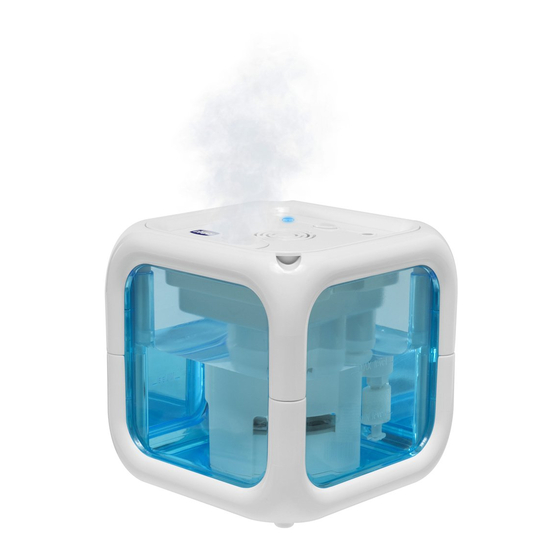
Chicco Humi3 Manual
Cold humidifier
Hide thumbs
Also See for Humi3:
- Manual (60 pages) ,
- Instructions for use manual (60 pages) ,
- Instructions manual (100 pages)
Table of Contents
Advertisement
Available languages
Available languages
Quick Links
Advertisement
Table of Contents

Related Manuals for Chicco Humi3


Summary of Contents for Chicco Humi3
- Page 1 Umidificatore a freddo Humi Cold Humidifier Humidificador frío Humidificador a frio Humidificateur à froid Kalt-Luftbefeuchter Koudeluchtbevochtiger Κρύος υγραντήρας Soğuk yöntemle nemlendirici Увлажнитель воздуха холодного типа...
- Page 2 Fig. A...
- Page 3 Fig. B Fig. D Fig. C Fig. E...
- Page 4 Chicco hy- grometer and compare them with the values tor label corresponds to the mains’ voltage shown in the following chart.
- Page 5 wet due to the accumulation of nebulised water. adaptor and relative power cable out of reach of children. side of the appliance with cloths or any other - Never submerge the appliance in water or object. Warning! Obstructing the air vents any other liquid.
-
Page 6: Safety And Maintenance
(<5°C). Warning!! DC mains adaptor (7) cable under carpets or Never add any salt, aromatic oils or anything close to radiators, or gas and/or electrical else to the water contained in the tank, as the heaters. appliance could be damaged permanently. or extension wires. - Page 7 ter cleaning. of the nebulising unit (transducer) (6); if this should happen, have it checked by a retailer vent. or qualified technician before using it. of the nebulising unit; if this should happen, have it checked by a retailer or qualified tech- ols.
-
Page 8: Troubleshooting
TROUBLE SHOOTING Problem Solution If the humidifier does not work Check that the AC/DC main adaptor (7) cable plug is cor- rectly connected to the mains adaptor connecter (3) and that the e AC/DC mains adaptor (7) is plugged into the mains socket Check that the ON/OFF switch (2) is in the ON (I) position. - Page 9 Pour le bien-être de l’enfant, avant d’allumer de doute, ne pas utiliser l’appareil et s’adres- l’humidificateur, contrôler attentivement la ser exclusivement au personnel technique- chets en plastique, boîtes, cartons, etc.) hors comparant à l’aide d’un hygromètre Chicco. 40-60%. 60-70% rhinite… 35 - 50% faces planes et stables non accessibles aux enfants.
- Page 10 l’appareil à une hauteur d’au moins 70 -100 sivement par du personnel techniquement cm du sol. le respect de certaines règles fondamentales: Durant le fonctionnement normal de l’appa- - Ne jamais toucher l’appareil avec les mains vapeur. de courant chiffons et des objets divers. Attention ! Leur obstruction pourrait provoquer la surchauffe seau (7) loin des sources de chaleur - Ne jamais plonger l’appareil dans l’eau ou...
- Page 11 seau AC/DC (7). tretien sur l’humidificateur s’il fonctionne ou viron 70 -100 cm du sol en respectant les “Avertissements” au AC/DC (7) au connecteur de l’adaptateur de Allumer l’appareil en appuyant sur l’interrup- liseur (transducteur) (6) de l’humidificateur teur (2) – position “I”; le voyant lumineux bleu et s’assurer qu’il soit correctement posi- s’allumera pour signaler que l’appareil est en sortir du conduit de sortie (4)
- Page 12 suivantes : ient se former plus ou moins rapidement en points de prise (8) de l’humidificateur. est dure, plus la formation d’incrustations est rapide. Les incrustations diminuent les prestations de l’appareil et pourraient empêcher son fon- ment l’eau. sus, nous recommandons, au moins une fois (6).
-
Page 13: Problemes Et Solutions
DC (7) à la prise de courant. lant l’allumage de l’appareil (1) est d’eau ou sur le transducteur. heures. CARACTERISTIQUES TECHNIQUES Déclaration CE de conformité : appareil humidificateur de marque Chicco Mod. UM550 essentielles et aux autres dispositions per- 50/60Hz 0,5A ˜...
Need help?
Do you have a question about the Humi3 and is the answer not in the manual?
Questions and answers