Table of Contents
Advertisement
Advertisement
Table of Contents

Summary of Contents for Pyronix LIGHTCAMERA
- Page 1 LIGHTCAMERA USER GUIDE Document SAP: 102028109-01...
- Page 2 LIGHTCAMERA USER GUIDE...
-
Page 3: Table Of Contents
Light settings Adjust brightness Light linkage Notifications Enabling and disabling notifications Push notification scheduling Draw motion detection area Motion detection sensitivity LightCamera sound mode Network signal Storage status Initialising memory card Device version Image and video encryption Maintenance Cleaning FAQs... -
Page 4: Camera Overview
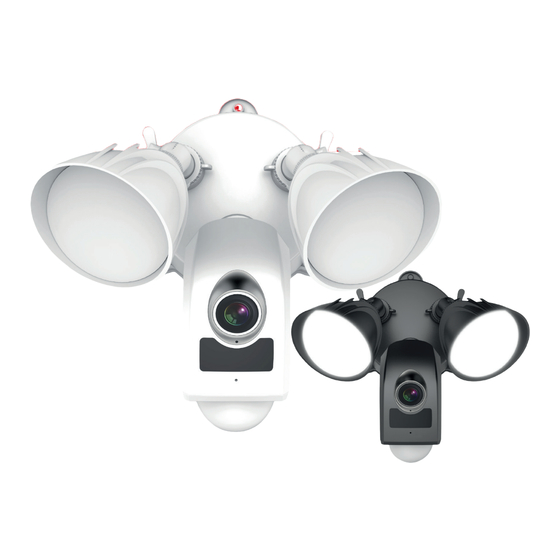
CAMERA OVERVIEW SIDE VIEW Flood lights MicroSD card and reset button (behind closed door) Camera details sticker (serial number and veri cation code) PIR sensor FRONT VIEW Flood lights Camera lens Infrared light Microphone PIR sensor LIGHTCAMERA USER GUIDE... -
Page 5: Procontrol+ Main Screen
Please note: Some features such as manually activating the flood lights and siren are not available for secondary users (have had the camera shared to them). The same login details must be used by multiple users to gain access to these features. LIGHTCAMERA USER GUIDE... -
Page 6: Camera Live Stream Control Overview
CAMERA LIVE STREAM CONTROL OVERVIEW Activate siren and flood lights Flood light control Image quality selection Two way talk Zoom Snapshot Record Pause stream Alarm output (not available on the LightCamera) Image flip LIGHTCAMERA USER GUIDE... -
Page 7: Features
IMAGE QUALITY The quality of the live stream can be changed on the LightCamera. The options are Standard, HD and Ultra HD. Please note: The higher the image quality, the more data it will use when live streaming and will take up more space when saving recordings to the memory card (if inserted). -
Page 8: Two Way Talk
TWO WAY TALK The LightCamera has an inbuilt speaker and microphone allowing for two way talk. This allows a conversation between a person at the LightCamera and someone communicating to them through the smart device application. To start the two way talk feature, press the microphone icon (pictured left). -
Page 9: Zoom
If the image is clicked, it will open up the folder containing all the saved images and clips. To view any of the images or clips, tap the desired thumbnail. To return to live view, select the ‹ icon in the top left corner. LIGHTCAMERA USER GUIDE... -
Page 10: Record Stream
This will resume the live stream. Whilst paused, the ‘play icon’ will also appear in a circle in the centre of the stream image window. This can also be tapped to return to the live feed. LIGHTCAMERA USER GUIDE... -
Page 11: Alarm Output
Network signal Displays the strength of the signal between the LightCamera and the wireless router. Configure network This is used to re-connect the LightCamera to the wireless network or connect the LightCamera to a new network. Storage status Initialises the MicroSD memory cards to use with the device. -
Page 12: Advanced Settings Configuration
Blue areas are still tap the ‘Light Linkage flood lights to illuminate. active. Area Settings’ . Please note: This section defines the area that causes the PIR sensor to trigger the flood lights. LIGHTCAMERA USER GUIDE... -
Page 13: Notifications
For example, to start at 8 in the evening and finish at 8 in the morning, two timers must be set. One at 20:00 till 11:59 and one at 00:00 whilst 08:00. Please note: The time frames (shown in blue) scheduled will be the periods when notifications will be delivered. LIGHTCAMERA USER GUIDE... - Page 14 Select ‘Disable’ . on the schedule. If the notifications are scheduled should be enabled at the time of configuring the schedule, leave the notifications slider enabled and the schedule will automatically switch it off at the relevant programmed time. LIGHTCAMERA USER GUIDE...
-
Page 15: Draw Motion Detection Area
DRAW MOTION DETECTION AREA Video analytics The LightCamera utilises video analysis and can apply this technology to determine movement in the scene it is viewing. The scene is divided into segments creating smaller scenes within the overall image. The camera analyses... -
Page 16: Lightcamera Sound Mode
-61 to -70 dBm < -71dBm The signal strength between the LightCamera and the router is displayed in dBm (decibel-milliwatts). As it is displayed in negative numbers, bear in mind that -30dBm is a stronger signal than -60dBm. Please note: Typically, the LightCamera will work in the ‘Fair’ category, however we recommend that the LightCamera is only installed in either ‘Excellent’... -
Page 17: Device Version
DEVICE VERSION As well as displaying the firmware that the LightCamera is currently operating on, this option will also display if there is a new version of firmware for the device. To update, just tap this option and the device will update the firmware ‘over-the-air’ . -
Page 18: Faqs
“Enabling and disabling notifications” on page 13 Can the camera be added to a NVR or DVR? Yes, the camera can be added to a Pyronix/Hikvision NVR. It can also be added to a Pyronix/Hikvision DVR if the DVR has IP video channels available. - Page 19 If the verification code has not been copied over or the sticker has not been affixed next to this section, there is no way to retrieve the code. “Camera details” on page iii “Camera Overview” on page 4 LIGHTCAMERA USER GUIDE...
Need help?
Do you have a question about the LIGHTCAMERA and is the answer not in the manual?
Questions and answers