Advertisement
Table of Contents
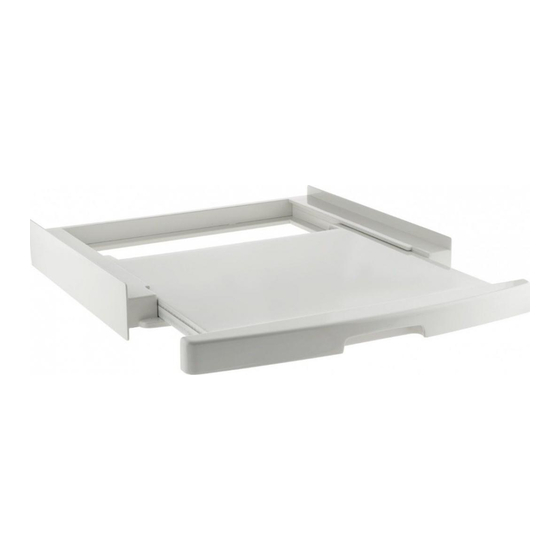
STACKING KIT 'STANDARD SIZE' WITH SLIDING SHELF
ASSEMBLY INSTRUCTIONS
- ISTRUZIONI DI MONTAGGIO - INSTRUCTIONS DE
MONTAGE - MONTAGEANLEITUNGEN - INSTRUCCIONES DE MONTAJE - INSTRUÇÕES
DE MONTAGEM -
-
-
MONTÁ NÍ NÁVOD -
-
MONTAGE-INSTRUCTIES -
INSTRUKCJE MONTA U - KOKOAMISOHJEET - MONTERINGSINSTRUKTIONER -
MONTERINGSVEJLEDNING - MONTERINGSANVISNING - MONTAJ TAL MATLARI - UPUTSTVA ZA
MONTA U ÖSSZESZERELÉSI UTASÍTÁSOK -
-
NAVODILA ZA MONTA O - UPUTE ZA
SASTAVLJANJE NÁVOD NA MONTÁ -
-
INSTRUC IUNI DE ASAMBLARE -
x 2
NOT INCLUDED
x 1
x 8
10mm
x 4
x 1
1
x 2
x 1
2
6 0
- 6 2
c m
4 7
c m
x 4
Advertisement
Table of Contents

Related Manuals for Candy WSK1110U


Summary of Contents for Candy WSK1110U
- Page 1 STACKING KIT ‘STANDARD SIZE’ WITH SLIDING SHELF ASSEMBLY INSTRUCTIONS - ISTRUZIONI DI MONTAGGIO - INSTRUCTIONS DE MONTAGE - MONTAGEANLEITUNGEN - INSTRUCCIONES DE MONTAJE - INSTRUÇÕES DE MONTAGEM - MONTÁ NÍ NÁVOD - MONTAGE-INSTRUCTIES - INSTRUKCJE MONTA U - KOKOAMISOHJEET - MONTERINGSINSTRUKTIONER - MONTERINGSVEJLEDNING - MONTERINGSANVISNING - MONTAJ TAL MATLARI - UPUTSTVA ZA MONTA U ÖSSZESZERELÉSI UTASÍTÁSOK - NAVODILA ZA MONTA O - UPUTE ZA...
- Page 2 EN: Place the Kit on the washing machine (fig.3) and check that it is straight using a spirit level (fig.4), adjusting the feet if necessary. IT: Posizionare il Kit sopra la lavatrice (fig.3) e verificare che sia in piano usando una livella (fig.4). Agire sui piedini perché questo avvenga.
- Page 3 5 c m - 5 c 5 c m - 5 c 5 c m...
- Page 4 EN: Use a spirit level and measuring tape to pin point the holes for the eyelet screws on the wall, observing the measurements indicated in fig.5-6. Fasten the straps between the Kit and the eyelets on the wall (fig.7). IT: Utilizzare la livella e un metro per marcare sul muro i fori per le viti ad occhiello, rispettando le misure indicate nelle fig.5-6. Fissare le fascette tra il Kit e l’occhiello a muro (fig.7).
- Page 5 EN: Reduce the height of the dryer’s feet to a minimum (fig.8). Fasten the rubber stands to the kit in line with the dryer’s feet (fig.9). If the feet are positioned other than as shown in fig.9, remove them and rest the dryer directly on the rubber stands. Stack the dryer, aligning the front with that of the washing machine (fig.10).
- Page 6 posición de los pies es diferente de la mostrada en la fig.9 retirarlos apoyando la secadora directamente sobre las gomas. Superponer la secadora respetando la alineación frontal con la lavadora (fig.10). PT: Reduza a altura dos pés da máquina de secar para um mínimo (fig.8). Aperte os suportes de borracha no kit alinhados com os pés da máquina de secar (fig.9).
- Page 7 ST A RT ST O P ST A RT ST O P EN: Insert the buckle into the belt and wrap it around the column (fig.11), placing the belt at the centre of the dryer. Apply the sticker as in fig.12A, with the START line aligned with the final section of the belt. Tighten the belt as far as the STOP line on the sticker, to ensure optimal tension (min.30kg) (fig.12B).
- Page 8 Застебніть ремінь пряжкою (мал. 12C). NL: Steek de gesp in de riem en omwikkel de zuil (afb. 11) met de riem in het midden van de droger. Breng de sticker aan zoals op afb. 12A met de START-lijn uitgelijnd met het laatste stukje van de riem. Trek de riem met kracht tot aan de STOP op de sticker om de optimale spanning te garanderen (min.30kg) (afb.
Need help?
Do you have a question about the WSK1110U and is the answer not in the manual?
Questions and answers