Advertisement
Quick Links
Pulse Oximeter
Instruction for Use
1. Introduction
1.1
Intended use
This Pulse Oximeter is intended to be used for measuring,
displaying and storing of pulse oxygen saturation (SpO
pulse rate of adults in home or healthcare facilities
environment.
1.2
Contraindications
No contraindications.
1.3
Warnings and Cautions
DO NOT squeeze the sensor part or apply excessive
force on it.
Do not use this device during MRI examination.
Do not use this device with a defibrillator.
Do not store the device in the following locations:
locations in which the device is exposed to direct
sunlight,
lint,dust,high
temperatures
or
moisture, or heavy contamination; locations near to
sources of water or fire; or locations that are subject to
strong electromagnetic influences.
Do not use the device in a combustible environment
(i.e., oxygen-enriched environment).
Never submerge the device in water or other liquids.
Do not clean the device with acetone or other volatile
solutions.
Do not drop this device or subject it to strong impact.
The device and accessories are provided non-sterile.
Do not place this device in pressure vessels or gas
sterilization device.
Do not dismantle the device, as this could cause
damage or malfunctions or impede the operation of the
device.
Consult your doctor immediately if you experience
symptoms that could indicate acute disease.
Do not self-diagnose or self-medicate on the basis of
this device without consulting your doctor. In particular,
do not start taking any new medication or change the
type and/or dosage of any existing medication without
prior approval.
Use only cables, sensors and other accessories
specified in this manual.
Prolonged continuous monitoring may increase the risk
of undesirable changes in skin characteristics, such as
irritation, reddening, blistering or burns.
Do not open the device cover without authorization.
The cover should only be opened by a qualified service
personnel.
The biocompatibility testing has been performed on the
materials in contact with the person in accordance with
ISO10993.
Do not place the SpO
probe on a finger with edema or
2
fragile tissue.
Check the SpO
sensor and cable before use. Do not
2
use a damaged SpO
sensor.
2
Check the SpO
sensor application site every 6-8 hours
2
to determine the positioning of the sensor and the
circulation and skin sensitivity of the patient. Patient
sensitivity varies depending on medical status or skin
condition. For patients with poor peripheral blood
circulation or sensitive skin, inspect the sensor site
),
2
more frequently.
The functional tester cannot be used to assess the
accuracy of the SpO
sensor or a device.
2
The device has no alarm system.
Continuous use for a long time may cause allergies,
redness, blistering or burns. Check the wearing
position every 6-8 hours.
The local laws and regulations should be followed
when disposing of the device and accessories.
Do not maintain the device while it is charging.
Please keep the cable away from children. It can cause
strangulation.
Keep the device out of reach of pets, pests and
children.
The PULSE OXIMETER EQUIPMENT is calibrated to
display FUNCTIONAL OXYGEN SATURATION.
levels
of
1.4
Guide to Symbols
Symbol
Description
Type BF-Applied Part
Manufacturer
Date of manufacture
Authorized Representative in the
European Community
Follow Instructions for Use.
MRI unsafe. Presents hazards in all MR
environments as device contains strongly
ferromagnetic materials.
Protected against spraying water and
IP22
against access to hazardous parts with a
tool, per IEC60529.
SN
Serial number
No alarm system
Temperature limitation
Humidity limitation
Atmospheric pressure limitation
Indicate separate collection for electrical
and electronic equipment (WEEE).
1.5
Unpacking
Device
User Manual
Charging Cable
2
Overview
Name:Pulse Oximeter
Model: PO6,PO6A
Model and Configuration see the table below.
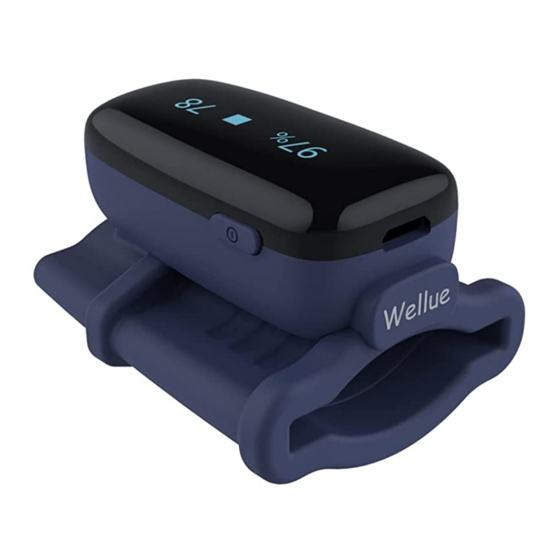
Appearance
No.
Model
color
1
PO6
Blue
2
PO6A
Gray
3
Using the Device
3.1
Charging
Use the USB cable to charge the product. Connect
the USB cable to a USB charger or to the PC.
There will be a battery logo flash on the device
when charging.When the battery is low,the display
screen will display a low power prompt.
A fully charge will need 2-3 hours. After fully
charged, the device will power off automatically.
Note: The device cannot be used during charging,
and if choosing a third party charging adaptor
(Class II), select one that complies with IEC60950
or IEC60601-1.
3.2
POWER ON/OFF
POWER ON:
Wear the device, it will turn on automatically.
POWER OFF:
The device turns off automatically in a moment
after you take off the sensor.
3.3
Typical steps
1)
START. Charge the battery. Wear the device
to power on.
2)
STOP. Take off the device, the recording will
be over after the countdown.
3)
DATA Uploading. Run your phone to download data.
3.4
Start working
1)
Wear the device on
index finger. Try to
move the device along the forefinger to find
out a best fit. Avoid being loose. Loose
wearing causes inaccurate measure.
2)
Device will turn on automatically. After a few
seconds, the device will begin to work.
Notice:
If the working time is less than 2 minute, the
data will not be saved.
Please avoid excessive motion.
Please avoid strong ambient light condition.
SpO
measurement principle:
2
The Pulse Oxiemter is a lightweight, portable
health oximeter for use in the home or in
healthcare
facilities.
SpO2
measurement
technology is based on developed photoelectron
method, the circuit design and calculation software
was developed by Shenzhen Viatom Technology
Co., Ltd. The SpO2 sensor receives the optical
signal from the red light and infra-red light through
the finger. Insert the finger into the oximeter, there
Advertisement

Related Manuals for Wellue PO6


Summary of Contents for Wellue PO6
- Page 1 The device has no alarm system. Continuous use for a long time may cause allergies, Model: PO6,PO6A Contraindications STOP. Take off the device, the recording will redness, blistering or burns. Check the wearing Model and Configuration see the table below.
- Page 2 Troubleshooting data averaging are two emitting tube (red light diodes and infrared after it’s turned on. time diodes) located on the inner upside of the sensor To establish a Bluetooth connection, Problem Possible Cause Possible Solution data update and they can emit red light and infrared; There is keep the device Bluetooth enabled.
- Page 3 -Increase the separation between the equipment and receiver. -Connect the equipment into an outlet on a circuit different from that to which the receiver is connected. Model: PO6、PO6A -Consult the dealer or an experienced radio/TV technician for Version: A help.