ADS Technologies USBAV-701 User Manual
Ads technologies usbav-701 video capture: users guide
Hide thumbs
Also See for USBAV-701:
- Install manual (13 pages) ,
- Reference manual (5 pages) ,
- Quick tips (4 pages)

Subscribe to Our Youtube Channel
Related Manuals for ADS Technologies USBAV-701


Summary of Contents for ADS Technologies USBAV-701
-
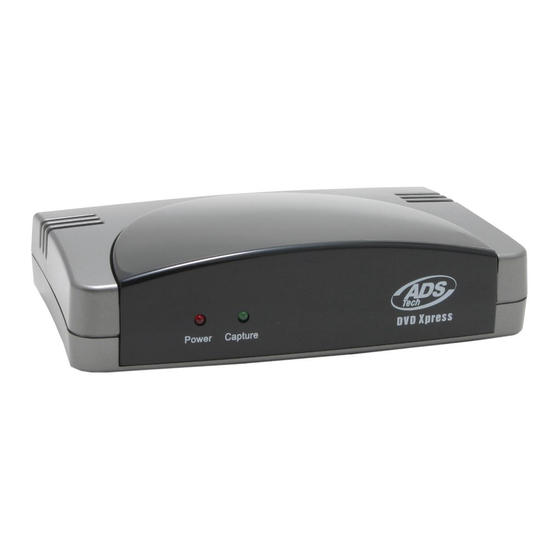
Page 1: Dvd Xpress
DVD Xpress: English Manual Save Your Memories To CD or DVD User's Guide Second Edition... -
Page 2: Table Of Contents
8. Installation Summary...13 9. Start Making DVD Movies ...13 DVD Xpress Capture Wizard ...13 Using Capture Wizard Video Capture/Playback tool for the first time: ...15 CapWiz Direct to Disc ...18 Direct to Disc Wizard Overview...18 Direct to Disc Wizard Instructions ...19 Menu Options...25... -
Page 3: Copyright Notice
The information furnished within this written document is for information pur- poses only and is subject to change without notice. ADS Technologies assumes no responsibility or liability for any errors or inaccuracies that may appear herein. -
Page 4: Ways To Capture And Edit Video
Ways to Capture and Edit Video DVD Movie Factory 3 CapWiz: EASY VIDEO CAPTURE & PLAYBACK This is the fastest and easiest way to capture MPEG-1 (VCD) or MPEG-2 (SVCD, DVD) video on your PC. Use the Wizard screens to verify your video connections, video compression format and where you want your video files stored on your computer hard drive. -
Page 5: Dvd Xpress Installation Guide
DVD Xpress Installation Guide System Requirements Getting Started - Intel® Pentium® III 800 MHz or higher or AMD The basic steps are: Athlon/ Duron CPU* 1. Check DVD Xpress package contents - Windows: Win98SE, WinME, Win2000 or WinXP 2. Wire it Up!- Audio and video connections - 128 MB RAM 3. -
Page 6: Install Device Drivers And Software
2. Wire It Up! In this section we will connect audio and video cables that you will use to capture audio and video and then send audio and video back to a TV or VCR for viewing or recording. 1. Connect your video source (VHS, DVD, Laser Disc Player, TV. etc.) to your DVD Xpress. Connect your (D) 6 ft. -
Page 7: Optimize System For Best Performance
PC without learning how to edit video or author a DVD. Use the Capture Wizard application to test video capture and playback of video before moving on to DVD Movie Factory 3 SE. We have created a simple getting started Wizard that allows you to verify your connections and make the proper setup choices before capturing video. -
Page 8: Using Capture Wizard Video Capture/Playback Tool For The First Time
Capture Wizard interface. DVD Xpress Page 14 Using Capture Wizard Video Capture/Playback tool for the first time: You have just completed the Wizard screens to ensure that you have connected your video cables, selected your video format and now you are ready to capture video. - Page 9 3. To Stop recording, Click the “Stop” ( ■ ) button or the “esc” key on your keyboard. 4. The video will be displayed in the resolution you selected for the video capture: 352 x 240 NTSC / 352 x 288 PAL...
-
Page 10: Direct To Disc Wizard Instructions
Single Session means that once you have recorded to the disc, the disc cannot be appended or added to. You can record only one time to a disc, one home movie one video capture session. You can only record video to a blank disc. -
Page 11: Splash Screen
Clicking the Direct to Disc button launches the Direct to Disc (DTD) Wizard. The DTD Wizard can be launched while CapWiz is idle (no video preview) or wheil video is being previewed. You cannot start the DTD Wizard while you are recording to the hard drive or if you are playing back a previously re- corded video file. - Page 12 DTD Wizard Step 2: In step 2 you customize your video disc with Movie and video clip titles, set video capture duration times, auto chapter timing points and back ground template. Background Template: You can select from several background templates. CapWiz 3.5 includes a dozen templates to choose from.
-
Page 13: Video Inputs/Outputs
MPEG-1 – When MPEG-1 is selected the only video resolution allowed is 352 x 240 (NTSC) or 352 x 288 (PAL), however you can select video capture bit rates from 1 Mb/sec. up to 15 Mb/sec. MPEG-2 – You can select any Video capture resolution and any video capture rate from 1 Mb/sec. to 15 Mb/sec. DVD Xpress Page 25 USB 1.1... - Page 14 Video Bit Rate: You will notice that you have the ability to select a video capture rate of up to 15 Mb/sec. You will also notice that any bit rate over 9 Mb/sec. is red in color. This is because any bit rate above 9 Mb/sec. is not supported by DVD players and DVD burners.
-
Page 15: Help
Disable Screen Saver during recording If you are doing a long capture you may want to disable your screen saver. Sometimes, depending upon the graphics card you are using, a screensaver, can disrupt the video capture. Record Duration You can set a time limit for your recording. If you know you want to record for exactly 1 hour, you can set the record duration, hours, minutes and seconds exactly. -
Page 16: Dvd Moviefactory 3
This is an abridged version of the DVD MovieFactory 3 User Guide. It's contents have been customized for use with DVD Xpress. The full edition of the DVD MovieFactory 3 User Guide, which is in the Adobe Acrobat PDF file format, can be found on the DVD Xpress CD by browsing the ULEAD Software folder. -
Page 17: What's New
• 128MB of RAM (256MB RAM or higher recommended) • 200MB of available hard disk space for program installation • 4GB or more of hard disk space for video capture and editing • Windows-compatible display with at least 800x600 resolution •... -
Page 18: Dvd Moviefactory Launcher
DVD MovieFactory launcher The DVD MovieFactory launcher serves as a control panel where you can find the tasks you’ll need for disc-authoring. Clicking a task icon will launch the program module associated with it. Note: Opening previously created project files from outside DVD MovieFactory launcher will automatically launch the associated program. -
Page 19: Print Disc Label
Erase Disc Erases the contents of a disc. Print Disc Label Launches the Print Disc Label dialog box where you can create and print disc labels and covers for your discs. See "Print Disc Label" for more details. Note: You could also run the EXE files of program modules to open them without using the DVD MovieFactory launcher. - Page 20 Manually select the Video Capture Plug-in for DVD Xpress 1) Be sure that the Video format and capture folder dialog (as shown) is visible on the Video Capture Window. If not, click the button to make this dialog appear.
-
Page 21: Edit Media
Now DVD Movie Factory will use the DVD Xpress as the selected video capture device. Select Video settings; video quality and resolution: 1) Click Advanced Settings 2) Select MPEG Settings and the properties dialog box will appear. 3) In this settings box you can select the video source (RCA or S-Video) video bit rate(quality), audio format and frequency, video resolution, and video format (NTSC, PAL or Secam). -
Page 22: Project Settings
• VCD player compliant Select to make sure that the VCD created will play in stand-alone VCD players. • Applying anti-flickering filter Select to apply the anti-flickering filter to the menu pages. The anti-flickering filter reduces the flickering that happens when using a television to view the menu pages. However, this does not help when the menu page is viewed on progressive scan devices such as computer monitors or projectors. -
Page 23: Edit Media
Edit Media After importing the media files into your project, you can now edit the content using DVD MovieFactory’s edit tools. Trimming a video You can trim a video using the Jog Bar, mark-in/out, and navigation controls. Trimming allows you to modify the length of the video according to your needs. To trim video: 1. -
Page 24: The Audio Tab
Options for the Effect tab • Auto Add Transition Effects Click to automatically add transition effects based on the scene changes or chapters of a video title. • Add effect only between joint videos Select to automatically insert transition effects in between videos that are joined together. -
Page 25: Editing A Slideshow
To add audio: 1. In the Audio tab, click Add Audio to locate the audio file you want to add. You can only add one audio file per video. 2. To add a voice annotation to your video, drag the Jog Bar or use the playback controls to move between frames in the video. -
Page 26: Setup Menus
Setup menus Create main menus and submenus in this step. These menus allow the viewers to instantly access specific portions of your video. DVD MovieFactory offers a set of menu templates to best fit the purpose of each menu. Custom-made menus are also easily created. -
Page 27: Preview
To create your own menu template: 1. Click Customize in the Edit Menu page to open the Customize Menu dialog box. 2. Select a menu template to modify in Customize template. 3. Double-click the thumbnail of the Layout, Scene Frame, or Navigation Button that you want to use. 4. -
Page 28: Options For Output
Output This is the final step in disc-authoring process. Choose the disc burner and/or select the folder where you want to output video files or a disc image file in this step. To burn your project onto a DVD: 1. Select Record to disc and specify the recording format. 2. - Page 29 • Required/Available DVD folder space Displays the space needed to save the DVD folders and the space available in the hard drive. • Required/Available disc image file space Displays the space needed to save the disc image file and the space available in the hard drive.
-
Page 30: Direct To Disc
Direct to Disc Direct to Disc provides you with a fast way to capture videos from a video device (such as DV camcorder, VCR, or TV) through an analog or IEEE-1394 (FireWire) interface card, and then burn them directly onto a video disc. -
Page 31: Dvd Xpress
8. Select the menu template and click Background Image or Background Music to add background image and music. Click OK. 9. Click Create Chapter to automatically add chapters with a specific time interval. 10.Select the desired output format in Format. Select Customize to open the Video and Audio Capture Property Settings dialog box where you can adjust the settings for your captured video. -
Page 32: Service And Warranty
ADS Technologies, Inc. product or inability to use the product, even if the dealer or ADS Technologies, Inc. has been advised of such liability or other claims. -
Page 33: Technical Support
If you have any problems or questions on this product, please call : Technical Support 562.926.4338 North America Support Hours: M-F : 7 am - 6 pm, PST website : www.adstech.com European Technical Support: +353.61.702042 ADS Tech North America Office 12627 Hidden Creek Way Cerritos, CA, 90703 Phone: 562.926.1928...
Need help?
Do you have a question about the USBAV-701 and is the answer not in the manual?
Questions and answers