Advertisement
Quick Links
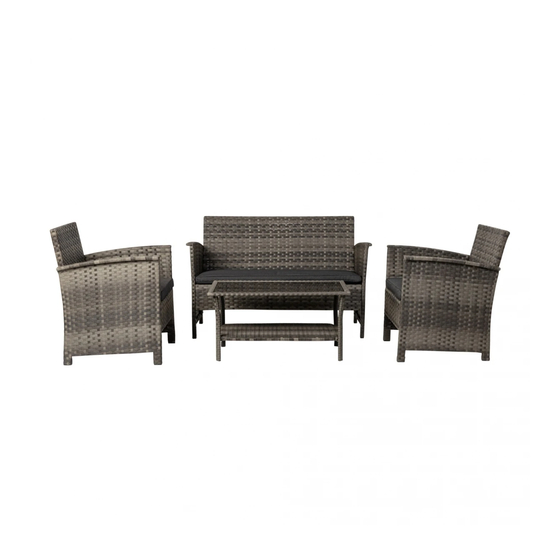
Jareth Patio Set
Item#: 63177
aTTach Your
rEcEiPT hErE
Keep a copy of your proof of
purchase or order confirmation
which will be needed if you need to
contact us about warranty coverage.
Purchase Date:
Questions, problems, missing parts?
Before returning to your retailer, our exceptional customer service is available.
Call toll-free
Email
Live chat
(866)
866) 985-7877
cservice@welltraveled.net
www.balkenehome.com
SavE ThESE
inSTrucTionS For
FuTurE rEFErEncE.
9 a.m. – 9 p.m., EST
9 a.m. – 6 p.m., EST, Monday - Friday
05132020
Advertisement

Related Manuals for Balkene Home Jareth 63177


Summary of Contents for Balkene Home Jareth 63177
- Page 1 Jareth Patio Set Item#: 63177 aTTach Your SavE ThESE rEcEiPT hErE inSTrucTionS For FuTurE rEFErEncE. Keep a copy of your proof of purchase or order confirmation which will be needed if you need to contact us about warranty coverage. Purchase Date: Questions, problems, missing parts? Before returning to your retailer, our exceptional customer service is available.
-
Page 2: Before You Begin
INFORMATION BEFORE YOU BEGIN Before beginning assembly, make sure all parts are present. Compare parts received with the parts list. If any part is missing or damaged, do NOT attempt to assemble the product. Please read and understand this entire manual before attempting to assemble, operate or install this product. - Page 3 PACKAGE CONTENTS: CHAIRS ParT DEScriPTion QuanTiTY Left* Side Panel Right* Side Panel Seat Panel Back Panel Seat Cushion *When facing the front of the chair harDWarE conTEnTS Washer M6x25 Bolt M6x35 Bolt Qty: 100 Qty: 4 Qty: 6 Hex Key Assemble in a clear area on a spacious, nonabrasive surface such as a carpet or blanket.
- Page 4 ASSEMBLY: CHAIRS Locate the Right Side Panel and Seat Panel . Place a Washer on each of 3 Bolts . Align the panels as shown. Insert each Bolt with Washer through the eyelets in the Seat Panel and into the holes in the edge of the Right Side Panel.
- Page 5 ASSEMBLY: CHAIRS Place a Washer on each of 3 Bolts . To attach the Left Side Panel to the Seat Panel , insert a Bolt with Washer into the 3 aligned sets of eyelets. Tighten Bolts using the Hex Key, but do not over- tighten.
- Page 6 PACKAGE CONTENTS: BENCH ParT DEScriPTion QuanTiTY Left* Side Panel Right* Side Panel Seat Panel Back Panel Seat Cushion *When facing the front of the sofa harDWarE conTEnTS Washer M6x25 Bolt M6x35 Bolt Qty: 12 Qty: 44 Qty: 8 Hex Key Assemble in a clear area on a spacious, nonabrasive surface such as a carpet or blanket.
- Page 7 ASSEMBLY: BENCH Locate the Right Side Panel and Seat Panel . Place a Washer on each of 3 Bolts . Align the panels as shown. Insert each Bolt with Washer through the eyelets in the Seat Panel and into the holes in the edge of the Right Side Panel.
- Page 8 ASSEMBLY: BENCH Locate the Left Side Panel . Place a Washer each of 2 Bolts . Place the partially-assembled sofa on the Left Side Panel as shown. Align the eyelets on the edge of the Back Panel with the holes in the Left Side Panel and insert a Bolt with Washer through each of the 2 aligned sets of eyelets.
- Page 9 PACKAGE CONTENTS: TABLE ParT DEScriPTion QuanTiTY Glass Tabletop Table Frame Shelf harDWarE conTEnTS Washer M6x15 Bolt Qty: 12 Qty: 12 Hex Key Assemble in a clear area on a spacious, nonabrasive surface such as a carpet or blanket. Wait to fully tighten hardware until final step.
- Page 10 ASSEMBLY: TABLE Place the Table Frame upside-down on a protected surface (Bolt holes will be visible at each corner). Place a Washer on each of 8 Bolts Position a Leg at the corner of the Table Frame as shown, aligning the eyelets in the top plate of the Leg with the threaded holes in the Table Frame.
-
Page 11: Limited Warranty
EXTEND YOUR WARRANTY When you purchase a Fire Sense or Balkene Home product from any authorized retailer, you'll have peace of mind in knowing that it comes with a one-year warranty. Extend your warranty for an additional year when you review your item at balkenehome.com within 365 days of purchase.
Need help?
Do you have a question about the Jareth 63177 and is the answer not in the manual?
Questions and answers