Table of Contents
Advertisement
Quick Links
Advertisement
Table of Contents

Related Manuals for Ruff Cycles Lil’Buddy


Summary of Contents for Ruff Cycles Lil’Buddy
- Page 1 ORIGINAL OPERATING MANUAL...
- Page 2 V1.1, September 2020 Layout, photographs and text: RUFF CYCLES GmbH, Regensburg, Germany Texts passages were provided with courtesy of HNF GmbH The mentioned brand names are subject to copyrights and are the property of their legitimate owners even without special indication. Any reprint or copy, even only in extracts, is only permitted with our express written consent.
-
Page 3: Table Of Contents
CONTENTS 6.3. After an accident Your Vehicle 1.1. Intended use 6.4. Battery 6.5. Tires 1.2. Vehicle overview 1.3. Delivery scope 6.6. Changing tires/tubes 1.4. Assembly of accessories 6.6.1. Dismounting the front wheel Commissioning 6.6.2. Dismounting the rear wheel 2.1. Handlebar alignment 6.6.3. -
Page 4: Your Vehicle
YOUR VEHICLE Index and symbols in this User Manual YOUR VEHICLE This User Manual contains important information for the enhanced safety and We congratulate you to the purchase of the Lil’Buddy with BOSCH driving prolonged service life of the Pedelec for an each time greater fun with your technology. -
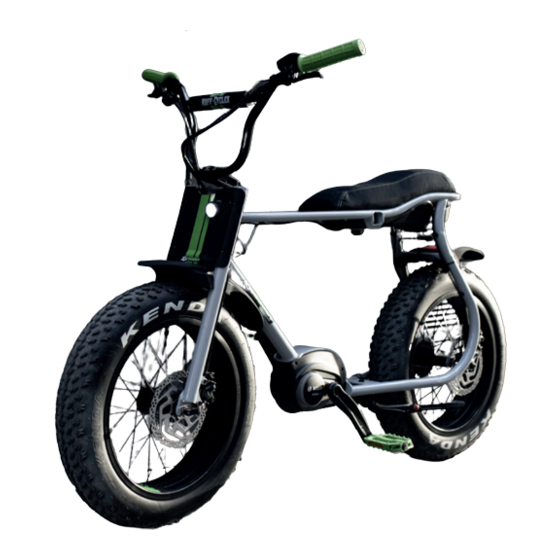
Page 5: Vehicle Overview
YOUR VEHICLE YOUR VEHICLE Intended use is also limited by: The required active and passive illumination devices have been installed according to the safety regulations applicable in Germany (StVZO). The tech- » The safety instructions in this User Manual nical design safety must be regularly checked and eventually be repaired by a specialist. -
Page 6: Delivery Scope
YOUR VEHICLE COMMISSIONING 1.3. DELIVERY SCOPE » Lift the vehicle by the front frame, so that it no longer touches the ground. Turn the fork leftwards and rightwards. The front wheel must follow the movement. This simulated steering operation should not be difficult. »... -
Page 7: Switching On/Off The Drive
COMMISSIONING COMMISSIONING 2.3. REMOVE THE BATTERY 2.6. SWITCHING THE LIGHT ON OR OFF » Make sure that the Bosch Motor is on. 1. Before removing the battery, ensure that the » By pressing the button + for a few seconds, system is disconnected. -
Page 8: Before Each Ride
BEFORE EACH RIDE BEFORE EACH RIDE BEFORE EACH RIDE The pressure point is the lever position of the travel at which the brake is engaged. If brakes function smoothly - there are no air bub- 3.1. CHECK TIRES bles in the hydraulic line - the pressure point is situated at the same lever position at each braking action. -
Page 9: Checking The Screw Connections
BEFORE EACH RIDE OPERATION OPERATION 3.6. CHECKING THE SCREW CONNECTIONS 4.1. SHIMANO DERAILLEUR GEARS Before each ride, check the firm screw connections for With the Shimano shifting system, you can adjust the gear ratio using a shif- » Quick release of the front wheel ter lever. -
Page 10: Brake System
OPERATION ERGONOMIC SETTINGS 4.3. BRAKE SYSTEM ERGONOMIC SETTINGS Your Lil’Buddy is equipped with hydraulic brake discs for a fast and safe stop- ping action. Use both brakes simultaneously for an optimal and safe braking. 5.1. BRAKE LEVER The left brake lever has an effect on the front wheel brake, the right brake lever has an effect on the rear wheel brake. -
Page 11: Brake Grip Angle
ERGONOMIC SETTINGS MAINTENANCE 5.1.2. BRAKE GRIP ANGLE A hazard of injury exists when the drive system is switched on during maintenance Adjust the brake grip angle so that with works! You hands may get caught between extended arm, your fingers rest on the brake the chain and chain ring during running levers when seated on the Pedelec. -
Page 12: Recommended Maintenance Intervals
MAINTENANCE MAINTENANCE 6.2. RECOMMENDED MAINTENANCE INTERVALS Any damages caused to the carrying parts of your Pedelec due to an accident may lead to a breakage hazard. Maintenance of your Pedelec is required according to its use and it cannot be ->... -
Page 13: Changing Tires/Tubes
MAINTENANCE MAINTENANCE 6.6. CHANGING TIRES/TUBES 6.6.2. DISMOUNTING THE REAR WHEEL » Change into the lowest gear. 6.6.1. DISMOUNTING THE FRONT WHEEL » Loosen and remove the axle as The wheels are easily dismounted by hanging the Pedelec in a shown in step 1, 2 and 3. maintenance support or placing it upside down on the saddle and »... -
Page 14: Front Wheel Assembly
MAINTENANCE MAINTENANCE 6.6.3. CHANGING TIRES/TUBE 6.6.5. REAR WHEEL ASSEMBLY » Unscrew the valve cap from the valve. » Remove the transportation lock between the brake pads. » Release the air completely by pressing the valve pin halfway the valve. » Mount the rear wheel into the rear dropout on the frame and lift the chain again on the sprocket. -
Page 15: 6.8.1. Wear Of Brake Pads And Discs
MAINTENANCE CLEANING 6.8.1. WEAR OF BRAKE PADS AND DISCS The inclination of the headlamp is set by releasing the screw connection on the lamp Brake pads and brake discs are subject to wear, which is originated by the holder with an appropriate open-end wrench frictioning of both parts together. -
Page 16: Transport On/By Car
-> Use a protective cover for the Pedelec, hub and motor. Rear hub Ruff Cycles Hub Rear Thru axle Rims Ruff Cycles Rim 20“ x 100 mm The weight of the Pedelec places high demands on a car rear carrier Wheels Spokes Sapim butted (2,34 - 2,0 mm) black or roof rack. -
Page 17: Liability For Material Defects
TECHNICAL DATA LIABILITY FOR MATERIAL DEFECTS Seatbench A statutory liability for material defects is applicable for a period of 24 months Brake adapter on fork or frame as from the day of purchase. Brake caliper on fork or frame The prerequisite for the assertion of material defects liability shall be the submission of the original invoice and proven inspections. -
Page 18: Ec Declaration Of Conformity
Packaging materials shall be collected sep- arately and directly disposed of according to local collection schemes. Take the used battery to an E-bike dealer or send it for disposal in the hazardous waste packaging to RUFF CYCLES GmbH. RUFF CYCLES GmbH - Disposal -... - Page 19 RUFF CYCLES GmbH Im Gewerbepark D36 93059 Regensburg Germany info@ruff-cycles.com www.ruff-cycles.com...
Need help?
Do you have a question about the Lil’Buddy and is the answer not in the manual?
Questions and answers