Table of Contents
Advertisement
Quick Links
Advertisement
Table of Contents

Related Manuals for Perma child safety 2748


Summary of Contents for Perma child safety 2748
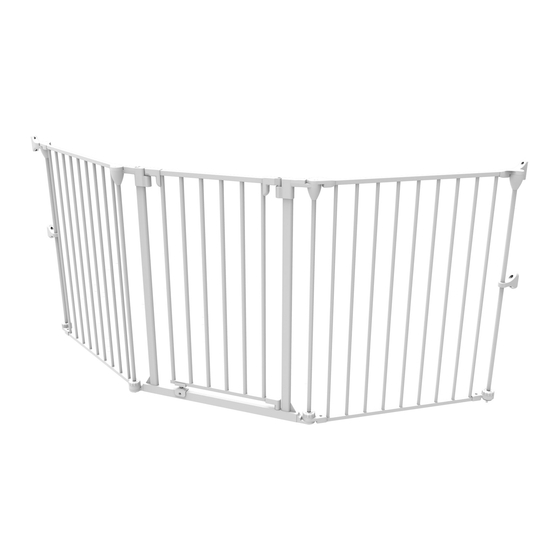
- Page 1 Extra Wide INSTALLATION VIDEO Barrier Instruction Manual #2748 75cm (30’’) Tall 73cm - 194cm | (28.7” - 76.3’’) IMPORTANT! READ AND FOLLOW THESE INSTRUCTIONS CAREFULLY AND KEEP FOR FUTURE REFERENCE. This product complies with safety standard EN 12227:2010.
-
Page 2: Table Of Contents
TABLE OF CONTENTS SAFETY INFORMATION General Maintenance Warnings Mountings WHAT’S IN THE BOX Parts INSTALLATION Gate Placement Underside Bracket Wall Assembly Topside Bracket Wall Assembly To Remove Unwanted Panels To Add Extra Panels Optional Extension OPERATION How to Open Stay Open Feature Cleaning Instructions SUPPORT Warranty Certificate... -
Page 3: Safety Information
SAFETY INFORMATION GENERAL Read this instruction manual carefully and keep it in a safe place for future reference. The correct use and maintenance of this product is essential. MAINTENANCE Regularly check that the gate is functioning correctly, lubricate hinges and moving components with a suitable spray lubricant. Tighten and adjust mounts to ensure secure smooth operation. -
Page 4: Warnings
WARNINGS To prevent serious injury or death, securely WARNING install gate or enclosure and use according to manufacturer’s instructions. WARNING Incorrect installation can be dangerous. Danger to older children if climbing over the WARNING product. WARNING Do not use the safety barrier if any components are damaged, missing or disassembled. - Page 5 WARNINGS This safety barrier has a ‘stay open’ feature. WARNING WARNING Always check that the safety barrier is correctly closed. Use only with the locking/latching mechanism WARNING securely engaged. WARNING Never use with a child able to climb over or dislodge/open the gate or enclosure.
-
Page 6: Mountings
SAFETY INFORMATION MOUNTINGS Gate must be installed in a structurally sound opening. Ensure mounting surface (wall, door frame, stair posts, etc.) is strong, rigid and has an even surface. Note: If using gate on stairs, it must be placed either on the top step or on the lowest step at the bottom. - Page 7 HARD WALL MOUNTING BRICK Drill 5mm (3/16’’) pilot holes, insert anchor and secure with screws. INSTALLATION Wood Screws Anchor HARD WALL MOUNTING CONCRETE Drill 5mm (3/16’’) pilot holes, insert anchor and secure with screws. TOOLS REQUIRED PHILLIPS HEAD PENCIL SCREW DRIVER DRILL This gate must only be fixed to a solid and secure surface.
-
Page 8: What's In The Box
WHAT’S IN THE BOX PARTS UNDERSIDE TOPSIDE Barrier Panels Gate Panel... - Page 9 Top Underside Top Topside Wall Bracket Wall Bracket Lower Wall Bracket Top Cap Bottom Cap Screws Corner Tubes If any parts are missing do not attempt to use your Extra Wide Barrier. Please contact us at www.permachildsafety.com/contact-us to obtain replacements. Only use parts supplied by the manufacturer with your Extra Wide Barrier.
-
Page 10: Installation
INSTALLATION STEP 1: GATE PLACEMENT SUITABLE PLACEMENT OF GATE AND CATCH MOUNT As a Barrier; Across the room As a Fire Barrier; In an open space... -
Page 11: Underside Bracket Wall Assembly
STEP 2: UNDERSIDE BRACKET WALL ASSEMBLY Place the Lower Wall Bracket over Corner Tube, and then put the Corner Tube into the Top Underside Wall Bracket. Put the Top Underside Wall Bracket into the top of the Barrier Panel, and the bottom into the bottom of the Barrier Panel, and then into the Bottom Cap. - Page 12 Mark screw hole positions with a pencil for the Top Underside Wall Bracket and the Lower Wall Bracket. Disassemble and screw in Top Underside Wall Bracket and Lower Wall Bracket.
- Page 13 Reassemble gate panel by connecting the top of the Barrier Panel to the Top Underside Wall Bracket. Place the Corner Tube through the Lower Wall Bracket. Then place the Corner Tube into the Top Underside Wall Bracket. Pull the Corner Tube up so you can position the bottom of the Corner Tube into the bottom hole, and then into the Bottom Cap.
-
Page 14: Topside Bracket Wall Assembly
INSTALLATION STEP 3: TOPSIDE BRACKET WALL ASSEMBLY Place the Lower Wall Bracket over Corner Tube, and put the Top Cap on the bottom of the Barrier Panel. Place the Corner Tube into the Barrier Panel and then into the Top Topside Wall Bracket. Pull the Corner Tube up, while lifting the bottom into its position. - Page 15 Mark screw hole positions with a pencil for the Top Topside Wall Bracket and the Lower Wall Bracket. Disassemble and screw in Top Topside Wall Bracket and then screw in the Lower Wall Bracket.
- Page 16 Place the Corner Tube through the Lower Wall Bracket and then push the Corner Tube through the top hole. Put the Top Cap on the bottom of the Barrier Panel, and then position the Corner Tube in place.
-
Page 17: To Remove Unwanted Panels
INSTALLATION STEP 4: TO REMOVE UNWANTED PANELS Turn base knob to the unlocked position, pull up on the corner tube and slide the bottom of the Corner Tube out from the base. With the Corner Tube removed you can lift and remove the unwanted panel. -
Page 18: To Add Extra Panels
INSTALLATION STEP 5: TO ADD EXTRA PANELS Align opposite ends of panels, place the corner tube into the top hole first, then pull the corner tube up so you can position the bottom of the corner tube into the bottom hole. UNLOCKED LOCKED... -
Page 19: Optional Extension
INSTALLATION OPTIONAL EXTENSION For larger openings join with the #2747 White Playpen Barrier to extend the barrier by an additional 6 panels. Individual panels are also available for order from our website, head to www.permachildsafety.com/... -
Page 20: Operation
OPERATION HOW TO OPEN Using one hand place thumb on the button and grip gate with fingers. Slide button and lift gate, then open gate in either direction, when released gate will swing closed automatically. Always check gate is properly closed. STAY OPEN FEATURE To engage the Stay Open feature, the gate needs to be... -
Page 21: Cleaning Instructions
CLEANING INSTRUCTIONS Simply use a soft damp cloth to wipe bed rail, dry after cleaning. Do not use chemical or abrasive cleaners. -
Page 22: Support
SUPPORT WARRANTY CERTIFICATE Congratulations! You have made an excellent choice of this quality product. Our commitment to quality also includes our service. Should you, contrary to expectations, experience defects due to manufacturing faults, we will provide you with a warranty against defects as follows: Warranty The product is guaranteed to be free from defects in workmanship and parts for a period of 12 months from the date of purchase. -
Page 23: Warranty Card
WARRANTY CARD Details: Extra Wide Barrier Product Name: Product Number: White 2748 Your Name: Address: Phone: Email: Date of Purchase: Location of Purchase: We recommend that you keep a copy of your receipt, showing the date of purchase, with this warranty certificate and keep for your reference. In the event of a product fault, please contact after sales support.
Need help?
Do you have a question about the 2748 and is the answer not in the manual?
Questions and answers