Table of Contents
Advertisement
Quick Links
Advertisement
Table of Contents

Related Manuals for ABB ACS800-67LC


Summary of Contents for ABB ACS800-67LC
- Page 1 — ABB WIND TURBINE CONVERTERS ACS800-67LC wind turbine converters Hardware manual...
- Page 2 — List of related manuals Standard manuals Code (English) ACS800-67LC wind turbine converters hardware manual 3AUA0000058400 ACS800-67LC wind turbine converters 3AUA0000059432 system description and start-up guide ACS800 grid-side control program firmware manual 3AUA0000075077 ACS800-67(LC) doubly-fed induction generator control 3AUA0000071689 program firmware manual...
- Page 3 Hardware manual ACS800-67LC wind turbine converters Table of contents 1. Safety instructions 4. Mechanical installation 6. Electrical installation 2018 ABB Oy. All Rights Reserved. 3AUA0000058400 Rev C EFFECTIVE: 2018-11-09...
-
Page 5: Table Of Contents
Table of contents 1. Safety instructions What this chapter contains ..........11 Use of warnings . - Page 6 Control unit of the rotor-side converter ....... . . 36 Control unit NDCU-33Cx/RDCU-12C .
- Page 7 Alternative 2: Cable bus system ......... 60 Alternative 3: Single core cables with concentric protective shields .
- Page 8 7. Installation checklist Mechanical installation ..........87 Electrical installation .
- Page 9 Draining the internal cooling circuit ........117 Adding inhibitor .
- Page 10 Product training............153 Providing feedback on ABB Drives manuals ....... . 153...
-
Page 11: Safety Instructions
Safety instructions 11 Safety instructions What this chapter contains This chapter contains safety instructions which you must follow when installing, operating and servicing the wind turbine converter. If ignored, physical injury or death may follow, or damage may occur to the converter, the generator or driven equipment. Read the safety instructions before you work on the converter. -
Page 12: Safety In Installation And Maintenance
12 Safety instructions Hot surface warning warns about hot surfaces. Some parts inside the converter cabinet remain hot for a while after the disconnection of input power. Safety in installation and maintenance Electrical safety These warnings are intended for all who work on the converter or generator. Ignoring the instructions can cause physical injury or death, or damage to the equipment. -
Page 13: Grounding
Safety instructions 13 WARNING! • Use extreme caution when manoeuvring heavy converter or filter modules. • Beware of hot surfaces. Some parts inside the converter cabinet, such as power modules or crowbar(s), remain hot for a while after the disconnection of input power. •... -
Page 14: Work With An Installation Stand And Lifting
14 Safety instructions Work with an installation stand and lifting Note: The installation stand is not included as standard in the delivery. Please contact local ABB representative for further inquires regarding installation stand. WARNING! • Attach a lifting chain to the front of the module before pulling out the entire module from the cabinet. -
Page 15: Safe Start-Up And Operation
Safety instructions 15 Safe start-up and operation General safety These warnings are intended for all who plan the operation of the converter or operate the converter. Ignoring the instructions can cause physical injury or death or damage to the equipment. - Page 16 16 Safety instructions...
-
Page 17: Introduction To The Manual
The flowchart refers to chapters/sections in this manual and other manuals. Applicability The manual is compatible with ACS800-67LC wind turbine converters. Target audience This manual is intended for people who plan the installation, install and service the converter. -
Page 18: Contents Of The Manual
18 Introduction to the manual Contents of the manual The chapters of this manual are briefly described below. Safety instructions gives safety instructions for the installation, commissioning, operation and maintenance of the converter. Operation principle and hardware description describes the operation and construction of the converter. -
Page 19: Quick Installation, Commissioning And Operation Flowchart
Connect the power cables. Connect the control and the Electrical installation, page auxiliary control cables. Check the installation. Installation checklist, page Commission the converter. ACS800-67LC system description and start-up guide [3AUA0000059432 (English)] and ACS800-67(LC) doubly-fed induction generator control program firmware manual [3AUA0000071689 (English)]... -
Page 20: Terms And Abbreviations
The crowbar operates when the DC link voltage or rotor circuit current exceeds certain maximum limit. The voltage rise is typically caused by grid failures like voltage dips (sags). Crowbar type ACBU is used in ACS800-67LC. DC link... - Page 21 Introduction to the manual 21 Term/Abbreviation Explanation Incoming cubicle Cubicle with input power terminals, main switching and disconnecting devices, etc. (ICU) See Cubicle. Inverter Converts direct current and voltage to alternating current and voltage. Inverter module Inverter bridge, related components and converter DC link capacitors enclosed inside a metal frame or enclosure.
- Page 22 22 Introduction to the manual...
-
Page 23: Operation Principle And Hardware Description
ACS800-67LC liquid-cooled wind turbine converter is used with induction generators with wound rotor and slip rings, such as the ABB AMK series. The converter is connected between the generator rotor and the power supply network. The converter can be installed in a downtower cabinet, tower or in the nacelle. -
Page 24: Wind Turbine System With Low Voltage Stator (690 V)
24 Operation principle and hardware description and main part of the generator power is fed by the generator stator. Principle of the doubly- fed induction generator with a wind turbine converter can be seen in the figures below. Wind turbine system with low voltage stator (690 V) ... -
Page 25: Grid-Side And Rotor-Side Converters
Operation principle and hardware description 25 With the rotor-side converter (INU) it is possible to control the generator torque or speed and the power factor at the rotor/stator terminals, while the main task of the grid-side converter (ISU) is to keep the DC link voltage constant. While the rotor is accelerated by the wind and the speed is controlled by the pitch of the blades the converter can be started and controlled in DTC mode. -
Page 26: Product Overview
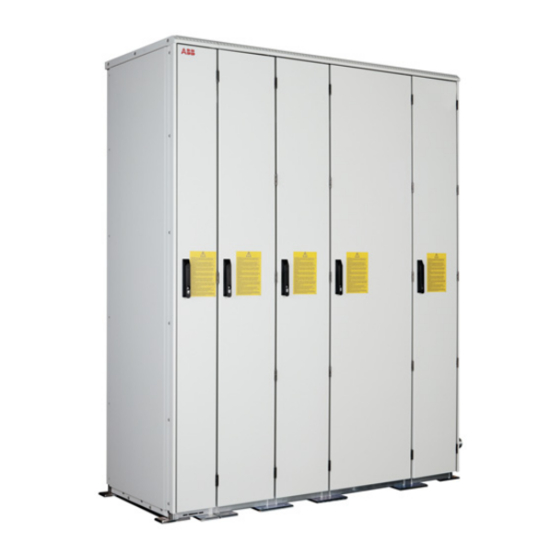
26 Operation principle and hardware description Product overview Layout An example layout of the converter is presented in the following drawings. For power cabinet layout, see ICU800-67LC incoming units (+C108/+C109) hardware manual [3AUA0000071553 (English)]. Doors closed Description Incoming cubicle (ICU) LCL filter cubicle (FIU) IGBT supply module cubicle (ISU) Inverter module cubicle (INU) -
Page 27: Converter With 200 Mm Wide Incoming Cubicle
Operation principle and hardware description 27 Converter with 200 mm wide incoming cubicle Doors open, shrouds removed Description Grid-side power cable terminals (busbars) Grid-side converter contactor K1 behind the charging circuit LCL filter IGBT supply module Inverter modules (behind the swing-out frame of the crowbar) Module cooling fans Auxiliary control unit cooling fan Rotor-side power cable terminals (behind removable fans) -
Page 28: Converter With 400 Mm Wide Incoming Cubicle (Option +C111)
28 Operation principle and hardware description Converter with 400 mm wide incoming cubicle (option +C111) Doors open, shrouds removed Description Grid-side power cable terminals (busbars) Load switch disconnector Cooling fan of the incoming cubicle Grid-side converter contactor K1 behind the charging circuit LCL filter IGBT supply module Inverter modules (behind the swing-out frame of the crowbar) -
Page 29: Power Modules
Operation principle and hardware description 29 Power modules Size R8i modules are used in single or parallel configurations in both grid-side converter and rotor-side converter. DC connection is located on the top front part of the module. The DC voltage is connected to the busbars through fuses. Common mode filtering is implemented by running the DC busbars through ferrite cores. -
Page 30: Crowbar
30 Operation principle and hardware description Crowbar The converter is equipped with active crowbar(s) as standard. The crowbar consists of crowbar unit (type ACBU-Ax) and crowbar resistor (type ACBU-Rx). The crowbar circuit is used for DC overvoltage protection in abnormal grid conditions, eg, short interruptions or voltage dip/sag events. -
Page 31: Smoke Detector
Operation principle and hardware description 31 Smoke detector The wind turbine converter is equipped with smoke detector to provide additional protection. The smoke detector is equipped with NC (normally closed) contact which opens if smoke is detected. Contact is wired to the digital input 1 (DI1) on the grid-side converter control unit together with other hardwired faults, for example LCL filter temperature. -
Page 32: Power Cable Lead-Throughs
32 Operation principle and hardware description Power cable lead-throughs There are three possible lead-through types for power cables: the blank plate (as default), sealing modules (optional) and cable glands (on request). Cable lugs can be connected to both sides of the connection busbar. The busbar size and number of holes varies according to cabinet size. -
Page 33: Control Interfaces
Operation principle and hardware description 33 Control interfaces Control interfaces of the converter are described below. Sliding frame in the auxiliary control cubicle Description APBU branching unit RDCU unit. (If parallel connected grid-side converter modules are used, another APBU unit is located behind RMIO board.) NDCU unit NTAC Pulse Encoder Interface module, optional fieldbus modules if ordered... -
Page 34: Circuit Boards
34 Operation principle and hardware description Circuit boards The diagram below shows the interconnections between the circuit boards of the converter. For details, see the circuit diagrams delivered with the converter. -
Page 35: Pc Tool Interfaces
It is also possible to read fault indications through a relay output and communicate with the unit through a serial communication interface. DriveWindow PC tool is used with the ACS800-67LC. Control unit of the grid-side converter The grid-side converter is controlled by its own RDCU control unit. The RDCU is connected to the grid-side converter power modules by a fiber optic link (distributed through an APBU optical branching unit in case of parallel connected power modules). -
Page 36: Control Unit Of The Rotor-Side Converter
36 Operation principle and hardware description Control unit of the rotor-side converter The rotor-side converter is controlled by its own NDCU control unit. The NDCU is connected to the rotor-side converter power modules by a fiber optic link, distributed through APBU optical branching unit. In the rotor-side converter modules the fiber optic link is connected to the AINT board. -
Page 37: Voltage And Current Measurement Unit Nuim-61C/Nuim-10C
Operation principle and hardware description 37 RDCU-12C Optical link to AINT/NINT 24 VDC power Optional module 1 Optional module 2 board (or branching unit) input RMIO X39 for control panel connection LED indicators DDCS communication option module 3: RDCO Detachable I/O terminals Voltage and Current Measurement Unit NUIM-61C/NUIM-10C ... -
Page 38: Auxiliary Measuring Unit Namu-01C
38 Operation principle and hardware description Auxiliary Measuring Unit NAMU-01C Auxiliary Measuring Unit NAMU-01C is connected to CH2 of the RDCO module. Connectors of the unit are shown below. X 1 5 X 3 1 - X 3 4 I / U S E L E C T I O N X 2 1 - X 2 4 C U R R E N T R A N G E B Y S E N S O R T Y P E A N D S H U N T R E S I S T A N C E X 8 D A T A R A T E X 1 1 - X 1 4 V O L T A G E R A N G E A N D... -
Page 39: Type Designation Key
The option codes follow the basic code. Each option code starts with an identifying letter (common for the whole product series), followed by descriptive digits. The option codes are separated by plus signs. The selections are listed below. For more information, contact your local ABB representative. Basic code ... -
Page 40: Option Codes (+ Codes)
40 Operation principle and hardware description Option codes (+ codes) Code Description Construction C129 UL508A design. UL508A approved up to 600 V AC. C144 Cooling connectors on the left-hand side when viewed from front C171 Flange for cooling liquid connections of size DN64 with flange clamp, ISO 6162-1:2002 C111 400 mm wide incoming cubicle instead of standard 200 mm with AC fuses and load switch disconnector for grid-side converter... - Page 41 Operation principle and hardware description 41 Code Description 2H380 20 cables 3H380 28 cables Ride through options D150+D151 Zero voltage ride through option 1 (DC chopper + DC resistor 1500kJ / INU module) D150 Zero voltage ride through option 2 (DC chopper) Measurement for stator voltage G394 Standard NUIM replaced by NUIM-10 for MV measurement (stator voltage >...
- Page 42 42 Operation principle and hardware description...
-
Page 43: Mechanical Installation
Mechanical installation 43 Mechanical installation What this chapter contains This chapter describes the mechanical installation procedure of the ACS800-67LC converter. Safety See chapter Safety instructions. Checking the installation site See page for allowable operating conditions, and page for requirements for free space around the converter cabinet. -
Page 44: Required Tools
44 Mechanical installation Required tools The tools required for moving the unit to its final position, fastening it to the floor and tightening the connections are listed below: • crane, fork-lift or pallet truck (check load capacity!), iron bar and jack •... -
Page 45: Moving The Unit
Mechanical installation 45 Moving the unit Moving the unit by crane, fork-lift or pallet truck Moving the unit …by crane …by fork-lift or pallet truck Use the steel lifting bars attached to the top of the The centre of gravity is high. Be therefore careful cabinet. -
Page 46: Overview Of The Installation Procedure
46 Mechanical installation Overview of the installation procedure 1. The cabinet can be installed with its back against a wall. Fasten the cabinet to the floor with fastening clamps. For the location of the fastening clamps, see the delivery specific dimensional drawings. Note 1: Leave a minimum clearance of 400 mm above the basic roof level of the cabinet to allow the pressure release lids to open at an arc fault. -
Page 47: Fastening The Cabinet To The Roof
Mechanical installation 47 2. Remove the lifting bars. Use the holes for fastening the cabinet from top. Use the original bolts to block any unused holes. View from side Fastening the cabinet to the roof If the converter is installed in a nacelle, the cabinet roof must be fixed to the nacelle structure for roof support. - Page 48 48 Mechanical installation The unit must be fastened to the floor and roof (wall) as follows: Bolt the cabinet to the floor through the holes in each flat bar at the base of the cabinet using M10 or M12 screws. Remove the lifting bars.
-
Page 49: Joining The Liquid Cooling Unit To The Converter Cabinet
Mechanical installation 49 Customer support Customer support L bracket M16 bolt Cabinet roof Joining the liquid cooling unit to the converter cabinet Converter delivery does not include the liquid cooling unit (LCU) that is to be connected to the converter cabinet. Connecting the liquid pipes ... -
Page 50: Miscellaneous
50 Mechanical installation Miscellaneous Cable duct in the floor below the cabinet A cable duct can be constructed below the middle part of the cabinet. The duct width may not exceed 450 mm. The cabinet weight lies on the 100 mm wide section in front and 50 mm wide section on the back which the floor must carry. -
Page 51: Electric Welding
Mechanical installation 51 Electric welding It is not recommended to fasten the cabinet by welding. • Weld only the flat bar under the cabinet, never the cabinet frame itself. • Clamp the welding electrode onto the flat bar that is to be welded or to the next flat bar of the cabinet (within 0.5 metres of the welding point). - Page 52 52 Mechanical installation...
-
Page 53: Planning The Electrical Installation
Note: The installation must always be designed and made according to applicable local laws and regulations. ABB does not assume any liability whatsoever for any installation which breaches the local laws and/or other regulations. Furthermore, if the recommendations given by ABB are not followed, the converter may experience problems that the warranty does not cover. -
Page 54: Checking The Compatibility Of The Generator And Converter
The stress on generator insulation can be avoided by using ABB du/dt and common mode filters. The converter is equipped with the following output filters as standard: •... -
Page 55: Typical Power Cable Sizes
+ 120mm 95mm 70mm Type name converter current nr of cables / phase nr of cables rating [A] ACS800-67LC-1075/0575-7 ACS800-67LC-1375/0575-7 1143 ACS800-67LC-1375/1125-7 1143 ACS800-67LC-1595/0865-7 1334 ACS800-67LC-2035/1125-7 1697 Grid-side converter cables (or cables to the power cabinet (option +C109)) Grid-side 3×240mm... -
Page 56: Alternative Power Cable Types
Grid-side converter cables (or cables to the power cabinet (option +C109)) 500 kcmil (253 mm 350 kcmil (177 mm Grid-side converter Type name current rating [A] nr of cables / phase ACS800-67LC-1075/0575-7 ACS800-67LC-1375/0575-7 ACS800-67LC-1375/1125-7 ACS800-67LC-1595/0865-7 ACS800-67LC-2035/1125-7 Alternative power cable types ... -
Page 57: Rotor Cable Shield
Planning the electrical installation 57 Rotor cable shield To effectively suppress radiated and conducted radio frequency emissions, the shield conductivity must be at least 1/10 of the phase conductor conductivity. The requirements are easily met with a copper or aluminium shield. The minimum requirement of the rotor cable shield of the converter is shown below. -
Page 58: Conduit
58 Planning the electrical installation Sizes of grounding conductor terminals are listed below. Maximum ampere rating of Size of equipment grounding or bonding conductor, minimum overcurrent protection for Copper Aluminum field wiring conductors AWG or kcmil AWG or kcmil supplying panel 13.3 13.3 21.2... -
Page 59: Suitable Power Supply Networks
(PME) system. Secondary of supply transformer L1 L2 L3 PE Transformer ACS800-67LC Customer terminals TN-S power supply network In TN-S power supply network earth terminal is connected by the supply protective conductor (PE) back to the star point (neutral) of the secondary winding of the supply transformer, which is also connected at that point to an earth electrode. -
Page 60: Selecting The Grid-Side Power Cabling Principle
60 Planning the electrical installation Selecting the grid-side power cabling principle This section presents three alternative principles for the grid-side power cabling. Alternative 1: Symmetrical, shielded three-phase cable(s) Transformer Converter 1) As short as possible for low inductance 2) Not used if the supply cable screen operates as a protective conductor. -
Page 61: Alternative 3: Single Core Cables With Concentric Protective Shields
Planning the electrical installation 61 Alternative 3: Single core cables with concentric protective shields When single core cables equipped with concentric protective shields (metal) are used, the phase current will induce voltage to the cable shield. If the shields are connected to each other at both ends of the cable, current will flow in the cable shield. -
Page 62: Selecting The Control Cables
In remote use, the cable connecting the control panel (if any) to the converter must not exceed 3 metres (10 ft). The cable type tested and approved by ABB is used in control panel option kits. Control panel or cable is not included in the converter delivery. For control panel, contact local ABB representative. -
Page 63: Control Cable Ducts
Planning the electrical installation 63 A diagram of the cable routing is shown below. Converter Rotor cable min 300 mm (12 in.) Grid cable Control cables Grid cable Rotor cable min 500 mm (20 in.) min 200 mm (8 in.) Control cable ducts ... -
Page 64: Protecting The Converter, Grid Cable, Rotor And Rotor Cable In Short-Circuit Situation And Against Thermal Overload
64 Planning the electrical installation Protecting the converter, grid cable, rotor and rotor cable in short-circuit situation and against thermal overload Protecting the grid cable in short-circuit situations Protect the grid cable with fuses. Size the fuses according to local safety regulations, appropriate input voltage and rated current of the converter. -
Page 65: Protecting The Converter Against Ground Faults In The Converter, Grid Cable, Rotor Or Rotor Cable
The converter is equipped with a 1-phase 230 V AC (50/60 Hz) connection for control electronics to be supplied by UPS (UPS not included in the ABB delivery). It is recommended to use an on-line type of UPS the output voltage of which does not depend on the voltage and frequency of the power supply network. -
Page 66: Planning The Installation Of Equipment Connected To The Rotor Cable
66 Planning the electrical installation Planning the installation of equipment connected to the rotor cable Safety switches, contactors, connection boxes, etc. To minimize the emission level when safety switches, contactors, connection boxes or similar equipment are installed in the rotor cable between the converter and the generator: •... -
Page 67: Electrical Installation
Electrical installation 67 Electrical installation What this chapter contains This chapter describes the electrical installation procedure of the converter. WARNING! Only qualified electricians are allowed to carry out the work described in this chapter. Follow the Safety instructions on the first pages of this manual. Ignoring the safety instructions can cause injury or death. -
Page 68: Rotor And Rotor Cable
1 kV DC. Measure both rotor and stator cables. The insulation resistance of an ABB generator must exceed 100 Mohm (reference value at 25 °C (77 °F)). For the insulation resistance of other generators, please consult the manufacturer’s instructions. -
Page 69: Connecting The Grid Cables - Units With 200 Mm Wide Incoming Cubicle
Electrical installation 69 Connecting the grid cables – units with 200 mm wide incoming cubicle Note: The cabling from all converter modules must be physically identical considering cable type, cross-sectional area and length. Connection diagram The diagram below shows the connection of the grid cable to the converter. The connection principle is the same also for the larger units. -
Page 70: Connection Procedure - A Blank Plate At The Cable Lead-Through
70 Electrical installation Connection procedure – a blank plate at the cable lead-through For description of the blank plate, see chapter Operation principle and hardware description, page 32. WARNING! Read and follow the instructions given in chapter Safety instructions. Ignoring the instructions can cause physical injury or death, or damage to the equipment. -
Page 71: Connection Procedure - Sealing Modules At The Cable Lead-Through
Electrical installation 71 Connection procedure – sealing modules at the cable lead-through For description of the sealing modules, see chapter Operation principle and hardware description, page 32. Sealing modules are to be installed by the customer and they are located unfastened in the cubicles they are to be installed in. - Page 72 72 Electrical installation Adapt modules, which Achieve a 0.1…1.0 mm Lubricate all modules for are to hold cables, by gap between the two the frame thoroughly on peeling off layers until halves when held against both the inside and the you reach the gap seen the cable.
-
Page 73: Connection Procedure - Cable Glands At The Cable Lead-Through
Electrical installation 73 Connection procedure – cable glands at the cable lead-through For description of the cable glands, see chapter Operation principle and hardware description, page 32. WARNING! Read and follow the instructions given in chapter Safety instructions. Ignoring the instructions can cause physical injury or death, or damage to the equipment. -
Page 74: Connecting The Grid Cables - Units With 400 Mm Wide Incoming Cubicle (Option +C111)
74 Electrical installation Connecting the grid cables – units with 400 mm wide incoming cubicle (option +C111) Note: The cabling from all converter terminals must be physically identical considering cable type, cross-sectional area and length. Connection diagram The diagram below shows the connection of the grid cable to the converter. The connection principle is the same also for the larger units. -
Page 75: Connecting The Rotor Cables
Electrical installation 75 Connecting the rotor cables Note: The cabling from all converter modules must be physically identical considering cable type, cross-sectional area and length. When connecting several cables per phase, it is recommended to divide the cables as evenly as possible among the modules. Connection diagram ... -
Page 76: Connection Procedure - A Blank Plate At The Cable Lead-Through
76 Electrical installation Connection procedure – a blank plate at the cable lead-through For description of the blank plate, see chapter Operation principle and hardware description, page 32. WARNING! Read and follow the instructions given in chapter Safety instructions. Ignoring the instructions can cause physical injury or death, or damage to the equipment. -
Page 77: Connection Procedure - Cable Glands At The Cable Lead-Through
Electrical installation 77 Connection procedure – cable glands at the cable lead-through For description of the cable glands, see chapter Operation principle and hardware description, page 32. WARNING! Read and follow the instructions given in chapter Safety instructions. Ignoring the instructions can cause physical injury or death, or damage to the equipment. - Page 78 78 Electrical installation Alternative cable shield grounding means at the generator end Alternative 1: 360° grounding of the 360° grounding of the shield shield Conductive gasket Alternative 2: grounding the twisted b > 1/5 × a shield Cable lead-through when shielded cable is used L1 L2 L3 As short unshielded wires as possible...
- Page 79 Electrical installation 79 Rotor-side cable connection terminals U2, V2, W2...
-
Page 80: Control Connections
80 Electrical installation Control connections Control cable connections are described below. For location of the connectors, see page Connector X2: Connector X1: 230 V AC supply (non-UPS) 230 V AC supply (UPS) Description Description Connector X3: RJ45 cable with Ethernet Casing PE Connector X4: fieldbus... - Page 81 Normally closed contact, converter's common fault 230 V AC, release blocking of grid MCB (inside ABB converter) switching 0 V AC, release blocking of grid MCB (inside ABB converter) switching on Common, request for immediate grid MCB (outside of ABB converter)
- Page 82 82 Electrical installation WARNING! Either +24 V DC or +230 V AC can be supplied to connector X6.1. Example connections are shown above. Check the actual connections of your converter from the circuit diagrams delivered with the converter. Connector X6.2: Stator MCB control Description 0 V DC Not used...
- Page 83 Electrical installation 83 Connector X8.1: Grid voltage measurement Description Phase U Phase V Phase W Not used Not used Not used Connector X8.2: Stator voltage measurement Description Not used Not used Not used Phase U Phase V Phase W Connector X9: Stator current measurement Description Phase U, S1 Phase U, S2...
- Page 84 84 Electrical installation Connector X10: ICU auxiliaries Description Smoke detector, sensor's alarm contact Smoke detector, sensor's alarm contact High temperature sensor High temperature sensor Low temperature sensor Low temperature sensor Main fuses' status contact Main fuses' status contact 230 V AC fan supply voltage 0 V AC fan supply voltage WARNING! Either +24 V DC or +230 V AC can be supplied to connector X10.
-
Page 85: Connection Procedure
(option +K464) is connected, remove its fiber optic link first. Connecting to the rotor-side converter: Connect a PC to CH3 of the NDCU unit via a fiber optic link. For the connection diagram, see ACS800-67LC wind turbine converters system description and start-up guide [3AUA0000059432 (English)]. - Page 86 86 Electrical installation To access the auxiliary control unit: 1. Open the cubicle door. 2. Remove two fastening screws in the front part of the sliding frame. 3. Press down the knob between the fastening screws and pull the sliding frame out of the cubicle.
-
Page 87: Installation Checklist
Installation checklist 87 Installation checklist Check the mechanical and electrical installation of the converter before start-up. Go through the checklist below together with another person. WARNING! Read and follow the instructions given in Safety instructions. Ignoring the instructions can cause physical injury or death, or damage to the equipment. -
Page 88: Cooling Circuit
88 Installation checklist If the converter has been stored over one year: The electrolytic DC capacitors in the DC link of the converter have been reformed. See the reforming instructions (available from your local ABB representative). There is an adequately sized protective ground conductor between the generator and the converter. -
Page 89: Maintenance
This chapter contains maintenance intervals and maintenance instructions. Maintenance intervals The table below lists the main maintenance intervals recommended by ABB. Consult a local ABB Service representative for more details. See also Service Plan document (options +P910 and +P911). In the Internet, go to www.abb.com/drivesservices, select Drive Services, and Maintenance and Field Services. -
Page 90: Power Connections
The cooling fan lifespan depends on the running time of the fan, ambient temperature and dust concentration. Each power module has own cooling fan. Replacements are available from ABB. Do not use other than ABB specified spare parts. Replacing the cooling fan of the converter module ... - Page 91 Maintenance 91 1. Ensure that the converter is disconnected from the power supply network and all other precautions described in section Safety in installation and maintenance, page have been taken into consideration. 2. Disconnect the 230 V AC supply cables from connectors X1 and X2 at the right-hand side of the cabinet.
- Page 92 92 Maintenance...
-
Page 93: Replacing The Fan In The 400 Mm Wide Incoming Cubicle (Option +C111)
Maintenance 93 Replacing the fan in the 400 mm wide incoming cubicle (option +C111) WARNING! Read and follow the instructions on the first pages of this manual. Ignoring the instructions can cause physical injury or death, or damage to the equipment. -
Page 94: Replacing The Fan In Auxiliary Control Cubicle
94 Maintenance Replacing the fan in auxiliary control cubicle WARNING! Read and follow the instructions on the first pages of this manual. Ignoring the instructions can cause physical injury or death, or damage to the equipment. 1. Ensure that the converter is disconnected from the power supply network and all other precautions described in section Safety in installation and maintenance, page... -
Page 95: Converter Module
Note: Performing this action requires following accessories that are not included in the delivery as standard: winch (not available from ABB) and installation stand (order code: 3AUA0000078146). 1. Ensure that the converter is disconnected from the power supply network and all other... - Page 96 96 Maintenance of the quick connector and apply a layer of suitable joint compound (eg, Isoflex® Topas NB 52 from Klüber Lubrication) onto them. 16. Install a new module in reverse order. WARNING! Mind your fingers when pushing the module into the wind turbine converter.
- Page 97 Maintenance 97 Unplugging the fiber optic cables Decoupling the pipes Removing the mounting screws 13 Attaching the lifting chains...
-
Page 98: Installing The Installation Stand
98 Maintenance Installing the installation stand 1. The installation stand is fastened to the module frame. Remove the two screws in the module frame. 2. Align the stand and the rails on which the module lies on. Fasten the two screws (removed in previous step) back to their original positions. -
Page 99: Capacitors
It is not possible to predict capacitor failure. Capacitor failure is usually followed by damage to the unit and an input cable fuse failure, or a fault trip. Contact ABB if capacitor failure is suspected. -
Page 100: Ppcs Branching Unit (Apbu-Xx)
100 Maintenance PPCS branching unit (APBU-xx) Replacing the memory backup battery WARNING! Read and follow the instructions in chapter Safety instructions. Ignoring the instructions can cause physical injury or death, or damage to the equipment. 1. Ensure that the converter is disconnected from the power supply network and all other precautions described in section Safety in installation and maintenance, page... -
Page 101: Replacing The Pressure Transmitter
Maintenance 101 Replacing the pressure transmitter WARNING! Read and follow the instructions in chapter Safety instructions. Ignoring the instructions can cause physical injury or death, or damage to the equipment. 1. Open the connector and disconnect it from the pressure transmitter. 2. -
Page 102: Replacing Dc Fuses
102 Maintenance Replacing DC fuses There are two types of DC fuses that can be used with the converter, Bussmann and Mersen fuses. If the replacement fuses are of the other type than the fuses previously used in the converter, you have to adjust assembly parts as instructed in Bussmann fuses Mersen fuses. -
Page 103: Bussmann Fuses
Maintenance 103 Bussmann fuses Mersen fuses ... -
Page 104: Replacing Ac Fuses (Option +C111)
104 Maintenance Replacing AC fuses (option +C111) 1. Ensure that the converter is disconnected from the power supply network and all other precautions described in section Safety in installation and maintenance, page have been taken into consideration. 2. Remove the shrouds in front of the fuses. 3. -
Page 105: Replacing The Capacitor Of The Lcl Filter
Maintenance 105 Replacing the capacitor of the LCL filter 1. Ensure that the converter is disconnected from the power supply network and all other precautions described in section Safety in installation and maintenance, page have been taken into consideration. 2. Remove the shroud of the LCL filter cubicle. 3. -
Page 106: Replacing The Temperature Measurement Sensor
106 Maintenance Replacing the temperature measurement sensor 1. Ensure that the converter is disconnected from the power supply network and all other precautions described in section Safety in installation and maintenance, page have been taken into consideration. 2. The temperature measurement sensors are located on the coolant inlet and outlet pipes in the cubicle the pipes enter the converter cabinet. -
Page 107: Replacing The Smoke Detector
Maintenance 107 Replacing the smoke detector 1. Ensure that the converter is disconnected from the power supply network and all other precautions described in section Safety in installation and maintenance, page have been taken into consideration. 2. Remove the shrouds in front of the fuses. 3. -
Page 108: Replacing The Main Contactor
108 Maintenance Replacing the main contactor 1. Ensure that the converter is disconnected from the power supply network and all other precautions described in section Safety in installation and maintenance, page have been taken into consideration. 2. Remove the shroud of the LCL filter cubicle. 3. - Page 109 Maintenance 109...
-
Page 110: Replacing The Charging Circuit Resistors
110 Maintenance Replacing the charging circuit resistors 1. Ensure that the converter is disconnected from the power supply network and all other precautions described in section Safety in installation and maintenance, page have been taken into consideration. 2. Remove the shrouds in front of the resistors. The resistor are located in the upper part of the cubicle. -
Page 111: Replacing The Crowbar
Maintenance 111 Replacing the crowbar 1. Ensure that the converter is disconnected from the power supply network and all other precautions described in section Safety in installation and maintenance, page have been taken into consideration. 2. Remove the shrouds of the inverter module cubicle. 3. -
Page 112: Replacing The Crowbar Resistor
112 Maintenance Replacing the crowbar resistor WARNING! Beware of hot surfaces. Some parts remain hot for a while after the disconnection of input power. 1. Follow the steps 1…8 in section Replacing the crowbar on page 111. 2. Remove the crowbar resistor from the swing-out frame by removing four M8 nuts. 3. -
Page 113: The Internal Cooling Circuit
This chapter deals with the internal cooling circuit. Liquid cooling unit is not included in the ABB deliveries (the liquid cooling system of the converter does not include eg, pump, expansion tank etc.). -
Page 114: Diagram Of The Internal Cooling Circuit
114 The internal cooling circuit Diagram of the internal cooling circuit The following diagram shows how the coolant circulates in the converter system. Coolant OUT Coolant IN The power modules in each cubicle can not be isolated from the main cooling circuit. The converter is equipped with a drain valve and a bleed valve. -
Page 115: Additional Us And Canada Requirements
The internal cooling circuit 115 Additional US and Canada requirements To comply with the requirements of UL508C, install a pressure relief valve in the liquid cooling unit. The recommended discharge rate of the valve is 8…10 bar (800…1000 kPa). Coolant temperature control The temperature of the coolant in the internal cooling circuit must be kept within the limits specified in Specifications... -
Page 116: Maintenance
116 The internal cooling circuit Maintenance Filling up and bleeding the internal cooling circuit Converter line-ups with a customer cooling unit Both the converter and coolant must be at room temperature before filling in the cooling circuit. WARNING! Ensure that the maximum permissible operating pressure is not exceeded. -
Page 117: Draining The Internal Cooling Circuit
The internal cooling circuit 117 15. Repeat steps 13 to 15 a few times until all air is let out of the cooling circuit. Listen for a humming sound and/or feel the piping for vibration to find out if there is still air left in the circuit. -
Page 118: Pressure Limits
32.8 00553829 = Not allowed as standard but the coolant temperature must be 5 °C or above. Consult an ABB representative if operation below coolant temperature 5 °C is required. Example: At an air temperature of 45 °C and relative humidity of 65% the coolant temperature may not be below +36.8 °C... -
Page 119: Water Quality
The internal cooling circuit 119 Water quality Tap water The use of tap water is allowed as follows. Tap water must fulfil the requirements of the Council Directive 98/ 83/EC of 3/11/98 on the quality of water intended for human consumption. Corrosion inhibition with 0.5% by volume Cortec VCI-649 is required. -
Page 120: Approved Coolants
120 The internal cooling circuit Approved coolants • BASF Glysantin G30 • BASF Glythermin P44 • Clariant Antifrogen N • Clariant Antifrogen L • DOW company Dowcal 20 • DOW industrial grade propylene glycol (PGI) with Cortec VpCI-649 corrosion inhibitor that makes up 0.5% of the total coolant quantity in the circuit •... -
Page 121: Technical Data
Technical data 121 Technical data What this chapter contains This chapter contains technical data of the ACS800-67LC, eg, ratings, frame sizes, technical requirements and provisions for fulfilling the requirements for CE and other markings. Ratings The ratings for the converter with 50 Hz and 690 V AC power supply network are given below. -
Page 122: Rotor-Side Converter Ratings
At altitudes from 1000 to 4000 m (3281 to 13123 ft) above sea level, the derating is 1% for every 100 m (328 ft). If the installation site is higher than 2000 m (6600 ft) above sea level, contact the local ABB representative. -
Page 123: Type Equivalence Table
Technical data 123 Type equivalence table Grid-side converter Rotor-side converter Type Construction Module type Module type ACS800-67LC-1075/0575-7 2xR8i+1xR8i+1xLCL ACS800-104LC-0705-7+E205 ACS800-104LC-0705-7+E205 ACS800-67LC-1375/0575-7 2xR8i+1xR8i+1xLCL ACS800-104LC-0705-7+E205 ACS800-104LC-0705-7+E205 ACS800-67LC-1375/1125-7 2xR8i+2xR8i+1xLCL ACS800-104LC-0705-7+E205 ACS800-104LC-0705-7+E205 ACS800-67LC-1595/0865-7 3xR8i+2xR8i+1xLCL ACS800-104LC-0555-7+E205 ACS800-104LC-0555-7+E205 ACS800-67LC-2035/1125-7 3xR8i+2xR8i+1xLCL ACS800-104LC-0705-7+E205 ACS800-104LC-0705-7+E205 Fuses Main circuit AC fuses ... -
Page 124: Dimensions And Free Space Requirements
124 Technical data Notes: • Larger fuses must not be used. • Use always the fuses that are specified by ABB. • The recommended fuses are for branch circuit protection per NEC as required for UL approval. • Make sure that fuses within a converter are made by the same manufacturer. -
Page 125: Internal Cooling Circuit Data
Technical data 125 Liquid massflow l/min (m With option With options ACS800-67LC- With option With option With options ICU200 +C108 or +D150 and +C111 +D150 +D150 and +C111 +C109 +C108 or +C109 1075/0575-7 75 (4.5) 85 (5.1) 100 (6.0) 93 (5.6) 103 (6.2) -
Page 126: Terminal And Lead-Through Data For The Control Cables
126 Technical data Terminal and lead-through data for the control cables The control cables are internally wired. The counterpart connector data is given in the table below. Terminal Identification Type Part number Han Q 5/0 Crimp terminal Female insert (F) 09 12 005 3101 Crimp contact female 09 33 000 6202... -
Page 127: Electric Power Network Specification
Technical data 127 Terminal Identification Type Part number X6.1 Han 16A Crimp terminal Male insert (M) 09 20 016 3001 Crimp contact male 09 33 000 6105 Han 1.0 mm Han 16A Hood 19 20 016 1440 Cable gland M20 Han Hv E Screw terminal Male insert (M) 09 34 006 2601... -
Page 128: Dc Resistor Connection Data
128 Technical data DC resistor connection data See ABRU-0x DC choppers (+D150) and resistors (+D151) for ACS800-67LC/-77LC/- 87LC wind turbine converters hardware manual [3AUA0000076494 (English)]. DC connection data Nominal voltage 976 V DC +20% Maximum operating voltage < 1211 V DC... -
Page 129: Materials
EU. They must be removed and handled according to local regulations. For further information on environmental aspects and more detailed recycling instructions, please contact your local ABB distributor. Auxiliary circuit current consumption Cooling fans ... -
Page 130: Applicable Standards
• UL 508A First Edition. Industrial Control Panels. Grid codes See ACS800-67LC wind turbine converters system description and start-up guide [3AUA0000059432 (English)]. CE marking A CE mark is attached to the converter to verify that the unit follows the provisions of the European Low Voltage and EMC Directives. -
Page 131: Declaration Of Incorporation
Technical data 131 Declaration of incorporation ... -
Page 132: Validating The Operation Of A Safety Function
132 Technical data Validating the operation of a safety function IEC 61508 and EN IEC 62061 require that the final assembler of the machine validates the operation of the safety function with an acceptance test. The acceptance tests for the standard safety functions of the converter are described in chapter Planning the electrical installation. -
Page 133: Category C4
600 V AC. The markings are attached to the converter when option +C129 (cULus) is selected. ETL marking according to UL508C up to 690 V AC is pending. Contact the local ABB representative when ETL marking is required. ACS800 multidrive modules: The module is cULus listed industrial control equipment. The approvals are valid with rated voltages up to 600 V. -
Page 134: Csa Marking
CSA marking ACS800 multidrive modules: The module is cCSAus certified. The approvals are valid with rated voltages up to 600 V. The ACS800-67LC is not CSA marked. Contact the local ABB representative when CSA approval is required. C-Tick marking C-Tick marking is required in Australia and New Zealand. -
Page 135: Dimension Drawings
Dimension drawings 135 Dimension drawings What this chapter contains This chapter contains example dimension drawings. Example lead-through drawings are included. The example drawing set helps in understanding the structure of the converter. WARNING! These drawings are not intended for mechanical installation and cable lead-through purposes as they most probably differ from a customized converter. -
Page 136: Acs800-67Lc-1075/0575-7 And -1375/0575-7
136 Dimension drawings ACS800-67LC-1075/0575-7 and -1375/0575-7... -
Page 137: With 400 Mm Wide Incoming Cubicle (Option +C111)
Dimension drawings 137 With 400 mm wide incoming cubicle (option +C111) ... -
Page 138: Acs800-67Lc-1375/1125-7
138 Dimension drawings ACS800-67LC-1375/1125-7... -
Page 139: With 400 Mm Wide Incoming Cubicle (Option +C111)
Dimension drawings 139 With 400 mm wide incoming cubicle (option +C111) ... -
Page 140: Acs800-67Lc-1595/0865-7 And -2035/1125-7
140 Dimension drawings ACS800-67LC-1595/0865-7 and -2035/1125-7... -
Page 141: With 400 Mm Wide Incoming Cubicle (Option +C111)
Dimension drawings 141 With 400 mm wide incoming cubicle (option +C111) ... -
Page 142: Sealing Modules For Grid Cables
142 Dimension drawings Sealing modules for grid cables Dimensions and illustrations for optional sealing modules in incoming cubicles (widths 200 mm and 400 mm (option +C111)) are presented below. Option +1H370 Options +1H370 and +C111 ... -
Page 143: Options +2H370 And +C111
Dimension drawings 143 Options +2H370 and +C111 Option +1H371 ... -
Page 144: Options +1H371 And +C111
144 Dimension drawings Options +1H371 and +C111 Options +2H371 and +C111 ... -
Page 145: Option +H378
Dimension drawings 145 Option +H378 Options +H378 and +C111 ... -
Page 146: Sealing Modules For Rotor Cables
146 Dimension drawings Sealing modules for rotor cables Dimensions and illustrations for optional sealing modules in inverter module cubicles (widths 500 mm and 700 mm) are presented below. Option +1H372 ... -
Page 147: Option +2H372
Dimension drawings 147 Option +2H372 ... -
Page 148: Option +3H372
148 Dimension drawings Option +3H372 ... -
Page 149: Option +1H373
Dimension drawings 149 Option +1H373 ... -
Page 150: Option +2H373
150 Dimension drawings Option +2H373 ... -
Page 151: Option +3H373
Dimension drawings 151 Option +3H373 ... -
Page 152: Option +H375
152 Dimension drawings Option +H375 ... -
Page 153: Further Information
Product and service inquiries Address any inquiries about the product to your local ABB representative, quoting the type designation and serial number of the unit in question. A listing of ABB sales, support and service contacts can be found by navigating to abb.com/searchchannels. - Page 154 © Copyright 2018 ABB. All rights reserved. Specifications subject to change without notice.
Need help?
Do you have a question about the ACS800-67LC and is the answer not in the manual?
Questions and answers