
Related Manuals for Wahsega Labs Carina


Summary of Contents for Wahsega Labs Carina
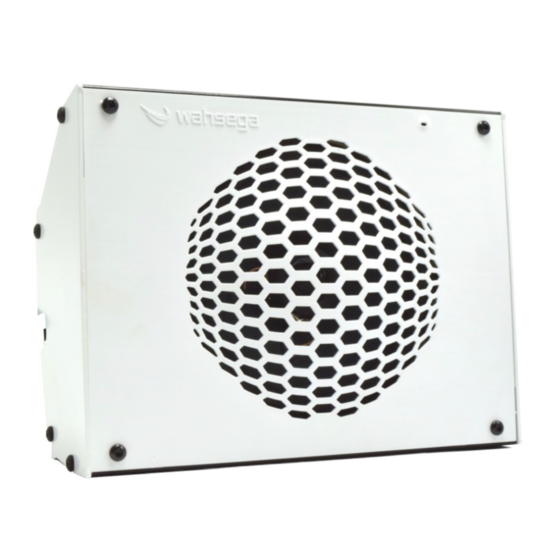
- Page 1 Carina Wall Mount IP Speaker User’s Guide Getting Started This step-by-step guide will help you setup and install your Wahsega Carina Wall Mount IP Speaker. www.wahsega.com...
-
Page 2: Preface
Wahsega Labs Company, except as allowed under the copyright laws. Trademarks Wahsega and the Wahsega logo are trademarks of Wahsega Labs, LLC. All other brand and product names are trademarks, service marks, registered trademarks, or registered service marks of their respective companies. -
Page 3: Table Of Contents
Important Notice ......................i Copyright Notice ......................i Trademarks ........................i 1: O ......................3 HAPTER VERVIEW Carina Wall Mount IP Speaker Functionality ............. 4 Quality Standards ......................6 2: U ....................7 HAPTER XPERIENCE Software Capabilities ....................8 Getting Started ......................9 Endpoint Configuration Without Carina Event Manager ........ -
Page 4: Chapter 1 Overview
Each and every Wahsega product is designed, developed and manufactured in the USA, ensuring a superior product at the best price available in the market. Carina Wall Mount IP Speaker User’s Guide Page 3 v 3.0.1.20200827... -
Page 5: Carina Wall Mount Ip Speaker Functionality
Carina Wall Mount IP Speaker Functionality The initial functions of Wahsega’s Carina Wall Mount IP Speaker include: Centralized Event Manager configuration Event Manager auto-detects each Carina IP Speaker on the network All configuration options accessible via Carina Event Manager’s centralized HTTP Web interface ... - Page 6 (short press vs. long press) Classroom sound reinforcement via optional audio input wallplate Audio input LED indicator Volume control Line-in microphone Activation button Carina Wall Mount IP Speaker User’s Guide Page 5 v 3.0.1.20200827...
-
Page 7: Quality Standards
To assure the highest quality standards, all Wahsega products are designed, developed and manufactured in the USA. Carina Wall Mount IP Speaker User’s Guide Page 6 v 3.0.1.20200827... -
Page 8: Chapter 2 User Experience
The Carina Wall Mount IP Speaker also has the ability to drive a second, independent and lower-cost Wahsega speaker up to 20 meters away via Cat5e or Cat6 cable. For larger classrooms where a second... -
Page 9: Software Capabilities
Software Capabilities Wahsega’s Carina IP Speaker is configured centrally at the Carina Event Manager, which allows bulk configuration as well as individual customization. This allows access to various settings such as network/IP address, SIP account and Event Manager configuration, intercom/speaker and display behavior, panic button call numbers, and administrative functions such as firmware upgrade and configuration backup/restore. -
Page 10: Getting Started
When connected, it will power on immediately, and the LINK/ACTV status LED will begin to blink. 4. Your Carina Event Manager will automatically detect the Wall Mount IP Speaker when you power up and connect to the network via PoE. -
Page 11: Endpoint Configuration Without Carina Event Manager
3. On the left side of the page is the Status bar. It shows the speaker’s current System information such IP address, MAC address, system time and uptime. The speaker’s SIP account status (default status is unconfigured and unregistered) is listed under Accounts. Carina Wall Mount IP Speaker User’s Guide Page 10 v 3.0.1.20200827... - Page 12 5. Set time and date and change username or password on the System page. Please note that the Carina Event Manager may be used as a system NTP server for consistent date and time across the network.
-
Page 13: Chapter 3: Configuration In Event Manager
Chapter 3 Configuration in Event Manager The Carina Wall Mount IP Speaker should be configured within the Carina Event Manager’s configuration webpages. Event Manager automatically detects each Carina IP Speaker on the same network, and it provides bulk or individual configuration options. Wahsega recommends using a Chrome or Firefox browser for best results. -
Page 14: Individual Device Configuration
Individual Device Configuration Navigate to the Devices page on your Event Manager and click the button next to the device you’d like to configure. Carina Wall Mount IP Speaker User’s Guide Page 13 v 3.0.1.20200827... -
Page 15: Details
Target Version – Firmware version this speaker should be running currently or upon next reprovisioning cycle. Target version “Not Set” will keep this device at Current Version upon reprovisioning. Carina Wall Mount IP Speaker User’s Guide Page 14 v 3.0.1.20200827... -
Page 16: General
2 rooms (1 speaker each) – IP speaker with connected Second Room Speaker (WL-SPKR-xx-2R) for independent control of a second room. Room 1 and Room 2 are configured separately on their respective tabs. Carina Wall Mount IP Speaker User’s Guide Page 15 v 3.0.1.20200827... - Page 17 A button press during an active call or call attempt will NEVER hang up a long press call. The call will continue until the remote party hangs up. Carina Wall Mount IP Speaker User’s Guide Page 16 v 3.0.1.20200827...
-
Page 18: Rtp
Speaker Volume – Volume level of speaker for incoming SIP calls and RTP multicast broadcasts. Microphone Volume – Volume level of the integrated microphone, used in SIP calls. Carina Wall Mount IP Speaker User’s Guide Page 17 v 3.0.1.20200827... - Page 19 Tone Notification – When enabled, a tone is played before the RTP broadcast begins. Trigger Relay – When enabled, the IP Speaker’s onboard relay will be triggered for the duration of the RTP broadcast. Carina Wall Mount IP Speaker User’s Guide Page 18 v 3.0.1.20200827...
-
Page 20: Sip
SIP server, if needed. Authentication username – By default, authentication is done with the Username/Number above. Fill in the Authentication Username if a different username is needed. Carina Wall Mount IP Speaker User’s Guide Page 19 v 3.0.1.20200827... - Page 21 Timers Call Attempt Timeout – An unanswered outbound call attempt will be automatically cancelled when this timer expires. Default is 180 seconds. Carina Wall Mount IP Speaker User’s Guide Page 20 v 3.0.1.20200827...
- Page 22 NAT connection, or in keeping a TCP connection to the SIP server active. Silence suppression – When enabled, RTP packets are not sent when silence is detected. Carina Wall Mount IP Speaker User’s Guide Page 21 v 3.0.1.20200827...
-
Page 23: Logging
Report to server – Enable to begin logging to a network server. Default value: Disabled. Server address – The IP address or URL of the syslog server. Server port – The port (if needed) for the syslog server. Carina Wall Mount IP Speaker User’s Guide Page 22 v 3.0.1.20200827... -
Page 24: Network
Event Manager. Host Name – Set host name to change how this device is listed in your DHCP server, if desired. Carina Wall Mount IP Speaker User’s Guide Page 23 v 3.0.1.20200827... - Page 25 MTU size – Maximum transmission unit allowed on the Ethernet connection. The standard for Ethernet networks is 1500, and you should not change this value unless directed by your network administrator. Carina Wall Mount IP Speaker User’s Guide Page 24 v 3.0.1.20200827...
-
Page 26: System
NTP Enabled – When enabled, the system will query the NTP (network time protocol) server for the current time. The timezone and daylight savings time configuration is handled separate from the NTP time. Default value: Enabled Carina Wall Mount IP Speaker User’s Guide Page 25 v 3.0.1.20200827... - Page 27 For more information about DST rules and dates, see http://www.nist.gov/pml/div688/dst.cfm. Time zone – Select the region that most closely matches your time zone. (Note that daylight saving time is not automatically applied based on region.) Carina Wall Mount IP Speaker User’s Guide Page 26 v 3.0.1.20200827...
-
Page 28: Config File
Revert Changes – Delete any changes made in this session and revert to currently loaded configuration file. Load from File – Load a JSON configuration file for a Carina IP Speaker into this speaker. Download to File – Download this IP Speaker’s current info.json configuration file. -
Page 29: Appendix A: Restoring Factory Settings
Mount IP Speaker, you can do so by following the steps below. Line Out + Line Out – LED 1 LED 2 Input 1 Input 2 Input 3 Relay 1: NO Relay 1: COM Relay 1: NC Carina Wall Mount IP Speaker User’s Guide Page 28 v 3.0.1.20200827... - Page 30 IP Speaker to dynamic IP (DHCP) mode. You will need to use the new, dynamic IP address to gain access to your IP Speaker’s configuration webpages once again. Carina Wall Mount IP Speaker User’s Guide Page 29 v 3.0.1.20200827...
- Page 31 Carina Wall Mount IP Speaker WL-SPKR-SMT-CAR User’s Guide Version 3.0.1.20200827 Carina Wall Mount IP Speaker User’s Guide Page 30 v 3.0.1.20200827...
Need help?
Do you have a question about the Carina and is the answer not in the manual?
Questions and answers