
Subscribe to Our Youtube Channel
Related Manuals for Wahsega Labs WL-SPKR-22-SIP-1


Summary of Contents for Wahsega Labs WL-SPKR-22-SIP-1
-
Page 1: Getting Started
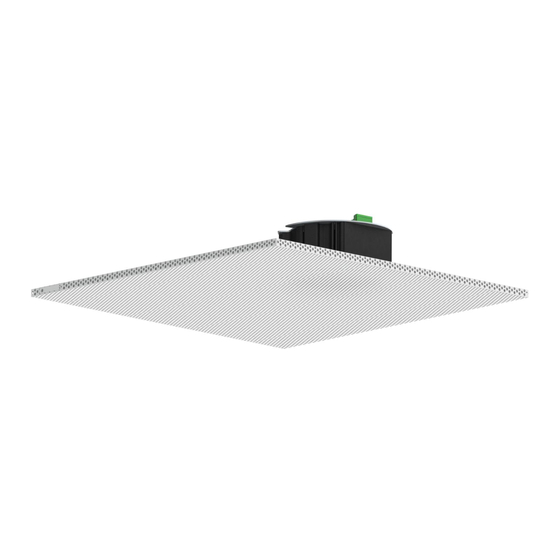
2x2 Ceiling Speaker with SIP Users Guide Getting Started This step by step guide will help you setup and install your Wahsega Labs speaker with SIP. www.wahsega.com... -
Page 2: Preface
Copyright Notice © 2017 Wahsega Labs, Inc. All rights reserved Reproduction, adaptation, or translation of this manual is prohibited without prior written permission of Wahsega Labs Company, except as allowed under the copyright laws. Trademarks Wahsega Labs Incorporated and the Wahsega Labs Incorporated logo are trademarks of Wahsega Labs Incorporated, Inc. -
Page 3: Table Of Contents
T able of Contents PREFACE .............................. I Important Notice ......................... i Copyright Notice ......................... i Trademarks ............................ i CHAPTER 1: OVERVIEW ........................2 Speaker Functionality ....................... 3 Quality Standards ........................5 CHAPTER 2: USER EXPERIENCE ....................6 Software Capabilities ........................ 8 Getting Started .......................... -
Page 4: Chapter 1: Overview
Chapter 1 Overview The Wahsega Labs product line offers the highest quality two-way audio and durability in the industry today. Each and every Wahsega Labs product is designed, developed and manufactured in the USA, ensuring a superior product at the best price available in the market. -
Page 5: Speaker Functionality
Speaker Functionality The initial functions of the Wahsega speaker with SIP include: SIP intercom IP paging speaker Crystal clear audio Multiple audio codecs, including G.722, G.711, DVI4, Speex, SILK, PCM and iLBC Environmental noise suppression Extensive interoperability with most SIP servers and PBXs ... - Page 6 Secondary inputs Second RJ45 connector for easy installation and expansion Able to drive second, auxiliary Wahsega speaker up to 20m away via Cat5e or Cat6 cable Compatible with standard panic buttons Advanced panic button functionality, designed to reduce false alarm triggers with short press and long press options ...
-
Page 7: Quality Standards
Wahsega Labs’ ultimate goal is to provide a solution that is both cost effective and unsurpassed in quality. By leveraging existing... -
Page 8: Chapter 2: User Experience
Chapter 2 User Experience The Wahsega 2x2 Ceiling Speaker with SIP may look like a standard 2x2 ceiling tile speaker, but it can receive audio from multicast IP broadcasts or from a SIP PBX, and it can act as an intercom for two-way conversations with the help of its built-in microphone. - Page 9 Once your speaker is installed and configured, you will be able to receive SIP calls with no additional in-room setup. Two-way communication is clear and simple with a built-in microphone which transmits audio from the classroom to the caller. If a panic button is connected to the speaker, it will make an emergency call to a preset SIP number on the PBX.
-
Page 10: Software Capabilities
Software Capabilities The speaker’s configuration is accessible using an HTTP Web interface, viewable from any Web browser on the same LAN. This allows access to various settings such as network/IP address, SIP account configuration, RTP multicast broadcast configuration, intercom/speaker behavior, panic button call numbers, and administrative functions such as firmware upgrade and configuration backup/restore. -
Page 11: Getting Started
Getting Started 1. Connect the speaker’s main Ethernet port—labeled POE—to a network using a Power-over-Ethernet (PoE) Ethernet connection. When connected, it will power on immediately, and the LINK/ACTV LED on the Ethernet port will begin to blink. 2. Locate and note your speaker’s MAC address. It is printed as a QR code on a white sticker on the front of the speaker. - Page 12 4. Once the search is complete, the speaker will appear in the Network view as “Wahsega Speaker (:XX:XX).” The last two octets of its MAC address will be included in its name, so you can easily distinguish multiple units. Double-click the speaker’s icon to open its Web interface. 5.
- Page 13 9. To change the SIP account settings, go to the Accounts page and modify settings in the account. Most users will only need to set Username/Number (the phone number or extension assigned to this speaker) and Domain (the hostname or IP address of your SIP server). You may also provide an Account Name, which is used only for logging purposes, and a Display Name, which may be used by your SIP server depending on its configuration.
-
Page 14: Chapter 3: Configuration And Web Interface
Chapter 3 Configuration and Web Interface The Web interface is a set of webpages used to configure the various settings available on the speaker. It allows the speaker to be configured from any computer or device with a Web browser on the same network as the speaker. -
Page 15: General Settings
General Settings The General page configures settings for Room Mode and Panic Button. Room Mode Room Mode – Configure the number of rooms and/or speakers controlled by this primary speaker. 1 room, 1 speaker – Single room, single speaker configuration. -
Page 16: Account Settings
Account Settings www.wahsega.com Page 14... - Page 17 The Accounts page configures settings for Multicast and SIP accounts for the primary speaker (Room 1) and second room speaker (Room 2), if applicable. There are nine (9) priority levels in each room for Multicast and SIP calls. Four of the multicast streams are considered “high priority” and four are considered “low priority.”...
- Page 18 Username/Number – The phone number or extension this speaker is configured with on the SIP server. Domain – The hostname or domain name of the SIP server. Not used in peer-to-peer (P2P) mode. Register with domain – If checked, operates in normal SIP mode. If unchecked, operates in P2P mode.
-
Page 19: Audio Settings
Audio Settings The Audio page configures settings for speaker and microphone audio as well as codec selection. www.wahsega.com Page 17... - Page 20 Audio Settings Speaker volume – Increase or decrease decibel level of speaker output. Default level is 0 dB, or no change. Microphone volume – Increase or decrease decibel level of microphone input. Default level is +15 dB. Microphone high-pass filter – Eliminates low-frequency noise that can make speech difficult to understand.
-
Page 21: Network Configuration
Network Configuration The Network page configures settings for TCP/IP networking. www.wahsega.com Page 19... - Page 22 Connection Type Dynamic IP – Choose this to use DHCP to assign an address automatically. Note that when using DHCP, you will have to determine the IP address assigned to the speaker using your DHCP server or through some other method in order to access the configuration webpages in the future.
- Page 23 Port Range – Select the UDP port range to use for sending RTP audio network traffic during a call. SNMP SNMP Enabled – SNMP is required to control relays in the speaker. The speaker’s relays cannot be used while SNMP is disabled, so be sure to check this box if you may be using relays.
-
Page 24: General System Configuration
General System Configuration The System page configures settings for the speaker’s operating system and other administrative functions. www.wahsega.com Page 22... - Page 25 Authentication Username – Set the username and password used on the configuration webpages and Telnet shell. Default is admin. Syslog (optional) Report to server – Configures a syslog server that can receive system logs from the speaker. This requires a PC or server running a syslog server to receive and store the logs.
-
Page 26: Firmware Management
Firmware Management The Management page has functions for managing the speaker’s configuration and firmware. Configuration Backup/Download – Use this to retrieve a copy of the speaker’s current configuration and save to disk. Restore/Upload – Use this to upload a valid configuration file (.json format) that has been retrieved and saved from a speaker. - Page 27 Firmware Use this to upload new firmware. First, click “Choose File” and select the appropriate firmware file in .bin format. Next, click “Update firmware.” Once the file has loaded and your device begins its update, it will restart automatically with the new firmware in place.
-
Page 28: Appendix A: Restoring Factory Settings
Appendix A Restoring Factory Settings Software-based Factory Reset If you need to erase the configuration settings in your 2x2 Ceiling Speaker with SIP, you can do so in one of two ways. Option A returns only IP settings to factory default, and Option B returns all of the speaker’s settings to factory default. - Page 29 Option A – Steps for activating a partial factory reset: 1. Start with the PoE cable plugged in and the speaker powered on. 2. Find the green status LED on the face of the speaker. Next to the status LED, locate the small, black reset button. 3.
- Page 30 2x2 Ceiling Speaker with SIP WL-SPKR-22-SIP-1 WL-SPKR-22-SIP-2 WL-SPKR-22-B User’s Guide Rev 053017 www.wahsega.com Page 28...
Need help?
Do you have a question about the WL-SPKR-22-SIP-1 and is the answer not in the manual?
Questions and answers