
Related Manuals for Securam BSL-0601A-D66

Summary of Contents for Securam BSL-0601A-D66
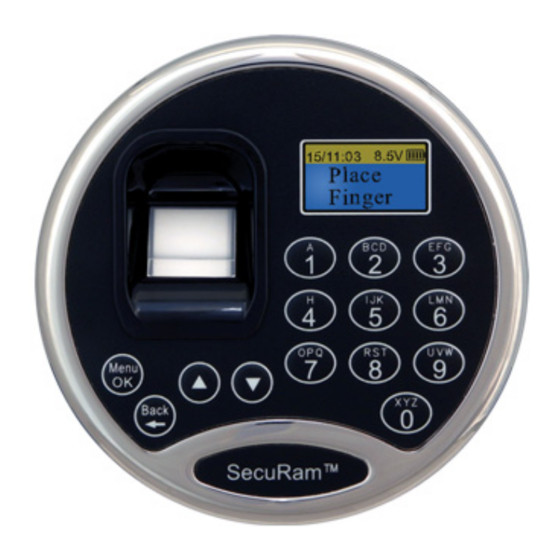
- Page 1 Document No.: BSL0601AD66 Version No.:V9.93140529 (E) BSL-0601A-D66 Model: Biometric Controller User’s manual SecuRam Systems, Inc.
-
Page 2: Table Of Contents
Contents E n r o l l t h e f i r s t f i n g e r p r i n t f o r q u i c k s t a r t ( L e v e l 3 ) … … … E n r o l l t h e s e c o n d... - Page 3 3 6 . D e l e t e o n e u s e r / a l l u s e r s ( L e v e l 1 & 2 ) … … … … . … … … 3 7 .
- Page 4 Security Level Classification Level 1: Entrypad can be operated by a code only. Level 2: Entrypad must be operated by a fingerprint and its bound code. It is a higher security level. Level 3: Entrypad can be operated by a fingerprint or a code. All enrolled users will be deleted when security level is changed.
-
Page 5: Enroll Additional Fingerprints (Level 3)
Press “Menu/OK” again. press “▲” or “▼” to select the ID NO. to be enrolled. For example: select ID No. 02. Press “Menu/OK”. Place your finger (different from the first one) on the fingerprint reader window and hold. The second fingerprint, with an ID No. 02, is enrolled successfully. Note: ID No. -
Page 6: Enable User Code (Level 3)
5.Enable User Code (Level 3) Press “Menu/OK”. The screen will show “Select Menu”. Press “▲” or “▼” to select “System Menu”. Press “Menu/OK” again. Place an enrolled administrator’s finger (ID No. 01 or 02) on the reader window and hold or enter the code of an administrator . -
Page 7: Enable User (Level 3)
reader window and hold or enter the code of an administrator . After the fingerprint or code verified successfully, Press “▲” or “▼” to select “Disable User”. Press “▲” or “▼” to select the ID No. to disable (e.g. ID 03). Press “Menu/OK”. - Page 8 Press “Menu/OK”. Now the time delay is set successfully. Attentions on Time Delay operations: ● Time Delay Override: At anytime ,TDO (time delay override) user can unlock the actuator without time delay. During Time Delay period, after ID No. 01 is verified successfully, the actuator will be unlocked without delay.
-
Page 9: Authorize Access To Locks (Level 3)
with the LCD showing: When the door is closed ,LCD screen will show “Door closed”. Note: TDO user can unlock the actuator without time delay. When the entrypad starts its Time Delay process, user can operate the entrypad normally, but the actuator will not be unlocked even if the verification is successful. - Page 10 Press “Menu/OK”. Press “▲” or “▼” to set the first ID in the group of users to be authorized. For example, to authorize users with ID No. from 03 to 05. Press “Menu/OK”. Press “▲” or “▼” to set the last ID in the group of users to be authorized. press “Menu/OK”.
- Page 11 Press “1”, Lock 1 will be unlocked; If you press a number which is >1 (for example 3), Lock 1 will open firstly and Lock 3 will open in 2 seconds. Then Door 3 can be open within 18 seconds . 15.
-
Page 12: Mode
reader window and hold or enter the code of an administrator . After the fingerprint or code verified successfully, When the LCD shows “Select Menu”, press “▲” or “▼” to select “Enable Dual Mode”. Press “Menu/OK. When the LCD shows: Dual Mode function is activated. - Page 13 “Menu/OK”. Two (2) time tables can be preset. Press “▲” or “▼” to select Time Table number and “Y” (yes) or “N” (No) and press “Menu/OK”. If “Y” is selected, the Time Table (for sample: Time Table 01) is enabled. If “N” is selected, the Time Table is disabled. Press “▲”...
- Page 14 . Wrong entry penalty (Level 3) Four (4) consecutive invalid code entries initiates a 4-minute delay period with the LCD showing: The entrypad is shut down and no operation is permitted. Then, the entrypad will start counting down with the LCD flashing the remaining time every 15 seconds.
- Page 15 Select the “End Month” Select the “End Week” Select the “End Time” For example: If you live in America or Canada, so, you can select “Start Month” : 03 “Start Week” :02 “Start Time” :02 “End Month” :11 “End Week” :01 “End Time”...
- Page 16 1) Max. Door Open Time can be set between 00 ~ 30 min. 2) When FPC-0601A-D66 entry pad use with EL-0601-S actuator , BSL-0601A-D66 Biometric Controller have the function of Max. Door Open Time . 23. Show Audit Trail (Level 3) Press “Menu/OK”.
-
Page 17: Enr Ol L T He F I R S T F I Nger Pr I Nt And I T S Bound Code F Or Qui Ck S T Ar T
Follow the same steps to set to Level 1. Note: After Security Level is changed, the number of locks will not be changed. When security level is changed, all fingerprints and codes will be deleted. The first default code will be 123456. 26.Enroll the first fingerprint and its bound code for quick start (Level 2) Place your finger on the fingerprint reader window and hold. - Page 18 default code 123456. When the LCD screen shows “Select Menu”, Press “▲” or “▼” to select “Set/Change User Code” ,Enter the 6-digits new code . Note: Follow the same steps to change any valid code. 29. Enroll the second or additional codes (Level 1 ) Press “Menu/OK”.
- Page 19 Follow the steps on page 16. 38.Set Time Lock (Level 1 & 2) Follow the steps on page 17-18. 39.See Timer (Level 1 & 2) Follow the steps on page 18. 40.Wrong entry penalty (Level 1 & 2) Follow the steps on page 19. 41.Day light savings (Level 1 &...
Need help?
Do you have a question about the BSL-0601A-D66 and is the answer not in the manual?
Questions and answers