bora Professional PKA3 Operating Instructions Manual
Cooktop extractor and cooktops
Hide thumbs
Also See for Professional PKA3:
- Installation instructions manual (28 pages) ,
- Installation instructions manual (44 pages)

Related Manuals for bora Professional PKA3


Summary of Contents for bora Professional PKA3
- Page 1 Operating instructions BORA Professional 3.0 system Cooktop extractor and cooktops P3XUMEN-100 1044130 - 48 www.bora.com...
-
Page 2: Table Of Contents
– Activating the automatic extractor function ...... 23 Model description ...............11 – Deactivating the automatic extractor function ....23 – BORA Professional 3.0 cooktop extractors ....... 11 6.4.2 Short-time timer/egg timer (system function) ....23 – BORA Professional 3.0 cooktops ........11 –... - Page 3 – Calling up the menu ............34 – Selecting and confirming menu items ....... 34 10.1 BORA manufacturer’s warranty .........43 – Making, confirming and saving settings ......34 10.1.1 Warranty extension ..............43 – Closing the menu .............. 34 10.2...
-
Page 4: General Information
APAC Pty Ltd and BORA Lüftungstechnik GmbH – hereinafter Information notes point to special features that must be referred to as BORA – does not assume any liability for damage taken into account. arising from disregard for or non-adherence to the documents... -
Page 5: Safety
Only use stove guards and covers that are is described here is classed as unintended. approved by the appliance manufacturer; BORA does not assume any liability for otherwise, there is a risk of accidents. damages caused by improper use or incorrect To choose a suitable stove guard, contact your operation. -
Page 6: Safety Instructions - Operation
This can damage the using the LS switch, fuses, automatic circuit appliances (particularly in the case of hard and breakers or contactor. sharp objects). Contact BORA Service. Never use the appliances as work or storage surfaces. WARNING! ÿ... - Page 7 This can damage the fan or impair the exhaust performance. Do not store any items or paper on the cooktop extractor. Only operate the integrated cooktop extractor with the grease filter fitted. www.bora.com...
-
Page 8: Safety Instructions - Cleaning And Maintenance
During or after a power cut, a cooktop that was previously in operation may still be hot even though there is no indication of residual heat. Do not touch the cooktop while it is still hot. Keep children away from the hot cooktop. www.bora.com... -
Page 9: Safety Instructions - Repairs, Servicing And Spare Parts
Do not make any modifications, additions or alterations to the appliance. A damaged power supply cable must be replaced by a suitable power supply cable. This may only be done by an authorised member of the After Sales Service team. www.bora.com... -
Page 10: Energy Labelling
Product information according to delegated regulation (EU) no. 65/2014 and regulation (EU) no. 66/2014. Product information according to delegated regulation (EU) no. 65/2014 and regulation (EU) no. 66/2014. Manufacturer Manufacturer Manufacturer Manufacturer BORA BORA BORA BORA Model identification Model identification... -
Page 11: Appliance Description
Tab. 4.1 Cooktop extractor model description BORA Professional 3.0 cooktops The cooktops PKFI3, PKI3, PKIW3, PKC3, PKCB3, PKCH3, PKT3 and PKG3 are the modular components of the BORA Professional 3.0 system. Model Long name and description PKFI3... -
Page 12: Control Knob Assignment
For hygiene and health reasons, this must be replaced at the recommended intervals (see the Cleaning and maintenance Cover frame chapter). Holding plate Curved duct piece In recirculation mode, ensure sufficient ventilation and Straight duct piece aeration to expel humidity. Universal control unit Control knob Cover flap www.bora.com... -
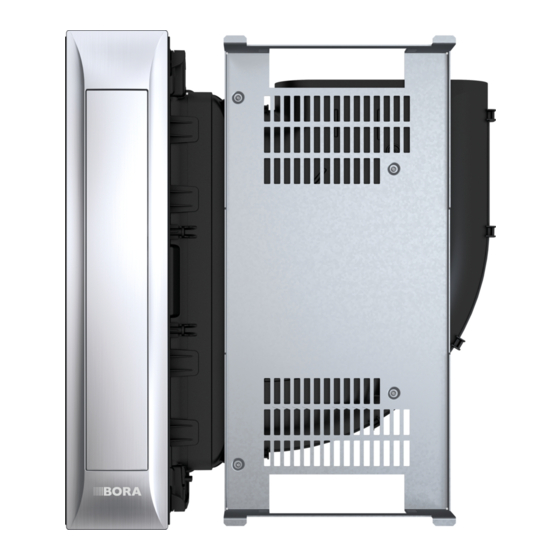
Page 13: Cooktop Extractor System Pkas3/Pkas3Ab
The USB port is only designed for updates or data export and only has sufficient power supply for these processes. It is not possible to charge devices or carry out other functions. Fig. 4.7 Grease filter components Cover flap Stainless steel grease filter Filter tray Maintenance tray www.bora.com... -
Page 14: Cooktop Appliance Description
Heat retention levels active Error message (see the Troubleshooting chapter) Tab. 4.5 Fig. 4.9 Cooktop display Layout of cooktop PKI3 and cooking zone dimensions Front induction cooking zone Rear induction cooking zone Rear cooking zone display Front cooking zone display www.bora.com... - Page 15 2-ring rear cooking zone Cooktop PKCH3 Fig. 4.11 Layout of cooktop PKC3 and cooking zone dimensions Fig. 4.13 3-ring front cooking zone Layout of cooktop PKCH3 and cooking zone 2-ring rear cooking zone dimensions 1-ring Hyper front cooking zone 2-ring rear cooking zone www.bora.com...
-
Page 16: How Induction Cooktops Work (Pkfi3, Pki3, Pkiw3)
Observe the minimum pot base diameter (see table 4.7). Minimum cookware diameter Power levels The BORA induction wok pan HIW1 is ideal for the induction wok cooktop PKIW3 and is available as an The high power output of induction cooktops results in the very accessory. -
Page 17: Noises
The power setting can be used in order to quickly heat up large quantities of water. If the power setting is activated, the cooking zones will run at extra high power. After 10 minutes, the cooking zone is automatically switched back to power level www.bora.com... -
Page 18: Safety Devices
Tab. 4.15 Safety shut-down on the different heat retention levels 2:12 2:12 Switch the cooking zone back on if you want to put the cooking zone back into operation (see the Operation chapter). 1:48 1:18 0:10 ß p Tab. 4.11 Safety shut-down on the different power levels www.bora.com... -
Page 19: Residual Heat Indicator
The childproofing feature can only be activated when all the cooking zones are switched off (see the Operation chapter). If a single cooktop is operated without a cooktop extractor, removal of the knob ring can prevent the appliance from being switched on accidentally or without permission. www.bora.com... -
Page 20: Overview Of Features And Functions
Overview of features and functions Overview of features and functions The full range of functions is only available for BORA Professional 3.0 system cooktops in combination with the cooktop extractors PKA3 and PKAS3/PKAS3AB. BORA Professional 3.0 system Cooktop extractors Cooktops... -
Page 21: Functions And Operation
Long press diagram Turn the knob ring anticlockwise to power level 0. Extra-long press diagram Any active additional functions will be deactivated and the Use tap commands to: appliance will be switched off. call up the function menu confirm menu items/times/functions www.bora.com... -
Page 22: Operating The Cooktop Extractor
Operating the cooktop extractor Activating the power setting Turn the knob ring clockwise to power setting The cooktop extractor must only be operated with BORA Maximum extractor power is available. cooktops. After 10 minutes, the power setting is automatically The cooktop extractor can only be operated when the switched back to power level 9. -
Page 23: Calling Up The Function Menu
(1, 2, 3, ..., 19, 20, 25, 30, ..., 115, 120) ...20 seconds (cooktops PKC3, PKCB3, PKCH3, PKT3) Tab. 6.4 Times that can be set on the short-time timer Activating the automatic extractor function Open the cooktop extractor function menu. Do the following: www.bora.com... -
Page 24: Activating The Short-Time Timer (Egg Timer)
At the end of the time, an acoustic signal is heard for 2 minutes and the control knob display flashes The childproofing feature is permanently activated. is displayed on all control knobs. The display switches off after 10 seconds. www.bora.com... -
Page 25: Deactivating The Childproofing Feature For A Cooking Session
(see the Cooking sessions are possible, however, the cooktop “Cleaning and Maintenance” chapter). extractor remains inactive and cannot be operated. Only when the grease filter has been replaced can the cooktop extractor be reactivated. www.bora.com... -
Page 26: Displaying The Remaining Filter Service Life
Open the cooktop extractor function menu. Enter the following settings: Operating the cooktops The full range of functions is only available for BORA Professional 3.0 system cooktops in combination with the cooktop extractors PKA3/PKA3AB and PKAS3/ PKAS3AB. -
Page 27: Special Operating Instructions For The Tepan Stainless Steel Grill Pkt3
Setting another power level for the cooking zone with the power setting active Setting a higher power level than 5 for the other, second cooking zone (only on cooktops PKFI3 and PKI3) www.bora.com... -
Page 28: Bridging Function (Only On Pkfi3 And Pkt3)
Paused cooking zone timers resume their countdown. touch command on both control knobs at the same time. An acoustic signal can be heard and the bridging function is deactivated. All cooking zones are deactivated. Each cooking zone then goes back to being operated separately. www.bora.com... -
Page 29: Pan Size Recognition (Only On Pkfi3, Pki3, Pkiw3)
The cooking session is continued at the set power level with Tab. 6.7 Function menu on Tepan stainless steel grill PKT3 two or three active rings. The number of active rings is shown in the control knob display next to the power level (e.g. www.bora.com... -
Page 30: Deactivating Additional Rings
Deactivating the heat retention function Fig. 6.29 Activating the heat retention function (PKFI3; PKI3; PKIW3) Fig. 6.33 An acoustic signal is heard. Deactivating the heat retention function The selected heat retention level is activated. is shown in the control knob display. www.bora.com... -
Page 31: Timer Function/Automatic Cut-Off (Not On Pkt3)
After 5 seconds the acoustic signal and the flashing display are automatically deactivated. The flashing display and acoustic signal can be stopped early with a touch command on the control knob. If necessary, the residual heat indicator is then displayed. Fig. 6.35 Turning the knob ring clockwise www.bora.com... -
Page 32: Automatic Heat Up Function (Not On Pkt3)
If the cooking zone power level is decreased while the automatic heat up function is active, the automatic heat up function is deactivated. Requirement for the automatic heat up function: cooking session with a power level between 1 and 8. www.bora.com... -
Page 33: Cleaning Function (Only On Pkt3)
The cleaning function is automatically deactivated after 10 minutes. When the knob ring is turned clockwise, a higher power level is activated and cleaning must be stopped immediately (risk of burns). www.bora.com... -
Page 34: Configuration Menu
The menu is called up and the first menu item is displayed. Explanation of the menu item display (e.g. C23): Number in middle segment = menu item (100% brightness) Number in right-hand segment = current setting (50% brightness) www.bora.com... -
Page 35: (Only In Exhaust Air Mode)
Standard installation (Factory setting) (0° installation) Setting Operating mode Installation rotated by 180° Normal operation (Factory setting) Demo mode Not connected Tab. 7.6 Tab. 7.11 Set-up of the right cooktop Normal operation or demo mode www.bora.com... -
Page 36: Menu Item C9: Pause Function Activated/Deactivated
(= left interface board software version) xxx (= extractor electronics software version) xxx (= right interface board software version) Tab. 7.13 software version indicator The software version indicators appear one after the other. is shown in the control knob display. www.bora.com... -
Page 37: Cleaning And Maintenance
To clean the Tepan stainless steel grill you need a special Tepan the grease filter [2] and filter tray [3]. spatula and suitable cleaning agents. are shown alternately for 1 second in the control o v t knob display on the cooktop extractor. www.bora.com... -
Page 38: Fitting The Cover Flap, Grease Filter And Filter Tray
Allow the cover flap [3] to slide diagonally into the holder [2]. Press the ends of the cover flap [3] lightly from above until you hear them click into place. Make sure that the cover flap [3] has been fitted correctly. Fig. 8.5 Installing the maintenance tray www.bora.com... -
Page 39: Cleaning The Components
Clean the stainless steel surface in the polishing direction You can obtain recirculation filters (activated charcoal only. filters) from your specialist supplier or from the BORA Shop via the website at http://www.mybora.com. Do not apply citric acid to surfaces adjacent to the cooktop and worktop as the acid may damage them. -
Page 40: Looking After Your Cooktops
Remove the knob ring. Clean the touch surface and the knob housing with a soft, damp cloth. Dry the touch surface and the knob housing carefully. Place the knob ring on the knob housing. www.bora.com... -
Page 41: Troubleshooting
Switch the automatic circuit breaker back on defective The fuse or the automatic circuit breaker trips Contact the BORA Service Team several times. The power supply is disconnected Have a specialist electrician inspect the power supply The micro fuse in the control unit‘s cooling device... -
Page 42: Cooktop Troubleshooting
Tab. 9.2 Resolving a fault Acknowledge the error by tapping the control knob. In all other cases, contact the BORA Service Team (see Warranty, technical service and spare parts chapter) and enter the error number displayed and the appliance type. www.bora.com... -
Page 43: Warranty, Technical Service, Spare Parts, Accessories
The manufacturer’s warranty starts as soon as the BORA www.bora.com/registration. product is handed over to the end customer by an authorised BORA dealer and is valid for 2 years. By registering on www. 10.2 Service bora.com/registration the end customer has the possibility of extending the manufacturer’s warranty. -
Page 44: Accessories
BORA Pro Cover flap PKA1VK BORA Pro Cover flap All Black PKA1VKAB BORA Pro Filter tray PKA1FW BORA Power supply cable Type I UNLI (AUS) BORA Power supply cable Type J UNLJ (CH) BORA Power supply cable Type G UNLG (GB-IE) -
Page 45: Notes
Notes 11 Notes www.bora.com... - Page 46 Notes www.bora.com...
- Page 47 Notes www.bora.com...
- Page 48 Please accept our apologies in this eventuality. An updated version can be requested from the BORA Service Team. Subject to printing errors and mistakes. © BORA Vertriebs GmbH & Co KG All rights reserved.
Need help?
Do you have a question about the Professional PKA3 and is the answer not in the manual?
Questions and answers