
Related Manuals for X-pole X-Stage

Summary of Contents for X-pole X-Stage
- Page 1 www.XPOLE.com Instruction Manual Please Read Fully Before Assembly Copyright© Vertical Leisure Ltd. 2020 Version 3.0 All rights reserved.
- Page 2 THIS BEFORE OPENING YOUR PACKAGE To get the best from your X-STAGE – with SAFETY being the utmost priority – it is extremely important that you READ & FOLLOW the Instruction Manual from beginning to end and most importantly, understand it! Follow the simple but explicit instructions in this manual to get the best results from your X-STAGE.
-
Page 3: What To Wear
– take a break. Always rest between moves & exercise sensibly, if you experience any health issues, seek medical advice. The X-STAGE is designed for use by a single person. - Page 4 TIP: We recommend that you leave the parts in their carry cases until you need them, as this lessens the risk of accidental damage or loss. The X-Stage/X-Stage Lite is supplied in 4 purpose-made carry cases for safety, storage and transportation purposes.
- Page 5 Carry Case for now. CAUTION: The Main Stage Frame is the heaviest single component of the X-Stage/X-Stage Lite, so care must be taken not to injure yourself when removing or handling. Please ensure your knees are slightly bent and your back is straight when lifting.
- Page 6 TIP: Easiest method to attach the wheels is to remove just one pre-fixed screw, very loosely attach the wheel (turn the screw only 4-5 rotations) then remove the other screws and install them. X-Stage - Main Frame Carry Case (Back) X-Stage Lite - Main Frame Carry Case (Back) Fig. (4.2) Fig. (4.1)
- Page 7 Finding a suitable area to dance/exercise To use the X-Stage/X-Stage Lite properly and safely, you need to be able to fully rotate around the pole with your arms outstretched and NOT be able to touch/hit anything whilst doing so (Fig.6.1). This will require an area greater than the diameter of the stage itself all around the stage.
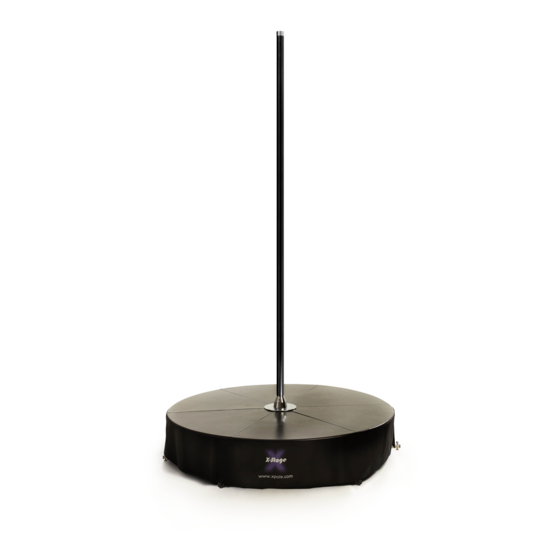
- Page 8 This is to ensure that the X-Stage/X-Stage Lite will fit into your chosen space. A key point with any pole is to get the maximum height of workable (usable) pole. The X-Stage/X-Stage Lite is supplied with an overall height of 3m (10'). This is called the 'Standard Format'. The usable pole height for the X-Stage and X-Stage Lite is 2.68m (8'.8") and 2.89m (9'.5") respectively, when standing on the stage floor.
- Page 9 LEADERS IN POLE & AERIAL FITNESS Fig. (8.3) Fig. (8.4) Fixed frame leg Fixed frame leg Note: 2 Frame legs Clockwise 3 Frame legs Anti-Clockwise TIP: The legs fan out from the fixed frame leg clockwise or anti/counter-clockwise, it does not matter which direction you choose.
- Page 10 ® LEADERS IN POLE & AERIAL FITNESS Fig. (9.3) Fig. (9.4) Upper Centre Plate Spring Catch Locating Hole Slide the nose of the floor plate under the upper centre plate Floor Plate Locating Pins Important: You must always start at the fixed frame leg Whilst retracting the spring catch with one finger lower and continue in the same direction.
- Page 11 This section includes 2x M10 hex screws which set Bearing Body the 'Static/Spinning' modes of the X-Stage/X-Stage Lite. When these 2x hex screws are tightened it is in 'Static' mode. When the hex screws are loosened, the pole is in ‘Spinning’...
- Page 12 ® LEADERS IN POLE & AERIAL FITNESS Pole installation - Mounting the 'A' pole & Bearing unit Fig. (11.1) Fig. (11.2) Bearing Retaining Screw (M10) Domed Bearing Carrier Ring Top Plate Static & Spinning Screw (M10) Pole Retaining Screw (M8) 'A' Pole Locating Screw Static/Spin Hole...
- Page 13 M10 Domed Screws) firmly using the 5mm Hex Key – ensure that your bearing unit is tightened into the bearing carrier. Tighten progressively – first lightly tighten each screw – then re-tighten all three firmly. (Replacement screws can be purchased from your local X-Pole agent). Fig. (11.8) Fig.
- Page 14 Getting to know your X-Joint The X-STAGE includes the very latest in pole joint technology, the X-Joint. This joint is simple, easy to use, very strong and stable. Just follow these simple operational instructions to ensure the joint is properly locked.
- Page 15 LEADERS IN POLE & AERIAL FITNESS Using the X-Joint to install the pole tubes At the top of the 'A' Pole, you will see a hole on the outside and two U slots on the inside of the pole. To install the X-Joint simply slide one half into the A-Pole, ensuring the 2 x keys on the joint locate fully into the corresponding U slots in the tube.
-
Page 16: Additional Accessories
Additional accessories The X-Stage and X-Stage Lite are very stable in their standard format with the feet correctly adjusted. However, if you intend to perform more advanced moves or wish to use the stage for a performance, or with an X-POLE Lyra pole, additional weights are mandatory. - Page 17 LEADERS IN POLE & AERIAL FITNESS Fig. (15.3) Fig. (15.4) Sandbag Sandbag Sandbag It is important to place the Weight Plates on alternating plates as displayed in (Fig.15.4). Once all the Weight Plates are installed place your sandbags or weights onto them and replace all the Floor Plates (as per pg. 9-10) and now your stage is ready to be used (Fig.15.5).
- Page 18 DO NOT USE X-Clean on Brass, Powder Coated or Silicone Poles. WARNINGS DO NOT - lift or carry the X-STAGE by the plates. This will damage the spring catch pins. DO NOT - drag/slide the X-STAGE. This will damage the rubber feet.
- Page 19 M10 x 8 Domed (Pk 4) To purchase any additional accessories or if you have any questions or are unsure about the assembly, operation or use of your X-STAGE, then please contact your local X-POLE office. All assembly videos are available on: www.youtube.com/xpoleinternational...
-
Page 20: Warranty
If X-POLE is unable to provide a replacement and repair is not practical or cannot be made in a timely fashion, X-POLE may elect to refund the purchase price in exchange for the return of the product.
Need help?
Do you have a question about the X-Stage and is the answer not in the manual?
Questions and answers