Table of Contents
Advertisement
Quick Links
This is a safety alert symbol and should never be ignored. When you see this symbol on labels or in manuals, be alert to
the potential for personal injury or death.
Installation and servicing of air conditioning equipment
can be hazardous due to internal refrigerant pressure
and live electrical components. Only trained and
qualified service personnel should install or service
this equipment. Installation and service performed by
unqualified persons can result in property damage,
personal injury, or death.
ELECTRICAL SHOCK HAZARD!
Risk of electrical shock. Disconnect all
remote power supplies before installing
or servicing any portion of the system.
Failure to disconnect power supplies
can result in property damage, personal
injury, or death.
Sharp metal edges can cause injury. When installing
the unit, use care to avoid sharp edges.
Manufactured By
Allied Air Enterprises LLC
A Lennox International, Inc. Company
215 Metropolitan Drive
West Columbia, SC 29170
506860-03
INSTALLATION INSTRUCTIONS
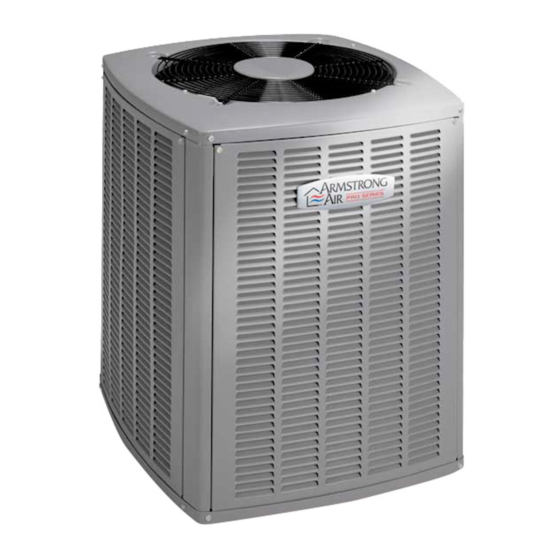
4SHP16LS SERIES
Split System Heat Pump
This manual must be left with the homeowner for future reference.
WARNING
WARNING
WARNING
Save these instructions for future reference
General ........................................................................1
Installation ...................................................................2
Refrigerant Piping ........................................................4
Electrical Wiring .........................................................12
Start-Up .....................................................................14
Operation ...................................................................15
7-Segment Alert and System Status Codes ..............17
Maintenance ..............................................................24
Homeowner Information ............................................24
Wiring Diagrams ........................................................26
General
Read this entire instruction manual, as well as the
instructions supplied in separate equipment, before
starting the installation. Observe and follow all warnings,
cautions, instructional labels, and tags. Failure to comply
with these instructions could result in an unsafe condition
and/or premature component failure.
These instructions are intended as a general guide only
for use by qualified personnel and do not supersede any
national or local codes in any way. The installation must
comply with all provincial, state, and local codes as well as
the National Electrical Code (U.S.) or Canadian Electrical
Code (Canada). Compliance should be determined prior
to installation.
*506860-03*
Issue 1946
Table of Contents
*506860-03*
Page 1 of 27
Advertisement
Table of Contents

Related Manuals for Armstrong Air 4SHP16LS Series

Summary of Contents for Armstrong Air 4SHP16LS Series
-
Page 1: Table Of Contents
INSTALLATION INSTRUCTIONS 4SHP16LS SERIES Split System Heat Pump This manual must be left with the homeowner for future reference. This is a safety alert symbol and should never be ignored. When you see this symbol on labels or in manuals, be alert to the potential for personal injury or death. -
Page 2: Installation
This unit uses R-410A, which is an ozone-friendly HFC Installation refrigerant. The unit must be installed with a matching indoor coil and line set. A filter drier approved for use with R-410A is installed in the unit. NOTE: In some cases, noise in the living area has been traced to gas pulsations from improper installation of IMPORTANT: This product has been designed and equipment. - Page 3 Discharge Air Building Structure 24” Mounting Slab 6”* Ground Level Mounting slab must slope slightly away from building, not to exceed 1/4” per foot. 30” around Control Figure 1. Slab Mounting NOTE: See Table 2 for specific minimum clearance guidelines. Elevate Unit Figure 2.
-
Page 4: Refrigerant Piping
Be extra careful with sharp bends. Tubing can “kink” very Refrigerant Piping easily, and if this occurs, the entire tube length will have to be replaced. Extra care at this time will eliminate future • Use only refrigerant grade copper tubes. service problems. - Page 5 Flushing Line Sets CYLINDER CONTAINING GAUGE If the unit will be installed in an existing system that uses CLEAN R-410A TO BE MANIFOLD USED FOR FLUSHING an indoor unit or line sets charged with R-22 refrigerant, (Positioned to deliver liquid installer must perform the following flushing procedure.
- Page 6 Refrigerant Piping - Install Indoor Expansion Valve This outdoor unit is designed for use in systems that include an expansion valve metering device (purchased separately) at the indoor coil. See the Product Specifications for approved expansion valve kit match-ups and application information. The check expansion valve unit can be installed internal or external to the indoor coil.
- Page 7 Refrigerant Piping - Brazing Procedures CAP AND CORE REMOVAL CUT AND DEBUR Cut ends of the refrigerant lines square (free from nicks or dents) Remove service cap and core from and debur the ends. The pipe must remain round. Do not crimp end both the vapor and liquid line service of the line.
- Page 8 WRAP SERVICE VALVES To help protect service valve seals during brazing, wrap water-saturated cloths around service valve bodies and copper tube stubs. Use additional water-saturated cloths underneath the valve body to protect the base paint. FLOW NITROGEN Flow regulated nitrogen (at 1 to 2 psig) through the refrigeration gauge set into the valve stem port connection on the liquid service valve and out of the vapor valve stem port.
- Page 9 Leak Test and Evacuation LEAK TEST HIGH MANIFOLD GAUGE SET OUTDOOR UNIT TO VAPOR SERVICE VALVE NOTE - Position canister to deliver liquid refrigerant. NITROGEN HFC-410A CONNECT GAUGE SET A - Connect the high pressure hose of an HFC-410A manifold gauge set to the vapor valve service port. NOTE - Normally, the high pressure hose is connected to the liquid line port.
- Page 10 EVACUATION HIGH CONNECT GAUGE SET NOTE - Remove cores from service valves (if not already done). A - Connect low side of manifold gauge set with 1/4 SAE in-line tee to vapor line service valve B - Connect high side of manifold gauge set to OUTDOOR MANIFOLD liquid line service valve...
- Page 11 Liquid and Suction Line Service Valves The liquid line and suction line service valves (see Figure 4) and service ports are used for leak testing, evacuation, charging, and checking charge. Each valve is equipped with a service port which has a factory-installed Schrader valve.
-
Page 12: Electrical Wiring
Install low voltage wiring from outdoor to indoor unit Electrical Wiring and from thermostat to indoor unit (see Figure 6). Do not bundle any excess 24V control wire inside All field wiring must be done in accordance with the control box. Run control wire through installed wire tie National Electrical Code... - Page 13 Field Wiring and Routing - Communicating Controls Maximum length of wiring (18 gauge) for all connections on the RSBus is 1500 feet (457 meters). Wires should be color coded, with a temperature rating of 95ºF (35ºC) minimum, and solid core (Class II Rated Wiring). All low voltage wiring must be connected through the low voltage grommet in the control box.
-
Page 14: Start-Up
Oz. Per 5 ft. adjust from 15 Start-Up Liquid Line Set Diameter ft. line set* 3 oz. per 5 ft. 3/8 in. or 0.6 oz. per 1 ft. CAUTION * If line length is greater than 15 ft., add this amount. If line length is less than 15 ft., remove this amount. -
Page 15: Operation
NOTE: The control board ignores input from the low Operation pressure switch terminals as follows: • During the TEST mode The outdoor unit and the indoor blower cycle on demand • During the defrost cycle from the room thermostat. When the thermostat blower switch is moved to the ON position, the indoor blower •... - Page 16 Fan Cycling (J3) Shift Delay (J4) When the jumper is “ON,” the fan will cycle (see Figure During the defrost cycle, if the jumper is in the “ON” position, 8) for five minutes if the outdoor ambient air temperature there will be a compressor start delay of 30 seconds to is between 15ºF and 35ºF and the compressor has been reduce the shifting noise of the reversing valve.
-
Page 17: 7-Segment Alert And System Status Codes
7-Segment Alert and System Status Codes Resetting Alert Codes Alert codes are displayed using the 7-segment display located on the outdoor control. Alert codes can be reset manually or automatically: NOTE: System fault and lockout 7-segment display Manual Reset alarm codes take precedence over system status codes Manual reset can be achieved by one of the following (cooling, heating stages or defrost/dehumidification). - Page 18 Code Diagnostic Codes / Status of Equipment Action Required to Clear and Recover E180 Outdoor air temperature sensor failure. Only shown if Compare outdoor sensor resistance to temperature shorted or out of range (Communicating systems only) resistance charts in unit installation instructions. Replace sensor pack if necessary.
- Page 19 Code Diagnostic Codes / Status of Equipment Action Required to Clear and Recover E416 The outdoor coil sensor is either open, short-circuited Coil sensor being detected open or shorted, or temperature is or the temperature is out of sensor range. As a result, out of coil sensor range.
- Page 20 Mode Description Example of Display 1 Stage AC: 1AC 2 Stage AC: 2AC 1 Stage AC: 1HP Unit type and number of stages is displayed. Verify configuration with 1 Stage AC: 2HP information published on the unit Power-Up 7-Segment Display String Power Up / Reset nameplate.
- Page 21 Following string is repeated if defrost is active while unit was in first- stage heat pump heating mode: Defrost Mode Shown only while in an active defrost. pause pause Following string is repeated if dehumidification is active with outdoor Shows that the unit is providing Dehumidification fan speed set at 225 RPM: dehumidification instead of straight...
- Page 22 Display Display and action (normal operation) Display and action (configuration and test mode) Display string displays > number of unit stages > pause > unit > pause > unit capacity in BTUs > pause > Power-Up RPM setting of outdoor fan. If 3 horizontal bars are displayed during any sequence of this string, it indicates that the specific parameter is not configured.
- Page 23 Configuring Unit Capacity (NOTE: Control must be in Idle mode) Release push button - Allows user to select Unit Capacity. IMPORTANT: Field replacement control Solid may need to be manually configured to validate outdoor unit capacity. Refer to unit nameplate model number for capacity in 1,000 of BTUs.
-
Page 24: Maintenance
Maintenance Condenser Coils Regular Maintenance Requirements Grass cuttings, leaves, dirt, dust, lint from clothes dryers, Your system should be regularly inspected by a qualified and foliage from trees can be drawn into coils by movement service technician. These regular visits may include of the air. - Page 25 • During the defrost cycle, you may notice steam rising Indicating Light from the outdoor unit. This is a normal occurrence. Most heat pump thermostats have an amber light The thermostat may engage auxiliary heat during the which indicates when the heat pump is operating in the defrost cycle to satisfy a heating demand;...
-
Page 26: Wiring Diagrams
Wiring Diagrams Page 26 of 27 Issue 1946 506860-03... - Page 27 506860-03 Issue 1946 Page 27 of 27...
Need help?
Do you have a question about the 4SHP16LS Series and is the answer not in the manual?
Questions and answers