Advertisement
This is a safety alert symbol and should never be ignored. When you see this symbol on labels or in
manuals, be alert to the potential for personal injury or death.
The equipment covered in this manual is to be installed
by trained and experienced service and installation
technicians. Improper installation, modification, service,
or use can cause electrical shock, fire, explosion, or
other conditions, which may cause personal injury,
death, or property damage. Use appropriate safety gear,
including safety glasses and gloves, when installing this
equipment.
Installation and servicing of air conditioning equipment
can be hazardous due to internal refrigerant pressure
and live electrical components. Only trained and
qualified service personnel should install or service
this equipment. Installation and service performed by
unqualified persons can result in property damage,
personal injury, or death.
Manufactured By
Allied Air Enterprises LLC
A Lennox International, Inc. Company
215 Metropolitan Drive
West Columbia, SC 29170
506860-03
INSTALLATION INSTRUCTIONS
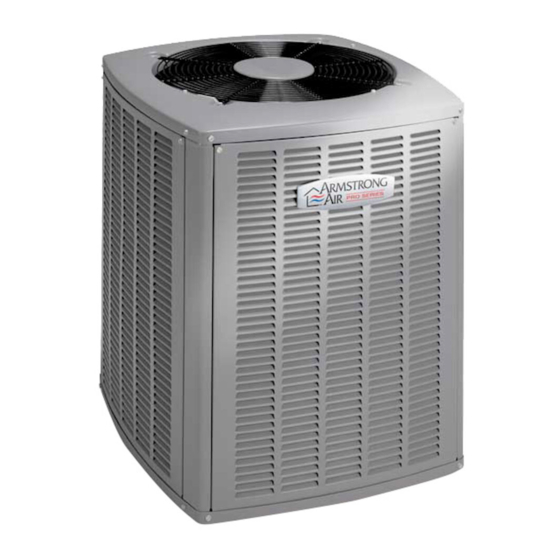
4SHP16LS SERIES
Split System Heat Pump
This manual must be left with the homeowner for future reference.
WARNING
WARNING
Save these instructions for future reference
Table of Contents
Installation ...................................................................2
Electrical Wiring ...........................................................3
Start-Up .....................................................................14
Operation ...................................................................16
7-Segment Alert and System Status Codes ..............18
Maintenance ..............................................................24
Homeowner Information ............................................25
Wiring Diagrams ........................................................28
Sharp metal edges can cause injury. When installing
the unit, use care to avoid sharp edges.
Risk of electrical shock. Disconnect all remote power
supplies before installing or servicing any portion of the
system. Failure to disconnect power supplies can result
in property damage, personal injury, or death.
Issue 1827
WARNING
WARNING
*506860-03*
*506860-03*
Page 1 of 29
Advertisement

Related Manuals for Armstrong Air 4SHP16LS Series

Summary of Contents for Armstrong Air 4SHP16LS Series
-
Page 1: Table Of Contents
INSTALLATION INSTRUCTIONS 4SHP16LS SERIES Split System Heat Pump This manual must be left with the homeowner for future reference. This is a safety alert symbol and should never be ignored. When you see this symbol on labels or in manuals, be alert to the potential for personal injury or death. -
Page 2: Installation
If any damages are discovered and reported to the carrier Installation DO NOT INSTALL THE UNIT, as claim may be denied. Check the unit rating plate to confirm specifications are as General ordered. Read this entire instruction manual, as well as the instructions supplied in separate equipment, before Location of Unit starting the installation. -
Page 3: Electrical Wiring
• When installed areas where ambient temperatures exist, locate unit so winter prevailing winds do not blow directly into outdoor coil. • Locate unit away from overhanging roof lines, which would allow water or ice to drop on, or in front of, coil or into unit. - Page 4 Figure 4. Typical Field Wiring Diagram Non-Communicating Install line voltage power supply to unit from a properly sized disconnect switch. Any excess high voltage field wiring should be trimmed or secured away from the low voltage field wiring. Ground unit at unit disconnect switch or to an earth ground.
- Page 5 Comfort Sync Thermostat with Comfort Sync Thermostat with Comfort Sync -enabled Furnace and Comfort Sync -enabled Furnace and Non-Communicating Outdoor Unit Comfort Sync -enabled Outdoor Unit Comfort Sync Enabled Comfort Sync Furnace Enabled OPTIONAL Furnace DISCHARGE AIR SENSOR OPTIONAL DISCHARGE AIR SENSOR OPTIONAL OUTDOOR...
- Page 6 Placement Install the thermal expansion valve, which is sold separately and which is approved for use with R410A Be aware that some localities are adopting sound refrigerant, in the liquid line at the indoor coil (see the ordinances based on how noisy the unit is at the neighbor’s Refrigerant Metering Device section).
- Page 7 Installing Refrigerant Line During the installation of an air conditioning system, it is CAUTION important to properly isolate the refrigerant line to prevent When flushing existing line set and/or indoor coil, be unnecessary vibration. Line set contact with the structure sure to empty all existing traps.
- Page 8 Automotive Anchored Muffler-Type Heavy Nylon Hanger Wire Tie Strap Liquid Strap Liquid Line to Vapor Line to Vapor Line Wall Wall Line Stud Stud Liquid Line Liquid Line – Vapor Line Wrapped – Vapor Line Wrapped Metal Sleeve in Armaflex Metal Sleeve in Armaflex Figure 9.
- Page 9 Flushing Existing Line Set and Indoor Coil If the existing outdoor unit is equipped with manual shutoff valves AND new R-22 refrigerant will be used to flush the This procedure should not be performed on systems that system: contain contaminants, such as compressor burn out. Start the existing R-22 refrigerant system in cooling mode Required Equipment and close the liquid line valve.
- Page 10 Remove the pressure tap valve cores from the unit’s service valves. Connect an R-22 cylinder with clean refrigerant to the suction service valve. Connect the R-22 gauge set to the liquid line valve and connect a recovery machine with an empty recovery tank to the gauge set.
- Page 11 Manifold Gauge Set Manifold gauge sets used with systems charged with R410A refrigerant must be capable of handling the higher system operating pressures. The gauges should be rated for use with pressures 1 - 800 on the high side and a low side of 30”...
- Page 12 Suction Line (Ball Type) Service Valve Leak Testing Suction line (ball type) service valves function the same After the line set has been connected to the indoor and way as the other valves; the difference is in the construction outdoor units, the line set connections and indoor unit must (see Figure 14).
- Page 13 Evacuation Evacuate the line set and indoor unit to a minimum of 500 microns or lower. During the early stages of Evacuating the system of non-condensables is critical for evacuation, it is desirable to close the manifold gauge proper operation of the unit. Non-condensables are defined valve at least once to determine if there is a rapid as any gas that will not condense under temperatures and rise in pressure.
-
Page 14: Start-Up
Oz. Per 5 ft. adjust from 15 Start-Up Liquid Line Set Diameter ft. line set* 3/8 in. 3 oz. Per 5 ft. * If line length is greater than 15 ft., add this amount. If line CAUTION length is less than 15 ft., remove this amount. If unit is equipped with a crankcase heater, it should Table 4. - Page 15 Figure 15. Use a digital thermometer to record the outdoor Charge Using Subcooling Method (Fixed Orifice/TXV ambient temperature. Systems) - Outdoor Temperatures 65°F or Above When the heating demand has been satisfied, switch If charging a fixed orifice or TXV system when the outdoor the thermostat to cooling mode with a set point of ambient temperature is 65°F or above, the subcooling 68°F.
-
Page 16: Operation
NOTE: The heat pump control accurately measures the Operation performance of the system as frost accumulates on the outdoor coil. This typically will translate into longer running The outdoor unit and the indoor blower cycle on demand time between defrost cycles as more frost accumulates from the room thermostat. - Page 17 Pressure Switch Circuit The unit will remain locked out until power to the board is interrupted, then re-established, or until the error is The defrost control includes two pressure switch circuits. cleaned. A high pressure switch is connected to the board’s HI- PS terminals (see Figure 16).
-
Page 18: 7-Segment Alert And System Status Codes
7-Segment Alert and System Status Codes Resetting Alert Codes Alert codes are displayed using the 7-segment display located on the outdoor control. Alert codes can be reset manually or automatically: NOTE: System fault and lockout 7-segment display alarm Manual Reset codes take precedence over system status codes (cooling, Manual reset can be achieved by one of the following heating stages or defrost/dehumidification). - Page 19 Code Diagnostic Codes / Status of Equipment Action Required to Clear and Recover E180 Outdoor air temperature sensor failure. Only shown if Compare outdoor sensor resistance to temperature shorted or out of range (Communicating systems only) resistance charts in unit installation instructions. Replace sensor pack if necessary.
- Page 20 Code Diagnostic Codes / Status of Equipment Action Required to Clear and Recover E416 The outdoor coil sensor is either open, short-circuited Coil sensor being detected open or shorted, or temperature is or the temperature is out of sensor range. As a result, out of coil sensor range.
- Page 21 Mode Description Example of Display 1 Stage AC: 1AC 2 Stage AC: 2AC 1 Stage AC: 1HP Unit type and number of stages is displayed. Verify configuration with 1 Stage AC: 2HP information published on the unit Power-Up 7-Segment Display String Power Up / Reset nameplate.
- Page 22 Following string is repeated if defrost is active while unit was in first- stage heat pump heating mode: Defrost Mode Shown only while in an active defrost. pause pause Following string is repeated if dehumidification is active with outdoor Shows that the unit is providing Dehumidification fan speed set at 225 RPM: dehumidification instead of straight...
- Page 23 Display Display and action (normal operation) Display and action (configuration and test mode) Display string displays > number of unit stages > pause > unit > pause > unit capacity in BTUs > pause > Power-Up RPM setting of outdoor fan. If 3 horizontal bars are displayed during any sequence of this string, it indicates that the specific parameter is not configured.
-
Page 24: Maintenance
Display Code Procedure Release push button - Allows user to select type and number of stages on outdoor unit. IMPORTANT: Field replacement control may need to be manually configured to validate outdoor Solid unit fan RPM setting is right for unit capacity. See RPM table on unit wiring diagram for proper RPM settings. -
Page 25: Homeowner Information
Inspect and Clean Outdoor Coil Homeowner Information Make sure no obstructions restrict airflow to the outdoor unit. Leaves, trash, or shrubs crowding the unit can cause In order to ensure peak performance, your system must it to work harder and use more energy. Keep shrubbery be properly maintained. - Page 26 Thermostat Operation Pre-Service Check Though your thermostat may vary somewhat from the If your system fails to operate, check the following before description below, its operation will be similar. calling for service: Temperature Setting Levers • Check to see that all electrical disconnect switches are Most heat pump thermostats have two temperature selector levers: one for heating and one for cooling.
- Page 27 Start-Up and Performance Checklist Job Name: ______________________________________________ Job No. _________________ Date: ________________ Job Location: ____________________________________________ City: ____________________ State: ________________ Installer: ________________________________________________ City: ____________________ State: ________________ Unit Model No. ___________________________________________ Serial No. _______________________________________ Service Technician: _______________________________________ Nameplate Voltage: _______________________________ Rated Load Ampacity: _______________ Compressor Amperage: _________________ Outdoor Fan: _____________________ Maximum Fuse or Circuit Breaker: ____________________________ Electrical Connections Tight?
-
Page 28: Wiring Diagrams
Wiring Diagrams Page 28 of 29 Issue 1827 506860-03... - Page 29 506860-03 Issue 1827 Page 29 of 29...
Need help?
Do you have a question about the 4SHP16LS Series and is the answer not in the manual?
Questions and answers