
Related Manuals for Wilo Atmos TERA SCH 150-555


Summary of Contents for Wilo Atmos TERA SCH 150-555
- Page 1 Pioneering for You Wilo-Atmos TERA-SCH en Installation and operating instructions zh-CHS 安装及操作说明 · 6088794 • Ed.01/2020-10...
- Page 3 English ....................... Chinese (simplified)..................
-
Page 4: Table Of Contents
6 Installation and electrical connection .......................... 19 Personnel qualifications.................................... 19 Operator responsibilities.................................... 19 Preparing the installation.................................... 19 Setting up the pump by itself (variant B, Wilo variant key) ........................ 19 Installing the pump unit on a base ................................ 20 Pipework........................................... 21 Aligning the unit...................................... 23 Electrical connection ...................................... - Page 5 12.3 Protective clothing ...................................... 47 12.4 Information on the collection of used electrical and electronic products.................... 47 13 Appendix.................................... 47 13.1 Examples for typical installation layouts.............................. 48 13.2 Examples for proper and inappropriate pipework............................ 49 Installation and operating instructions Wilo-Atmos TERA-SCH...
-
Page 6: General Information
ƒ WARNING! Failure to follow the instructions can lead to (serious) injuries! ƒ CAUTION! Failure to follow the instructions can lead to property damage and a possible total loss. ƒ NOTICE! Useful information on handling the product WILO SE 2020-10... -
Page 7: Personnel Qualifications
ƒ Electrical work Electrical work must be carried out by a qualified electrician. ƒ When connecting to the mains, comply with the locally applicable laws and regula- tions of the local energy supply company. Installation and operating instructions Wilo-Atmos TERA-SCH... -
Page 8: Transport
If hazardous defects occur, the operator must immediately deactivate the device. Hazardous defects include: – Malfunction of safety and monitoring devices – Damage to housing parts – Damage to electrical equipment ƒ Open all isolating valves in the piping on the suction and pressure side. WILO SE 2020-10... -
Page 9: Maintenance Tasks
Collect any leakage of fluid and operating fluid immediately and dispose of it ac- cording to the locally applicable guidelines. ƒ Store tools at the designated locations. ƒ After completing work, reattach all safety and monitoring devices and check that they function properly. Installation and operating instructions Wilo-Atmos TERA-SCH... -
Page 10: Drive: Iec Standard Motor
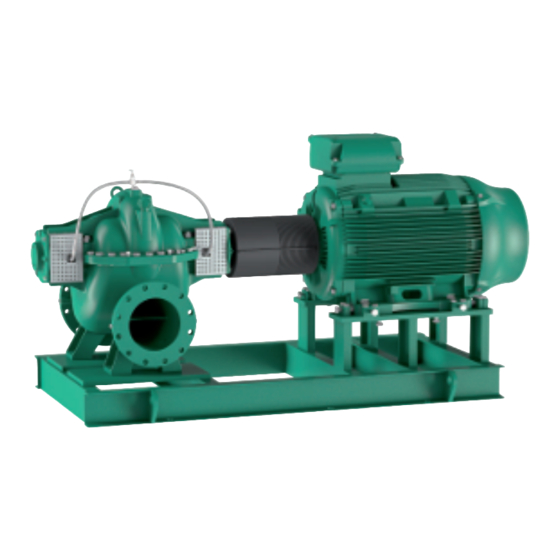
Product description Design The Wilo-Atmos TERA-SCH pump is an axially split case pump mounted on a base frame for horizontal installation. The pump is designed for in-line connection to the piping. Regarding customer specifications, the motor can be fitted on the left or right side of the pump (clockwise or anti-clockwise operation). -
Page 11: Operation With Frequency Converter
10/16 bar (depending on type) PN 16 in accordance with EN 1092-2 Flanges – Heating water in accordance with VDI 2035 – Cooling/cold water Permissible fluids – Water-glycol mixture up to 40 % vol. – Raw water IP55 Protection class Installation and operating instructions Wilo-Atmos TERA-SCH... -
Page 12: Connection Details
SSCH 400-490 SSCH 400-550 CG: Compound Ground; PG: Pressure Gauge; PM: Priming; AC: Air Cock; CDS: Casing Drain (Suction); CDD: Casing Drain (Delivery); CD: Casing Drain; GD: Gland Drain; VG: Vibration Gauge; TG: Temperature Gauge Table 1: Connection Details WILO SE 2020-10... -
Page 13: Rotating Element
Bearing cover (Drive end) Wear ring Lock nut Water thrower Shaft Bearing housing (Non-Drive End) Mechanical seal cover Impeller key O-ring Dowel pin for wear ring Table 3: Rotating element of mechanical seal version without sleeves Installation and operating instructions Wilo-Atmos TERA-SCH... -
Page 14: Scope Of Delivery
Accessories have to be ordered separately. For a detailed list, consult the catalogue and spare parts documentation. Anticipated noise levels Pump unit with three-phase motor, 50 Hz Motor power P [kW] Measuring surface sound-pressure level Lp, A [dB(A)] without speed control 2-pole 4-pole ( 6-pole (2900 rpm) 1450 rpm) (980 rpm) 0.75 WILO SE 2020-10... -
Page 15: Permissible Forces And Torques On The Pump Flanges
2325 1650 1905 3420 Fig. 5: Permissible forces and torques on the 4780 5320 4300 8340 2910 2070 2385 4290 pump flanges – pump made of grey cast iron 5380 5980 4840 9380 3585 2550 2940 5280 Installation and operating instructions Wilo-Atmos TERA-SCH... -
Page 16: Transport And Storage
Hand and foot injuries due to lack of protective equipment! Danger of (serious) injuries during work. Wear the following protective equipment: • Safety shoes • Safety gloves for protection against cuts • Sealed safety goggles • Safety helmet must be worn if lifting equipment is used! WILO SE 2020-10... - Page 17 For example, if the operator's field of vision is blocked. ƒ When lifting, make sure that the load limit of the lifting gear is reduced when pulling at an angle. The safety and efficiency of the lifting gear is best guaranteed when all Installation and operating instructions Wilo-Atmos TERA-SCH...
-
Page 18: Storage
Store the product somewhere safe against mechanical damage. ƒ Protect the bearings and couplings from sand, gravel and other foreign objects. ƒ Lubricate the unit to prevent rust and bearing seizing. ƒ Manually rotate the drive shaft several times once a week. WILO SE 2020-10... -
Page 19: Installation And Electrical Connection
< 10 kW < 40 kW Required addi- 25 % 20 % 15 % 10 % tional power to determine mo- tor rating value Table 7: Motor/shaft power Example: ƒ Duty point water: Q = 100 m /h; H = 35 m ƒ Efficiency: 78 % ƒ Hydraulic power: 12.5 kW Installation and operating instructions Wilo-Atmos TERA-SCH... -
Page 20: Installing The Pump Unit On A Base
The base must be able to support the unit installed on the base frame indefinitely. The base must be level to ensure there is no tension on the base frame or unit. Wilo recom- mends using premium, non-shrink concrete of an adequate thickness for manufactur- ing. -
Page 21: Pipework
Coat the unprotected surfaces of the base to protect from moisture. Pipework The pipe connections of the pump are fitted with dust caps so that no foreign objects can penetrate during transport and installation. ƒ These caps must be removed before connecting pipes. Installation and operating instructions Wilo-Atmos TERA-SCH... - Page 22 3 times the pipe cross section (approximately 100 meshes per cm²). The strainer must be far enough from the bottom to avoid excessive inlet losses, which could impair pumping performance. It is advisable to check that there is no leakage. WILO SE 2020-10...
-
Page 23: Aligning The Unit
Misalignments can be the cause of: ƒ excessive noise development during pump operation ƒ vibrations ƒ premature wear ƒ excessive coupling wear 6.7.1 Coupling alignment max. max. ∆Ka min. min. Fig. 17: Coupling alignment without spacer Installation and operating instructions Wilo-Atmos TERA-SCH... - Page 24 0.20 0.15 0.30 0.25 0.20 0.20 0.30 0.25 0.20 0.20 0.30 0.30 0.20 0.20 Permissible shaft displacement ΔS and ΔKr in mm (during operation, rounded) perm. perm. Table 9: Maximum permissible shaft displacement ΔS and ΔKr perm. perm. WILO SE 2020-10...
- Page 25 180, 194 67.5 200, 218 225, 245 250, 272 280, 305 315, 340 350, 380 400, 430 Fig. 22: Fastening screws B of coupling halves 440, 472 Table 10: Tightening torques for adjusting screws and coupling halves Installation and operating instructions Wilo-Atmos TERA-SCH...
- Page 26 After correct alignment, mount the coupling guard. The tightening torques for the pump and motor on the base frame are listed in the table “Tightening torques for pump and motor”. Screw: Tightening torque [Nm] Table 11: Tightening torques for pump and motor WILO SE 2020-10...
-
Page 27: Electrical Connection
Unused cable feedthroughs should be sealed with the sealing plates provided, and screwed tight. ƒ Reinstall any uninstalled safety devices, such as terminal box covers! ƒ Check the direction of rotation of the motor while commissioning! Installation and operating instructions Wilo-Atmos TERA-SCH... -
Page 28: Protective Devices
• The pump must not be operated outside of the specified operating range. • Do not operate the pump with the shut-off devices closed. • Make sure that the NPSH-A value is always higher than the NPSH-R value. WILO SE 2020-10... -
Page 29: Personnel Qualifications
The motor can be placed on the right or left side of the pump. The check of the rota- tion direction of the motor is a mandatory step in the commissioning procedure of the pump set! An arrow on top part of the pump housing indicates the correct direction of rotation. Installation and operating instructions Wilo-Atmos TERA-SCH... -
Page 30: Switching On The Pump
Switch on the pump. ƒ After reaching the speed, slowly open the shut-off device in the pressure pipe and regulate the pump to the duty point. ƒ While the pump is starting, vent completely via the venting screw. WILO SE 2020-10... -
Page 31: Switching Frequency
Drain the pump completely and rinse thoroughly. ƒ The remaining fluid and rinsing fluid should be drained, collected and disposed off via the drain plug. Observe local regulations along with the notes under “Disposal”! Installation and operating instructions Wilo-Atmos TERA-SCH... -
Page 32: Maintenance/Repair
Grease or oil the blank components. For this, use silicone-free grease or oil. Observe the manufacturer’s instructions for preservatives. Maintenance/repair It is recommended to have the pump serviced and checked by the Wilo customer ser- vice. Maintenance and repair work require the pump be partially or completely dismantled. -
Page 33: Maintenance Tasks
Wilo recommends checking the flexible coupling elements regularly and replacing them at the first sign of wear. ƒ Wilo recommends briefly putting the standby pumps into operation at least once a week to ensure they are always ready for operation. Maintenance tasks Atmos TERA-SCH pumps require little routine maintenance. -
Page 34: Dismantling
If present: Remove the intermediate sleeve of the coupling. ƒ Remove the fastening screws of the motor from the base frame. 9.5.1 Exploded views of hydraulics Fig. 25: Exploded view of Atmos TERA-SCH hydraulic (mechanical seal version without sleeves) WILO SE 2020-10... - Page 35 Lock washer Mechanical seal Jack screws for opening top housing 32 Lock nut Abutment ring Lifting bolts Bearing housing (Non-Drive End) Sleeve Impeller Table 14: Exploded view of Atmos TERA-SCH hydraulic (mechanical seal version with sleeves) Installation and operating instructions Wilo-Atmos TERA-SCH...
- Page 36 Remove all bolts (15) that are joining top and bottom housing (20, 22). ƒ Connect suitable lifting tackles to the lifting bolts (16) provided on top half housing (20). ƒ Remove the top housing. ƒ Remove the paper gasket placed in between the two housing halves. WILO SE 2020-10...
- Page 37 Remove the wear rings (25) from the impeller (21). ƒ Mark the position of impeller (21) on the shaft (22) to ease the reposition it while reassembling! ƒ Remove the impeller (21) carefully. Avoid damage to the impeller key (14)! Installation and operating instructions Wilo-Atmos TERA-SCH...
-
Page 38: Examination Of Internal Components
If the shaft is not true within 0.1 mm TIR (Total Indicated Reading), replacement or re- pair is recommended. Before any decision on repair work, ask Wilo for further informa- tion. Examine the shaft keys and keyways for damage and wear. Remove and replace dam- aged or worn out keys. -
Page 39: Installation
Slide the impeller (21) at its position on the shaft (24), matching the marked position done while disassembly. ƒ Place the wear rings (25) on the impeller (21). ƒ Slide sleeve (34) on both sides of the impeller over the shaft. Installation and operating instructions Wilo-Atmos TERA-SCH... - Page 40 46:8 SCH 400-550 Table 17: Table for Mechanical Seal Adjustment 9.7.2 Reassembly of the pump Ensure that housing is clean, dry, and free from foreign matter. Clean housing wear ring thoroughly and ensure that they have no burrs. WILO SE 2020-10...
- Page 41 Insert the bolts (1) for bearing housing at respective their position. ƒ Tighten bolts (15) and (1) with a torsion bar with the proper sequence. For tighten- ing torques, see chapter “Screw tightening torques”. Installation and operating instructions Wilo-Atmos TERA-SCH...
-
Page 42: Faults, Causes And Remedies
Inspection and repair at the factory. Costs may be incurred if you request customer services! Please contact customer ser- vices for more information. 10.1 Faults Possible error types Error type Description Delivery rate too low Motor overloaded WILO SE 2020-10... -
Page 43: Causes And Remedies
(consult than the design value with the manufacturer) The pump is strained Correct the pump in- stallation Speed too high Lower speed Pump unit poorly – Correct alignment aligned Installation and operating instructions Wilo-Atmos TERA-SCH... -
Page 44: Spare Parts
Table 21: Causes of error and remedies Spare parts Spare parts may be ordered via a local installer and/or Wilo customer service. List of ori- ginal spare parts: Refer to the Wilo spare parts documentation and the following in- formation in these installation and operating instructions. - Page 45 It is strongly recommended to pur- chase the original spares parts from Wilo. In order to avoid any mistake we invite you to supply with any spare parts demand, the information mentioned on the data plate of the pump and / or motor.
-
Page 46: Disposal
*Only mechanical seal version without sleeve; **Only mechanical seal version with sleeve Table 23: Recommended Spare Parts (mechanical seal version) Disposal 12.1 Oils and lubricants Operating fluid must be collected in suitable tanks and disposed of in accordance with the locally applicable guidelines (e.g. 2008/98/EC). WILO SE 2020-10... -
Page 47: Water-Glycol Mixture
ƒ Observe the locally applicable regulations! Consult your local municipality, the nearest waste disposal site, or your retailer for in- formation of proper disposal. See www.wilo‑recycling.com for more information about recycling. Subject to change without prior notice! Installation and operating instructions Wilo-Atmos TERA-SCH... -
Page 48: Appendix
Appendix Appendix 13.1 Examples for typical installation layouts Fig. 31: WILO SE 2020-10... -
Page 49: Examples For Proper And Inappropriate Pipework
Appendix 13.2 Examples for proper and inappro- priate pipework Ø 2xØ Fig. 32: Installation and operating instructions Wilo-Atmos TERA-SCH... - Page 50 6 Installation and electrical connection .......................... 65 Personnel qualifications.................................... 65 Operator responsibilities.................................... 65 Preparing the installation.................................... 65 Setting up the pump by itself (variant B, Wilo variant key) ........................ 65 Installing the pump unit on a base ................................ 66 Pipework........................................... 67 Aligning the unit...................................... 69 Electrical connection ......................................
- Page 51 12.2 Water-glycol mixture ..................................... 93 12.3 Protective clothing ...................................... 93 12.4 Information on the collection of used electrical and electronic products.................... 93 13 Appendix.................................... 93 13.1 Examples for typical installation layouts.............................. 94 13.2 Examples for proper and inappropriate pipework............................ 95 安装及操作说明 Wilo-Atmos TERA-SCH...
-
Page 52: General Information
ƒ WARNING! Failure to follow the instructions can lead to (serious) injuries! ƒ CAUTION! Failure to follow the instructions can lead to property damage and a possible total loss. ƒ NOTICE! Useful information on handling the product WILO SE 2020-10... -
Page 53: Personnel Qualifications
ƒ Electrical work Electrical work must be carried out by a qualified electrician. ƒ When connecting to the mains, comply with the locally applicable laws and regulations of the local energy supply company. 安装及操作说明 Wilo-Atmos TERA-SCH... -
Page 54: Transport
If hazardous defects occur, the operator must immediately deactivate the device. Hazardous defects include: – Malfunction of safety and monitoring devices – Damage to housing parts – Damage to electrical equipment ƒ Open all isolating valves in the piping on the suction and pressure side. WILO SE 2020-10... -
Page 55: Maintenance Tasks
Collect any leakage of fluid and operating fluid immediately and dispose of it according to the locally applicable guidelines. ƒ Store tools at the designated locations. ƒ After completing work, reattach all safety and monitoring devices and check that they function properly. 安装及操作说明 Wilo-Atmos TERA-SCH... -
Page 56: Drive: Iec Standard Motor
Product description Design The Wilo-Atmos TERA-SCH pump is an axially split case pump mounted on a base frame for horizontal installation. The pump is designed for in-line connection to the piping. Regarding customer specifications, the motor can be fitted on the left or right side of the pump (clockwise or anti-clockwise operation). -
Page 57: Operation With Frequency Converter
Product description zh-CHS Wilo control devices allow ƒ Optimisation of the pump output for the demands of the installation ƒ Particularly economically efficient pump operation 4.1.1 Hydraulics The pump consists of axially divided spiral housing (with replaceable wear rings) and cast-on pump support feet. -
Page 58: Connection Details
SSCH 400-490 SSCH 400-550 CG: Compound Ground; PG: Pressure Gauge; PM: Priming; AC: Air Cock; CDS: Casing Drain (Suction); CDD: Casing Drain (Delivery); CD: Casing Drain; GD: Gland Drain; VG: Vibration Gauge; TG: Temperature Gauge 表 1: Connection Details WILO SE 2020-10... -
Page 59: Rotating Element
Lock washer Bearing cover (Drive end) Wear ring Lock nut Water thrower Shaft Bearing housing (Non-Drive End) Mechanical seal cover Impeller key O-ring Dowel pin for wear ring 表 3: Rotating element of mechanical seal version without sleeves 安装及操作说明 Wilo-Atmos TERA-SCH... -
Page 60: Scope Of Delivery
Accessories have to be ordered separately. For a detailed list, consult the catalogue and spare parts documentation. Anticipated noise levels Pump unit with three-phase motor, 50 Hz Motor power P [kW] Measuring surface sound-pressure level Lp, A [dB(A)] without speed control 2-pole 4-pole ( 6-pole (2900 rpm) 1450 rpm) (980 rpm) 0.75 WILO SE 2020-10... -
Page 61: Permissible Forces And Torques On The Pump Flanges
4660 3760 7300 2325 1650 1905 3420 Fig. 5: Permissible forces and torques on the 4780 5320 4300 8340 2910 2070 2385 4290 pump flanges – pump made of grey cast iron 5380 5980 4840 9380 3585 2550 2940 5280 安装及操作说明 Wilo-Atmos TERA-SCH... -
Page 62: Transport And Storage
Hand and foot injuries due to lack of protective equipment! Danger of (serious) injuries during work. Wear the following protective equipment: • Safety shoes • Safety gloves for protection against cuts • Sealed safety goggles • Safety helmet must be worn if lifting equipment is used! WILO SE 2020-10... - Page 63 For example, if the operator's field of vision is blocked. ƒ When lifting, make sure that the load limit of the lifting gear is reduced when pulling at an angle. The safety and efficiency of the lifting gear is best guaranteed when all 安装及操作说明 Wilo-Atmos TERA-SCH...
-
Page 64: Storage
Store the product somewhere safe against mechanical damage. ƒ Protect the bearings and couplings from sand, gravel and other foreign objects. ƒ Lubricate the unit to prevent rust and bearing seizing. ƒ Manually rotate the drive shaft several times once a week. WILO SE 2020-10... -
Page 65: Installation And Electrical Connection
Setting up the pump by itself When installing a pump by itself, the required coupling guard and base frame of the (variant B, Wilo variant key) pump manufacturer should be used. In any case, all components must meet the CE regulations. The coupling guard must be compatible with EN 953. -
Page 66: Installing The Pump Unit On A Base
The base must be able to support the unit installed on the base frame indefinitely. The base must be level to ensure there is no tension on the base frame or unit. Wilo recommends using premium, non-shrink concrete of an adequate thickness for manufacturing. -
Page 67: Pipework
Coat the unprotected surfaces of the base to protect from moisture. Pipework The pipe connections of the pump are fitted with dust caps so that no foreign objects can penetrate during transport and installation. ƒ These caps must be removed before connecting pipes. 安装及操作说明 Wilo-Atmos TERA-SCH... - Page 68 3 times the pipe cross section (approximately 100 meshes per cm²). The strainer must be far enough from the bottom to avoid excessive inlet losses, which could impair pumping performance. It is advisable to check that there is no leakage. WILO SE 2020-10...
-
Page 69: Aligning The Unit
Misalignments can be the cause of: ƒ excessive noise development during pump operation ƒ vibrations ƒ premature wear ƒ excessive coupling wear 6.7.1 Coupling alignment max. max. ∆Ka min. min. Fig. 17: Coupling alignment without spacer 安装及操作说明 Wilo-Atmos TERA-SCH... - Page 70 0.20 0.15 0.30 0.25 0.20 0.20 0.30 0.25 0.20 0.20 0.30 0.30 0.20 0.20 Permissible shaft displacement ΔS and ΔKr in mm (during operation, rounded) perm. perm. 表 9: Maximum permissible shaft displacement ΔS and ΔKr perm. perm. WILO SE 2020-10...
- Page 71 160, 172 180, 194 67.5 200, 218 225, 245 250, 272 280, 305 315, 340 350, 380 400, 430 Fig. 22: Fastening screws B of coupling halves 440, 472 表 10: Tightening torques for adjusting screws and coupling halves 安装及操作说明 Wilo-Atmos TERA-SCH...
- Page 72 After correct alignment, mount the coupling guard. The tightening torques for the pump and motor on the base frame are listed in the table “Tightening torques for pump and motor”. Screw: Tightening torque [Nm] 表 11: Tightening torques for pump and motor WILO SE 2020-10...
-
Page 73: Electrical Connection
ƒ Unused cable feedthroughs should be sealed with the sealing plates provided, and screwed tight. ƒ Reinstall any uninstalled safety devices, such as terminal box covers! ƒ Check the direction of rotation of the motor while commissioning! 安装及操作说明 Wilo-Atmos TERA-SCH... -
Page 74: Protective Devices
• The pump must not be operated outside of the specified operating range. • Do not operate the pump with the shut-off devices closed. • Make sure that the NPSH-A value is always higher than the NPSH-R value. WILO SE 2020-10... -
Page 75: Personnel Qualifications
The motor can be placed on the right or left side of the pump. The check of the rotation direction of the motor is a mandatory step in the commissioning procedure of the pump set! An arrow on top part of the pump housing indicates the correct direction of rotation. 安装及操作说明 Wilo-Atmos TERA-SCH... -
Page 76: Switching On The Pump
Switch on the pump. ƒ After reaching the speed, slowly open the shut-off device in the pressure pipe and regulate the pump to the duty point. ƒ While the pump is starting, vent completely via the venting screw. WILO SE 2020-10... -
Page 77: Switching Frequency
Clean the pump thoroughly prior to storage! ƒ Drain the pump completely and rinse thoroughly. ƒ The remaining fluid and rinsing fluid should be drained, collected and disposed off via the drain plug. Observe local regulations along with the notes under “Disposal”! 安装及操作说明 Wilo-Atmos TERA-SCH... -
Page 78: Maintenance/Repair
Grease or oil the blank components. For this, use silicone-free grease or oil. Observe the manufacturer’s instructions for preservatives. Maintenance/repair It is recommended to have the pump serviced and checked by the Wilo customer service. Maintenance and repair work require the pump be partially or completely dismantled. -
Page 79: Maintenance Tasks
Wilo recommends checking the flexible coupling elements regularly and replacing them at the first sign of wear. ƒ Wilo recommends briefly putting the standby pumps into operation at least once a week to ensure they are always ready for operation. Maintenance tasks Atmos TERA-SCH pumps require little routine maintenance. -
Page 80: Dismantling
If present: Remove the intermediate sleeve of the coupling. ƒ Remove the fastening screws of the motor from the base frame. 9.5.1 Exploded views of hydraulics Fig. 25: Exploded view of Atmos TERA-SCH hydraulic (mechanical seal version without sleeves) WILO SE 2020-10... - Page 81 Hose pipe Lock washer Mechanical seal Jack screws for opening top housing 32 Lock nut Abutment ring Lifting bolts Bearing housing (Non-Drive End) Sleeve Impeller 表 14: Exploded view of Atmos TERA-SCH hydraulic (mechanical seal version with sleeves) 安装及操作说明 Wilo-Atmos TERA-SCH...
- Page 82 Remove all bolts (15) that are joining top and bottom housing (20, 22). ƒ Connect suitable lifting tackles to the lifting bolts (16) provided on top half housing (20). ƒ Remove the top housing. ƒ Remove the paper gasket placed in between the two housing halves. WILO SE 2020-10...
- Page 83 Remove the wear rings (25) from the impeller (21). ƒ Mark the position of impeller (21) on the shaft (22) to ease the reposition it while reassembling! ƒ Remove the impeller (21) carefully. Avoid damage to the impeller key (14)! 安装及操作说明 Wilo-Atmos TERA-SCH...
-
Page 84: Examination Of Internal Components
If the shaft is not true within 0.1 mm TIR (Total Indicated Reading), replacement or repair is recommended. Before any decision on repair work, ask Wilo for further information. Examine the shaft keys and keyways for damage and wear. Remove and replace damaged or worn out keys. -
Page 85: Installation
Slide the impeller (21) at its position on the shaft (24), matching the marked position done while disassembly. ƒ Place the wear rings (25) on the impeller (21). ƒ Slide sleeve (34) on both sides of the impeller over the shaft. 安装及操作说明 Wilo-Atmos TERA-SCH... - Page 86 46:8 SCH 400-550 表 17: Table for Mechanical Seal Adjustment 9.7.2 Reassembly of the pump Ensure that housing is clean, dry, and free from foreign matter. Clean housing wear ring thoroughly and ensure that they have no burrs. WILO SE 2020-10...
- Page 87 Insert the dowel pins (23) of the housing. ƒ Insert the bolts (1) for bearing housing at respective their position. ƒ Tighten bolts (15) and (1) with a torsion bar with the proper sequence. For tightening torques, see chapter “Screw tightening torques”. 安装及操作说明 Wilo-Atmos TERA-SCH...
-
Page 88: Faults, Causes And Remedies
ƒ Inspection and repair at the factory. Costs may be incurred if you request customer services! Please contact customer services for more information. 10.1 Faults Possible error types Error type Description Delivery rate too low Motor overloaded WILO SE 2020-10... -
Page 89: Causes And Remedies
– Check the pump of the fluid is higher dimensioning (consult than the design value with the manufacturer) The pump is strained Correct the pump installation Speed too high Lower speed Pump unit poorly – Correct alignment aligned 安装及操作说明 Wilo-Atmos TERA-SCH... -
Page 90: Spare Parts
表 21: Causes of error and remedies Spare parts Spare parts may be ordered via a local installer and/or Wilo customer service. List of original spare parts: Refer to the Wilo spare parts documentation and the following information in these installation and operating instructions. - Page 91 It is strongly recommended to purchase the original spares parts from Wilo. In order to avoid any mistake we invite you to supply with any spare parts demand, the information mentioned on the data plate of the pump and / or motor.
- Page 92 Bearing housing (Non-Drive End) Sleeve 34** O-ring for sleeve 35** Sleeve nut 36** Coupling key Coupling guard • Gasket paper • *Only mechanical seal version without sleeve; **Only mechanical seal version with sleeve 表 23: Recommended Spare Parts (mechanical seal version) WILO SE 2020-10...
-
Page 93: Disposal
Only hand over the product at designated, certified collection points. ƒ Observe the locally applicable regulations! Consult your local municipality, the nearest waste disposal site, or your retailer for information of proper disposal. See www.wilo‑recycling.com for more information about recycling. Subject to change without prior notice! 安装及操作说明 Wilo-Atmos TERA-SCH... -
Page 94: Appendix
Appendix Appendix 13.1 Examples for typical installation layouts Fig. 31: WILO SE 2020-10... -
Page 95: Examples For Proper And Inappropriate Pipework
Appendix zh-CHS 13.2 Examples for proper and inappropriate pipework Ø 2xØ Fig. 32: 安装及操作说明 Wilo-Atmos TERA-SCH... - Page 100 Local contact at www.wilo.com/contact WILO SE Wilopark 1 44263 Dortmund Germany T +49 (0)231 4102-0 T +49 (0)231 4102-7363 wilo@wilo.com Pioneering for You www.wilo.com...
Need help?
Do you have a question about the Atmos TERA SCH 150-555 and is the answer not in the manual?
Questions and answers