Table of Contents
Advertisement
DIGITAL VIDEO
COMBINATION FLAT COLOR
TELEVISION AND VIDEO CASSETTE
RECORDER / DVD VIDEO PLAYER
MW26G71
MW30G71
OWNER'S MANUAL
©2005 Toshiba Corporation
This device does not tape-record copy protected DVD video discs.
5U30101B [E]Cover
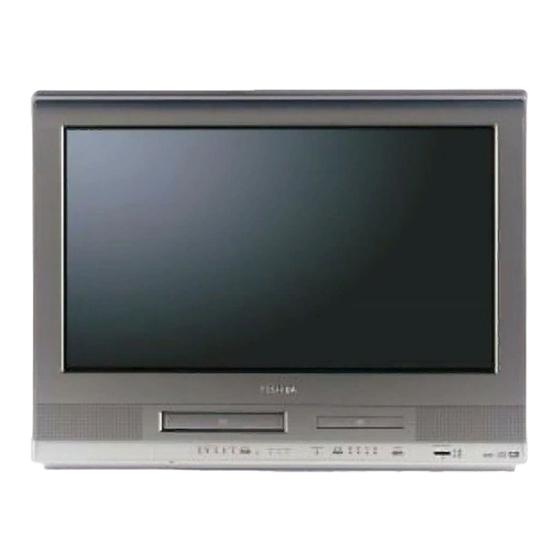
Illustration of MW30G71
1
4/1/05, 3:22 PM
Introduction
2
Connections
14
Basic setup
20
TV operation
25
Playback
46
(VCR)
Recording
51
(VCR)
Other functions
55
(VCR)
Basic playback
57
(DVD)
Advanced
60
playback
(DVD)
Function setup
69
(DVD)
Others
75
Advertisement
Table of Contents

Related Manuals for Toshiba MW26G71


Summary of Contents for Toshiba MW26G71
- Page 1 DIGITAL VIDEO COMBINATION FLAT COLOR TELEVISION AND VIDEO CASSETTE RECORDER / DVD VIDEO PLAYER MW26G71 MW30G71 OWNER’S MANUAL ©2005 Toshiba Corporation This device does not tape-record copy protected DVD video discs. 5U30101B [E]Cover Illustration of MW30G71 Introduction Connections Basic setup...
-
Page 2: Introduction
Introduction IMPORTANT SAFEGUARDS Dear Customer, Thank you for purchasing this Toshiba TV. This manual will help you use the many exciting features of your new TV. Before operating the TV, please read this manual completely, and keep it nearby for future reference. -
Page 3: Important Safety Instructions
IMPORTANT SAFEGUARDS Important Safety Instructions 1) Read these instructions. 2) Keep these instructions. 3) Heed all warnings. 4) Follow all instructions. 5) Do not use this apparatus near water. 6) Clean only with a dry cloth. 7) Do not block any ventilation openings. - Page 4 Grounding conductors or continuous, unplug the power cord (NEC Section 810-21) and contact a Toshiba Authorized Service Center. 33) Possible Adverse Effects on TV Picture Display If a fixed (non-moving) pattern or image remains on the TV screen for extended periods of time, the image can...
-
Page 5: Safety Precaution
SAFETY PRECAUTION/ WARNING: This equipment has been tested and found to comply with the limits for a Class B digital device, pursuant to Part 15 of the FCC Rules. These limits are designed to provide reasonable protection against harmful interference in a residential installation. This equipment generates, uses and can radiate radio frequency energy and, if not installed and used in accordance with the instructions, may cause harmful interference to radio communications. -
Page 6: Precautions
Introduction Precautions Notes on handling When shipping the unit, the original shipping carton and packing materials come in handy. For maximum protection, repack the unit as it was originally packed at the factory. Do not use volatile liquids, such as insect spray, near the unit. -
Page 7: Table Of Contents
Contents Introduction IMPORTANT SAFEGUARDS ... 2 SEFETY PRECAUTIONS ... 5 Power source ... 5 Precautions ... 6 Contents ... 7 Notes and information ... 8 Identification of controls ... 11 Connections Antenna connections ... 14 Cable TV connections ... 15 Connecting to optional equipment ... -
Page 8: Notes And Information
Introduction Notes and information On handling discs Do not touch the playback side of the disc. Do not attach paper or tape to discs. On cleaning discs Fingerprints and dust on the disc cause picture and sound deterioration. Wipe the disc from the center outwards with a soft cloth. -
Page 9: Playable Discs
If you happen to experience any difficulty playing a DVD on a Toshiba DVD player, please feel free to call our Contact listed in “How to Obtain Warranty Service” 4/1/05, 3:23 PM... - Page 10 32 MB – • It is recommended that you back up your Media card data. 1 GB Toshiba is not liable for any damage caused by the use of any Media card with this unit. Toshiba will not compensate 8 MB –...
-
Page 11: Identification Of Controls
FF (Fast Forward) button REC/OTR button CHANNEL ▲/▼ buttons Model MW26G71 and MW30G71 has a door on the front panel. Please open it to access the *S-VIDEO IN jack and the *AUDIO (L/R)/VIDEO IN (VIDEO2) jacks. Rear panel HDMI IN jack... -
Page 12: Remote Control
Introduction Identification of controls (continued) Remote control The instructions in this manual describe the function on the remote control. See the page in $" "& "% "& #& "' "& *DVD MENU button Use the DVD MENU button to display the menu included on many DVD video discs. -
Page 13: Remote Control Basics
Inserting batteries Open the battery compart- ment cover in the direction of the arrow. Caution: Never throw batteries into a fire. Notes: • Be sure to use AAA size batteries. • Dispose of batteries in a designated disposal area. • Batteries should always be disposed of with the environment in mind. Always dispose of batteries in accord- ance with applicable laws and regulations. -
Page 14: Connections
Connections Antenna connections If you are using an indoor or outdoor antenna, follow the instructions below that correspond to your antenna system. If you are using a cable TV service (CABLE), see page 15 for cable TV connections. Combination VHF/UHF antenna (Single 75 ohm cable or 300 ohm twin-lead wire) Antenna jack 75 ohm coaxial cable... -
Page 15: Cable Tv Connections
Cable TV connections This unit has an extended tuning range and can tune most cable channels without using a cable TV converter box. Some cable companies offer “premium pay channels” in which the signal is scrambled. Descrambling these signals for normal viewing requires the use of a descrambler device which is generally provided by the cable TV company. -
Page 16: Connecting To Optional Equipment
Connections Connecting to optional equipment Before connecting the unit to other equipment, be sure to turn off the power and unplug all of the equipment from the wall outlet before making any connections. You can enjoy the TV game, camcorder or high quality dynamic sounds of DVD video discs or audio CDs by connecting the unit to optional audio equipment. - Page 17 Connecting an HDMI™ device to the HDMI input The HDMI input on your unit receives digital audio and uncompressed digital video from an HDMI device or uncompressed digital video from a DVI device. This input is designed to accept HDCP electronic devices (such as a set-top box or DVD player with HDMI or DVI output.) The HDMI input is designed for best performance with high definition video signals.
-
Page 18: Connecting To An Amplifier Equipped With A Dolby Digital Decoder
Connections Connecting to optional equipment (continued) You can enjoy high quality dynamic sounds by connecting the unit to optional audio equipment. Connecting to an amplifier equipped with a Dolby Digital decoder Dolby Digital Dolby Digital is the surround sound technology used in theaters showing the latest movies, and is now available to repro- duce this realistic effect in the home. -
Page 19: Connecting To An Amplifier Equipped With A Digital Audio Input
Connecting to an amplifier equipped with a MPEG audio decoder MPEG2 sound You can enjoy motion picture and live concert DVD video discs with dynamic realistic sound by connecting an amplifier equipped with an MPEG2 audio decoder or MPEG2 audio processor. Amplifier equipped with an MPEG2 audio decoder To COAXIAL... -
Page 20: Basic Setup
Basic setup Starting setup The STARTING SETUP function makes installing your unit easily. It leads you the Language selection, TV/CABLE selection and auto channel memory automatically. IMPORTANT: Make sure that the antenna or cable TV system connection is made! Starting setup Press POWER. -
Page 21: Clock Setting
Clock setting The auto clock function will automatically set the built-in clock (Month, Day, Year and Time) when the unit is connected to an antenna or cable system and it is turned off. As the unit searches for a receivable station in your area and it receives a broadcast signal for auto clock, the auto clock needs several minutes to set itself. - Page 22 Basic setup Clock setting (continued) To set standard time In the rare event that you live within broadcast range of two stations in two different time zones, the unit may recognize the wrong station for the auto clock set. To correct the situation: Press MENU in the TV/VCR mode, then press to select TV SETUP T V S E T U P...
-
Page 23: Manual Clock Setting
Manual clock setting You must set the date and time manually for timer recordings, ON/OFF timer and daylight saving time if the auto clock process did not set them correctly. EXAMPLE: Setting the clock to “8:30 AM”, 29th. (SAT) October, 2005. Press MENU in the TV/VCR mode, then press to select TV SETUP T V S E T U P... -
Page 24: Setting The Language
Basic setup Setting the language/ TV/VCR operation status Setting the language This unit can display the on screen language in English, Spanish or French. Press MENU in the TV/VCR mode, then press to select TV SETUP T V S E T U P L A N G U A G E C L O C K S E T A U TO C L O C K... -
Page 25: Tv Operation
TV operation TV operation TV operation To turn on the unit, press POWER. The Power indicator will light. • Every time you turn on the TV, the unit starts from TV/VCR mode. When you use TV/VCR after DVD operation, press TV/VCR. Adjust the volume level by pressing VOL The volume level will be indicated on the screen by green bars. - Page 26 TV operation TV operation (continued) TV operation ■ CHANNEL UP/DOWN Press and release . The channel auto- matically stops at the next channel set into memory. For proper operation, before selecting channels, they should be set into the memory. See “To memorize channels”...
-
Page 27: Closed Captions
Closed captions WHAT IS CLOSED CAPTIONING? This television has the capability to decode and display closed captioned television programs. Closed captioning will display text on the screen for hearing impaired viewers or it will translate and display text in another language. -
Page 28: To Memorize Channels
TV operation To memorize channels This unit is equipped with a channel memory feature which allows channels to skip up or down to the next channel set into memory, skipping over unwanted channels. Before selecting channels, they must be programmed into the unit’s memory. In addition to normal VHF and UHF channels, this unit can receive up to 113 cable TV channels. -
Page 29: Programming Your Favorite Channels
Programming your favorite channels You can preset up to 12 of your favorite channels using the Favorite Channel Programming feature. Because this feature scans through only your favorite channels, it allows you to skip other channels you do not normally watch. -
Page 30: Labeling Channels
TV operation Labeling channels/Labeling the video input sources Channel labels appear above the channel number display each time you watch the TV, select a channel, or press DISPLAY. You can choose any four characters to identify a channel. The video label feature allows you to label each input source for your Labeling channels Select a channel you want to label. -
Page 31: Setting The V-Chip
Setting the V-Chip An age limitation can be set to forbid children to watch programs according to “TV RATING” and “MOVIE RATING” level set. To use the V-Chip function, you must register a password. Notes: • If you forget the password, you cannot set the V-Chip. •... - Page 32 TV operation Setting the V-Chip (continued) To set the V-Chip In the LOCKS menu, press “TV RATING”, then press desired setting. : TV RATING is not set TV-Y : All children TV-Y7 : 7 years old and above TV-G : General audience TV-PG : Parental guidance TV-14 : 14 years old and above TV-MA: 17 years old and above...
-
Page 33: Locking The Channels
Locking the channels With the CH LOCK feature, you can lock specific channels. You will not be able to tune locked channels unless you clear the setting. You can choose to lock up to nine TV channels and nine cable channels. Locking the channels Select a channel you want to lock. -
Page 34: Locking The Video Inputs
TV operation Locking the video inputs/ Setting the GameTimer With the VIDEO LOCK feature, you can lock out the input sources (VIDEO1, VIDEO2, COLORSTREAM HD, HDMI) and channels 3 and 4. You will not be able to select the input sources with INPUT or Direct channel selection buttons (0-9) unless you clear the setting. -
Page 35: Using The Front Panel Lock Feature
Using the front panel lock feature You can lock the front panel buttons to prevent your settings from being changed accidentally (by children, for example). When the front panel lock is in ON, all control buttons on the unit’s front panel (except POWER) do not operate. -
Page 36: To Set The On Timer
TV operation To set the on timer This feature allows you to have the unit automatically turn on at a predetermined time. If you program the ON TIMER once, the unit will turn on the programmed day (once/daily) at the same time to the same channel. -
Page 37: To Set The Off Timer
To set the off timer This feature allows you to have the unit turn off automatically at a predetermined time. If you program the OFF TIMER once, the unit will automatically turn off at the same time everyday. To set the off timer EXAMPLE: Turning off the TV at 11:30 PM. -
Page 38: Picture Control Adjustment
TV operation Picture control adjustment/ Adjusting the picture preference Picture controls are factory preset but you can adjust them individually as follows: And also you can select four picture modes—Standard, Sports, Movie, and Memory—as described in the following table: Picture control adjustment Press MENU in the TV/VCR mode, then press to select PICTURE PICTURE... -
Page 39: Using The Cableclear Feature
Using the CableClear Selecting the color temperature ® CableClear reduces visible interference in your TV picture. This is useful when receiving a broadcast with a weak signal (espe- cially a Cable channel) or playing a video cassette or disc damaged by repeated use. Change the picture quality by selecting from three preset color temperatures—cool, medium, and warm. -
Page 40: Selecting The Display Format
TV operation Selecting the display format/ Selecting the Scan Velocity Modulation (SVM) Display format feature converts a 480p input signal to 540p or 1080i. The SVM feature enhances picture contrast and sharpness. This feature has three modes: HIGH, LOW and OFF. Selecting the display format Press MENU in the TV/VCR mode, then press to select PICTURE... -
Page 41: Resetting Your Picture Adjustments
Resetting your picture adjustments/ Selecting the picture size Resetting your picture adjustments Press MENU in the TV/VCR mode, then press to select PICTURE PICTURE MODE BRIGHTNESS CONTRAST COLOR TINT SHARPNESS : SELECT Press to select “RESET”, and then press PICTURE CableClear COLOR TEMPERATURE... - Page 42 TV operation Selecting the picture size (continued) You can view 480i and 480p format programs in a variety of picture sizes—Natural, TheaterWide 1, TheaterWide 2, TheaterWide 3, and Full. The way the image displays in any of the picture sizes will vary depending on the format of the program you are viewing.
-
Page 43: Picture Scroll
Picture scroll/Selecting the cinema mode/ Using the ASPECT feature Picture scroll Press PIC SIZE to select the TheaterWide 2 or 3 mode. Press MENU in the TV/VCR mode, then press to select TV SETUP press to select “PICTURE SCROLL”. TV SETUP TV/CABLE CH PROGRAM ADD/ERASE... -
Page 44: Stereo And Second Audio Program (Sap)
TV operation Stereo and Second Audio Program (SAP)/ Sound control adjustment The unit is equipped with a feature known as multi-channel TV sound or MTS. MTS broadcasts greatly enhance TV viewing by bringing you programs with high fidelity stereo sound. MTS also provides an extra channel called the Second Audio Program or SAP which broadcasters can use to transmit a second language for bilingual transmis- sion or for other purposes. -
Page 45: Selecting The Hdmi Audio Input Source
Selecting the HDMI audio input source/ Resetting your audio adjustments See page 17 for details on connecting an HDMI or a DVI device to the TV’s HDMI input. If you connect a DVI device, to hear audio you must also connect the analog audio cables to the HDMI audio IN jacks (see page 17.) Set the HDMI audio input setting to “DVI”... -
Page 46: Playback (Vcr)
Playback (VCR) Loading and unloading a cassette tape Use only video cassette tapes marked Loading Push the center of the tape until it is automatically inserted. Automatic power ON When you insert a cassette tape the unit power will turn ON automatically. Automatic playback When loading a cassette tape without an erase prevention tab, playback will start automatically. -
Page 47: Cassette Tape Playback
Cassette tape playback To play a prerecorded tape. Playback Load a prerecorded tape: (When loading a cassette tape without the erase prevention tab, playback will start automatically). To start playback: Press PLAY on the front panel or on the remote. Playback will start. -
Page 48: Special Playback
Playback (VCR) Special playback Picture search Reverse picture search function Press REV once or twice during the playback. Forward picture search function Press FF once or twice during the playback. To return to playback, press PLAY. SPEED SEARCH TIMES PICTURE SEARCH SPEED TAPE SPEED PRESS ONCE SP (Standard Play) -
Page 49: Convenient Function
Convenient function Repeat playback The entire video tape will be played until its end. The tape will automatically rewind to the beginning and the playback will be repeated. Press MENU in the TV/VCR mode, then press to select VCR SETUP VCR SETUP TIMER REC SET AUTO REPEAT... -
Page 50: Zero Return Function
Playback (VCR) Convenient function (continued) Zero return function The zero return function provides a convenient method of rapidly returning to the starting point of recording or play- back. The starting point can be indexed for any location on the tape by pressing COUNTER RESET and ZERO RE- TURN. -
Page 51: Recording (Vcr)
Recording (VCR) Recording a TV program Recording and viewing the same TV program. Recording a TV program Load a cassette tape with the erase prevention tab intact. The unit will automatically turn on. Press SPEED to select the desired tape speed SP or SLP. -
Page 52: One-Touch Timer Recording (Otr)
Recording (VCR) One-touch Timer Recording (OTR) The One-touch timer recording feature provides a simple and convenient way to make a timed recording. One-touch timer recording (OTR) Example: One-touch timer recording for 30 minutes. Load a cassette tape with the erase prevention tab intact. -
Page 53: Timer Recording
Timer recording Timer recording can be programmed on-screen with the remote control. The built-in timer allows automatic unattended recording of up to 8 programs within 1 month. Timer recording Preparation: • Press TV/VCR to select the TV/VCR mode. • Load a cassette tape with the erase prevention tab intact. - Page 54 Recording (VCR) Timer recording (continued) To set daily/weekly timer Weekly (e.g. WKL-TUE: each Tuesday) or daily (e.g. MON-SAT: Monday to Saturday) Timer recording Follow the procedure of timer recording on the previous page. At step 4 press repeatedly until the desired setting appears.
-
Page 55: Other Functions (Vcr)
Other functions (VCR) Duplicating a video tape If you connect the unit to another VCR or Camcorder, you can duplicate a previously recorded tape. Make all connections before turning on the power. Duplicating a video tape Preparation: • Press TV/VCR to select the TV/VCR mode. •... -
Page 56: Recording A Dvd/Cd Disc
Other functions (VCR) Recording a DVD/CD disc You can record disc material in DVD, Audio CD, etc. onto a video tape with this unit. Duplicating a DVD or CD disc Preparation: • Press TV/VCR to select the TV/VCR mode. • Load a cassette tape with the erase prevention tab intact. •... -
Page 57: Basic Playback (Dvd)
Basic playback (DVD) Playing a disc This section shows you the basics on how to play a disc. CAUTION Keep your fingers well clear of the disc tray as it is closing. Neglecting to do so may cause serious personal injury. Basic playback Preparations: •... - Page 58 Basic playback (DVD) Playing a disc (continued) Basic playback To pause playback (still mode) Press PAUSE/STILL during playback. To resume normal playback, press PLAY. • The sound is muted during still mode. To stop playback Press STOP. Notes: • If a non-compatible disc is loaded, “Incorrect Disc”, “Region Code Error” or “Parental Error” will appear on the TV screen according to the type of loaded disc.
-
Page 59: Playing Frame By Frame
Playing in fast reverse or fast forward directions Press REV or FF during playback. REV: Fast reverse playback Fast forward playback Each time you press REV or FF, the playback speed changes. Playing frame by frame Press PAUSE/STILL during still playback. Each time you press PAUSE/STILL, the picture advances one frame. -
Page 60: Advanced Playback (Dvd)
Advanced playback (DVD) Zooming/Locating desired scene Zooming This unit will allow you to zoom in on the frame image. You can then make selections by switching the position of the frame. Press ZOOM during playback. The center part of the image will be zoomed in. -
Page 61: Repeat Playback
Repeat playback/A-B Repeat playback Repeat playback Press PLAY MODE during playback or stop mode. [DVD] Press B B B B B /A A A A A to select “Chapter” or “Title”. The unit automatically starts repeat playback after finishing the current title or chapter. -
Page 62: Program Playback
Advanced playback (DVD) Program playback/Random playback You can arrange the playback order of tracks or files on the disc. And also the unit selects tracks or files at random and playback them. These feature works for Audio CD and Video CD. Program playback Press PLAY MODE in the stop mode. -
Page 63: Changing Angles
Changing angles/Title selection/DVD menu Changing angles When playing back a disc recorded with multi-angle facility, you can change the angle that you are viewing the scene from. Press ANGLE during playback. The current angle will appear. Title selection Two or more titles are recorded on some discs. If the title menu is recorded on the disc, you can select the desired title. Press TOP MENU during playback. -
Page 64: Changing Soundtrack Language
Advanced playback (DVD) Changing soundtrack language/ Subtitles Changing soundtrack language You can select the language when you play a multilin- gual disc. Press AUDIO SELECT during playback. The current soundtrack language will appear. Press AUDIO SELECT repeatedly until the desired language is selected. -
Page 65: Disc Status
Disc status/To turn off the PBC Disc status With each press of DISPLAY, the status of the disc will appear on the screen and change as follows. 00:34:56 01:12:33 Title 1/32 To make status display disappear, press DISPLAY again. Video CD 00:12 04:32 Track —/—... -
Page 66: Mp3/Wma/Jpeg Operation
Advanced playback (DVD) MP3/WMA/JPEG operation This player can play back the MP3/WMA/JPEG-data which has been recorded on CD-R, CD-RW or Media card. MP3/WMA/JPEG file information Limitations on MP3/WMA/JPEG file playback • MP3/WMA/JPEG file is the disc/card that is standardized by ISO9660, its file name must include 3-digits extension letters, “mp3”, “wma”, “jpg”. -
Page 67: Mp3/Wma Playback
CAUTION Do not insert any foreign objects into the Media card slot as this can result in a risk of fire or electric shock. Place a CD-R/RW on which MP3, WMA or JPEG files have been recorded onto the disc tray or insert a Media card on which MP3, WMA or JPEG files have been recorded into the media card slot on the front panel. -
Page 68: Jpeg Playback
Prerecorded DVDs are automatically set to these standards. There are many different types of recordable disc formats (including CD-R containing MP3/WMA files). Given the fact that technology in this area is still maturing, Toshiba cannot ” appears briefly guarantee that all types of recordable discs will produce optimal playback quality. -
Page 69: Function Setup (Dvd)
Function setup (DVD) Customizing the function settings You can change the default settings to customize performance to your preference. Setting procedure Press SETUP during stop mode. The following on-screen display appears. /Enter/Setup/Return Press B or A to select the desired section, then press D or ENTER. -
Page 70: Setting Details
Function setup (DVD) Customizing the function settings (continued) Setting details Option Section Menu Subtitle Audio TV Screen Display Picture Mode JPEG Interval Password Parental Select Files 5U30101B [E]p69-74 Details To select the language of “Menu”, “Subtitle” and “Audio” if more than one language are available on the disc. - Page 71 Menu Subtitle Audio /Setup/Return Menu, Subtitle, Audio You can select the language of “Menu”, “Subtitle” and “Audio” if more than one languages are recorded onto the disc. English, Francais, Espanol: The selected language will be heard or seen. Other: Other language can be selected (see the “Language code list”...
- Page 72 Function setup (DVD) Customizing the function settings (continued) Setting details Picture Mode There are two types of source content in pictures re- corded in DVD video discs: film content (pictures re- corded from films at 24 frames per second) and video content (video signals recorded at 30 frames per sec- ond).
- Page 73 Password Parental Select Files /0Ð9/Enter/Cancel/Setup/Return Parental control setting Some discs are specified not suitable for children. Such discs can be limited not to play back with the unit. 1) Press C or D to select “Parental”, then press B or A until the level you require appears. •...
-
Page 74: Temporary Disabling Of Rating Level By Dvd Disc
Function setup (DVD) Temporary disabling of rating level by DVD disc Depending on the DVD disc, the disc may try to temporarily cancel the rating level that you have set. It is up to you to decide whether to cancel the rating level or not. Load a DVD disc and press PLAY or OPEN/ CLOSE . -
Page 75: Others
Others Language code list Enter the appropriate code number for the initial settings “Menu”, “Subtitle” and/or “Audio” Language Name Code Language Name Code Abkhazian 1112 Fiji Afar 1111 Finnish Afrikaans 1116 French Albanian 2927 Frisian Amharic 1123 Galician Arabic 1128 Georgian Armenian 1835... -
Page 76: Reception Disturbances
Others Reception disturbances Most types of television interference can be remedied by adjusting the height and position of the VHF/UHF antenna. Outdoor antennas are recommended for best results. The most common types of television interference are shown below. If one of these symptoms appear when the unit is connected to a cable TV system, the disturbance may be caused by the local cable TV company broadcast. -
Page 77: Troubleshooting
Troubleshooting Check the following guide for the possible cause of a problem before contacting service. SYMPTOMS POWER The AC power cord is not connected. No power. Although the power is on, the Cassette or disc is not inserted. unit does not operate. The TIMER REC button is depressed. - Page 78 Others Troubleshooting (continued) SYMPTOMS The video cassette's erase prevention tab TV recording does not work. is broken off. The time is not set correctly. The recording start/end time is not set Timer recording does not correctly. work. The TIMER REC button have not been pressed (the TIMER REC indicator is not lit).
-
Page 79: Specifications
• Designs and specifications are subject to change without notice. • This model may not be compatible with features and/or specifications that may be added in the future. 5U30101B [E]p75-79 MW26G71 195 W 30 inches (760 mm) diagonal* 2 x 4-11/16 inches (51x 119 mm), 8 Ω x 2 117.9 lbs (53.5 kg) -
Page 80: Limited United States Warranty
Limited United States Warranty for models MW26G71 and MW30G71 (“TV Combination(s)”) Toshiba America Consumer Products, L.L.C. (“TACP”) makes the following limited warranties to original con- sumers in the United States. THESE LIMITED WARRANTIES EXTEND TO THE ORIGINAL CONSUMER PURCHASER OR ANY PERSON RECEIVING THIS TV COMBINATION AS A GIFT FROM THE ORIGINAL CONSUMER PURCHASER AND TO NO OTHER PURCHASER OR TRANSFEREE. - Page 81 If, after following all of the operating instructions in this manual and reviewing the section entitled “Troubleshooting,” you find that service is needed: (1) To find the nearest TACP Authorized Service Station, visit TACP’s website at www.tacp.toshiba.com/ service or contact TACP’s Consumer Solution Center toll free at 1-800-631-3811.
- Page 82 Memo 5U30101B [E]p80-Back 4/1/05, 3:29 PM...
- Page 83 5U30101B [E]p80-Back 4/1/05, 3:29 PM...
- Page 84 CableClear, ColorStream and TheaterWide are registered trademarks of Toshiba America Consumer Products, L.L.C. GameTimer is a trademark of Toshiba America Consumer Products, L.L.C. J5U30101B SH 05/04 Printed in Thailand 5U30101B [E]p80-Back 4/1/05, 3:29 PM...
Need help?
Do you have a question about the MW26G71 and is the answer not in the manual?
Questions and answers