Table of Contents
Advertisement
Advertisement
Table of Contents

Related Manuals for anko JC-230


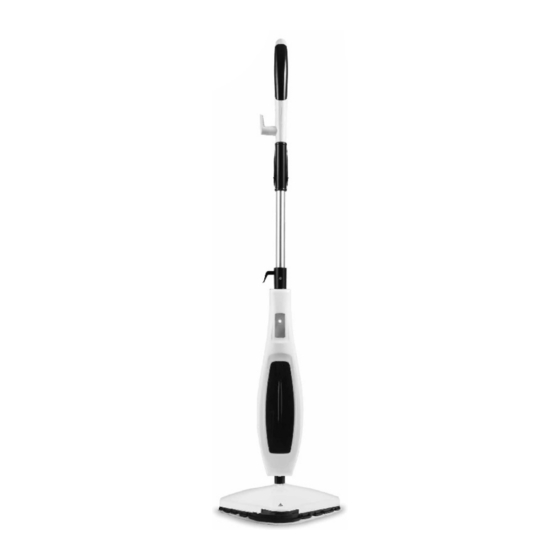
Summary of Contents for anko JC-230
- Page 1 Steam Mop User Manual Model No.: JC-230 Rev 1 READ AND SAVE THESE INSTRUCTIONS...
- Page 2 Page 2 of 16...
-
Page 3: Table Of Contents
Warnings .................. 4 Safety Direction ............... 4 Recommended Floor Surfaces ..........5 Transporting your Steam Mop ..........6 Components ................6 Assembly ................. 7 Adjustable Handle ..............8 Micro Fibre Pad ............... 8 Operation ................. 9 Using on carpets ..............10 User Maintenance .............. -
Page 4: Warnings
Warnings Before using this appliance, read and follow all warnings and instructions in this manual, even if you are familiar with this product. This appliance is not intended for use by persons (including children) with reduced physical, sensory or mental capabilities, or lack of experience and knowledge, unless they have been given supervision or instruction concerning use of the appliance by a person responsible for their safety. -
Page 5: Recommended Floor Surfaces
This appliance must be earthed. The use of an Earth Leakage Safety Switch is highly recommended. If unsure, consult an electrician. DO NOT use without the micro fibre cleaning pad fitted. DO NOT store or use the appliance near or in high temperature areas. DO NOT run over the power cord with the Steam Mop. -
Page 6: Transporting Your Steam Mop
DO NOT use on windows, tables or other types of furniture or fixtures. DO NOT add any other agents into the water tank, such as, rust removers, odour counter reacting agents, alcohol, cleaners, solvents, detergents, etc. as this may cause serious injury to the user and may damage the appliance and floor surface. -
Page 7: Assembly
Assembly The handle needs to be assembled to the body when you receive your steam mop. First, remove all the components from the packaging. • • Take the Handle and fit it into the hole located in the top of the Steam Mop body and push down until it clips in place. -
Page 8: Adjustable Handle
6.1 Adjustable Handle The Handle length can be adjusted to your desired length for comfort. To adjust, pull down the lever. • Slide the handle out to your desired length and then close the lever to lock • in place. Micro Fibre Pad To fit the Micro Fibre Pad, place the Micro Fibre Pad on the floor with the •... -
Page 9: Operation
Operation Note: Ensure the Micro Fibre Pad is fitted before use. To prevent damage to the floor never use the steam mop without the micro fibre pad. After fitting the Micro Fibre Pad, stand the steam mop upright. • • Open the water tank cap by pulling up on the tab. -
Page 10: Using On Carpets
If you need to stop cleaning the floor, i.e. you need to move an object, or • the phone rings, and steam is still being ejected from the base, lift the handle to the upright position until it locks inside the floor head. This stops the water pump and stop the steam. -
Page 11: Cleaning The Micro Fibre Pad
9.1 Cleaning the Micro Fibre Pad The Micro Fibre Pad must be cleaned regularly for best cleaning performance. Simply wash the Micro Fibre Pad in warm mild soapy water, rinse in clean fresh cold water and let dry. The Micro Fibre Pad may be washed in a washing machine on a Normal Wash. -
Page 12: Completion And Storage
After cleaning, the water tank and pipes etc. need flushing out with clean • water. To do this, fill the water tank with fresh clean water wait for approx. 30 seconds for the unit to heat and then tilt the handle back, so that it disengages from the floor head lock position, to start the steam. -
Page 13: Cleaning The Steam Mop
10.1 Cleaning the Steam Mop Do not clean the Steam Mop or components with petrol or any other flammable liquids, solvents, etc. Use only a moist cloth and mild detergent for cleaning the Steam Mop. Clean only the outside of the Steam Mop. After cleaning, wipe off the moisture with a dry cloth. - Page 14 Page 14 of 16...
-
Page 15: Warranty Against Defect
12 Warranty Against Defect 12 Month Warranty Thank you for your purchase from Kmart. Kmart Australia Ltd warrants your new product to be free from defects in materials and workmanship for the period stated above, from the date of purchase, provided that the product is used in accordance with accompanying recommendations or instructions where provided. - Page 16 Page 16 of 16...
Need help?
Do you have a question about the JC-230 and is the answer not in the manual?
Questions and answers